The short but bloody Falklands Conflict of 1982 can be regarded as a conflict that came out of nowhere, mainly thanks to Government Ministries ignoring the complicated politics and history of the
region.
As a ten year old, the editor can recall looking through a world atlas to find the location of these unknown and distant islands some 8,000 miles away in the South Atlantic; it appears much of
the British Military and Government also had to do the same.
Operation CORPORATE, the British operation to recover the 'Malvinas' from occupying Argentinean forces could very easily have turned into a disastrous military adventure, considering the distance
and logistics involved, and although ultimately successful it proved to be the last time Britain would be able conduct a military operation of any scale alone and relatively unaided.
The Harrier is an iconic image of the Falklands War, much the same as the Spitfire & Hurricane is to the Battle of Britain. Both the Royal Air Force and Royal Navy
contributed much to the success of Operation CORPORATE and the current combined operator of the type, the RAF
Cottesmore based Joint Force Harrier (JFH), began its commemorations of the 25th Anniversary of the Falkland Islands liberation on 13th June.
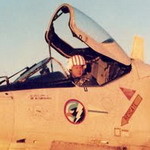
Three Harrier pilots who participated in Operation CORPORATE were reunited: Sqn Ldr Tony Harper, Sqn Ldr Jerry Pook MBE DFC and Lt Cdr David Morgan DSC. Details of
these pilots service during CORPORATE can be found at the bottom of this article.
A Service of Commemoration and Remembrance, attended by HM Queen Elizabeth II and HRH Duke of Edinburgh, was held at the Falkland Islands Memorial Chapel,
Pangbourne, on 14th June to mark the Anniversary. The service included a flypast of four Harriers, representing 1(F) & IV(AC) Sqns from the RAF and 800 & 801 NAS from the Fleet Air
Arm.
Pete Thompson presents a day by day history of what was happening during the campaign to recover the Falkland Islands, with particular focus on the activities of
1(F) Sqn's role in the campaign.
19th March 1982
Oddly enough many people simply overlooked the main news piece from the region on this day, when "scrap metal" workmen, accompanied by a military presence, land on South Georgia Island, hoisting
an Argentinean flag.
The red faces in Whitehall, that this could occur, were, as usual, hidden behind the veil of "diplomatic efforts". If only it had been known then what was to unfold over the coming weeks...
26th March
In Argentina the Military Junta under General Galtieri decide to invade 'Las Ilas Malvinas', The Falkland Islands. Operation ROSARIO is planned to take place on either 25th May or 9th July -
both important Argentine national celebrations.
However the mood in the country brings its own pressures to bear on the Junta and as a consequence the date of the invasion of the Falkland Islands is brought forward.
In London the Foreign Office, under Lord Carrington, are still searching for a diplomatic solution.
28th March
The Government receives reports that five Argentine warships have been sighted near South Georgia. Representation is made to the Junta in Buenos Aires requesting clarification of the Junta's
position on this matter, but only a muted response is received.
29th March
Diplomatic efforts by the Foreign Office continued on this day.
Several 'Departments' began to gather, order, and evaluate a mass of intelligence that was pouring in from all over the region. Most was useless, some was of interest, and several items held very
clear clues to what was likely about to occur.
This information was either ignored or overlooked. It was almost as if while groping in the dark for a 'final note' solution, the tangible inevitability of conflict had been ignored.
30th March
Despite evidence that the Argentine Navy had begun to assemble troops in Puerto Belgrano, the UK Joint Intelligence Committee's Latin American group stated on March 30 that "invasion was not
imminent".
British Foreign Secretary Lord Carrington states in Parliament "a diplomatic solution is being pursued".
31st March
In what appeared to be a remarkable, but equally very delayed change of opinion, late on the 31st March British Intelligence leaned to the belief that an invasion of the Falkland Islands was
imminent.
The Governor of the Falklands, Sir Rex Hunt, was passed the information, as was the small detachment of Marines based in and around Port Stanley.
1st April
Both the Secretary-General of the United Nations, Javier Pérez de Cuéllar of Peru, and the UN Security Council, meeting at Britain's request, calls for restraint and avoidance of the use of force
with respect to the Falkland Islands.
In Buenos Aires the Junta convinced of the lack of a strong political will, to intervene in any invasion, in the UK, ignore the call from the UN and make ready their troops for
invasion.
On the morning of the 1st of April, in Port Stanley the Governor Rex Hunt broadcasts to the Falkland Islanders informing them of imminent invasion, thereafter he spends time trying to form a
hasty defence using the Royal Marines Naval Party 8901 (NP8901) and members of the indigenous Falkland Islands Defence Force.
At 11am, Major Norman of NP8901 briefed his forces, telling them "Tomorrow you're all going to start earning your pay".
2nd April
The Argentine Navy lands thousands of troops on the Falklands Islands. The Royal Marines based on the islands put up isolated but stiff resistance before Governor Rex Hunt orders them to
surrender. A meeting with the Argentine commander Admiral Busser was arranged to formalise the surrender. Hunt refused to shake Busser's hand saying, "This is British property. You are not
invited". Busser was visibly upset when the former Governor refused to shake his hand.
News of the invasion began to reach London at around midday on 2nd April - 8am Falklands time, and was publicly announced in Britain that afternoon.
The British Government immediately cuts diplomatic ties with Argentina and begins to assemble a large naval taskforce.
Meanwhile for 1(F) Sqn at Wittering life continued almost as if nothing had happened.
The Squadron had an AOC's Parade Rehearsal that morning, the Inspection being due on Thursday 29th April. They were also down to play in a five-a-side football competition that afternoon at
14:15. Never the less the crew room conversation is dominated by the news of the Argentinean invasion of the Falkland Islands. The GLO, Major John Moseley, is tasked to find a map to confirm the
exact whereabouts of the Islands. The flexibility of the Harrier makes it a viable option to be used to regain the islands but the deployment options look very sparse. A popular choice would be
to be held in reserve in Rio de Janeiro.
3rd April
Argentine troops seize the islands of South Georgia and the South Sandwich group following a short battle, prompting enthusiastic celebrations in Buenos Aires. Royal Marines led by Lt Keith Mills
didn’t surrender without a fight, downing a Puma, and damaging an Alouette with small arms fire and severely damaging a corvette with a 84MM Carl Gustav anti tank weapon, and small arms
fire.
The UN Security Council passes Resolution 502 calling for troops on both sides to withdraw and renewed negotiations for a peaceful solution. Argentina refuses to comply.
In a House of Commons emergency session, unique in being held on a Saturday the first time since the Second World War, the British government faces criticism for not foreseeing the Argentine
attack.
The first Royal Air Force transport aircraft are deployed with stores to a small volcanic island in the Atlantic called Ascension, and its equally small but vital airfield called Wideawake.
4th April
In New York the United Nations condemned the Argentine invasion of the Falkland Islands in the strongest possible terms, which were unsurprisingly ignored by the Military Junta in Buenos
Aires.
In the UK the order to mobilise 3 Commando Brigade reinforced by 3 PARA and other Army units was given. Naval yards around the country went into over time to prepare vessels for sea.
5th April
Lord Carrington resigned as Foreign Secretary today, stating he felt his position was untenable after losing the support of Parliament and Party colleagues over the Falklands crisis.
The first Nimrod maritime patrol aircraft arrived on Ascension Island, forward deployed in advance of the growing task force to provide anti submarine protection to the fleet.
Type 21 frigates Alacrity and Antelope left Devonport and later that day met Sir Geraint, Sir Galahad, Sir
Lancelotand Sir Percivale. The landing ships carried up to 400 Royal Marines, Army, Naval and RAF personnel along with the 3 Commando Brigade Air Squadron.
Four hours after the departure of the frigates, the aircraft carriers left Portsmouth under the full glare of the media.
HMS Invincible passed the vast crowds which lined the walls of Portsmouth and Southsea seafront half an hour ahead of HMS Hermes. Sea Kings and Harriers lined the
decks, both for ceremonial purposes and to allow the hangers deck below to be used as holding areas for the rapidly delivered extra stores.
6th April
Francis Pym was appointed Foreign Secretary by Prime Minister Margaret Thatcher.
US Secretary of State, Alexander Haig, begins a peace shuttle between London Washington and Buenos Aires. Leaving Washington later today, he and his party arrive in London on 7th April. The basis
of this and all peace plans that are put forward are threefold - both sides' forces to withdraw from the islands, an interim administration to be set up, and a long term settlement to be
negotiated.
HMS Fearless departed Portsmouth, heading south to catch the carriers and on to Ascension island.
7th April
The British Government says it intends to impose a 200 mile Maritime Exclusion Zone (MEZ) around the islands on 26th April.
A group of ships known as the Antrim Group - HMS Antrim, HMS Plymouth and RFA Tidespring are ordered to "proceed with despatch" to Ascension
Island to join up with, and accompany, RFA Fort Austin which is due to head south to replenish HMS Endurance.
The ocean liner Canberra arrives in Southampton for conversion and to embark stores and troops.
In Port Stanley Maj-Gen Mario Menendez is appointed Commander-in-Chief of Argentine forces, and Military Governor of The Falkland Islands.
8th April
Ships of the Task force continued their steady progress south towards Ascension Island.
At RAF Wittering 1(F) had a quiet week preparing for the ferry flight of eight aircraft to Canada for Exercise MAPLE FLAG. They also had aircraft at Lyneham and Hullavington to film for the TV
Series "Squadron".
That afternoon as everyone wound down for the Easter Grant, the Station Commander, Group Captain Pat King, received a signal asking for details of operational requirements to cater for possible
involvement in the South Atlantic. It was proposed by Assistant Chief of the Air Staff(Ops) - AVM Ken Hayr, a Harrier man and a pioneer of the aircraft with 1(F), - that the Sqn undertakes DACT
(Dissimilar Air Combat Training) with the French Air Force.
The response to the signal included a "yes" to the DACT, 'operational' weapon deliveries and Ultra Low Flying. It was also urged that consideration be given to the fitting of Sidewinder, a fit
that the GR.3 had never worn before.
9th April
The luxury liner Canberra, a vessel in Royal Navy parlance 'STUFT' (Shipping Taken Up From Trade) departs Southampton, with 40 and 42 Commando RM, and 3 PARA embarked, in the
company of Elk, with 2,000 tons of ammunition on board.
US Secretary of State Alexander Hague continues his mediation efforts, with little visible result.
10th April
Today the EEC banned imports from Argentina in support of Britain.
The group of ships led by HMS Antrim arrived in the waters off Ascension Island.
The P&O liner Uganda is 'STUFT', while on an educational cruise in the Mediterranean. Her passengers are put ashore in Naples and she is taken to Gibraltar for conversion
to a hospital ship.
At RAF Wittering a further signal is received, this time warning of a possible deployment. As a result of this second signal, a recce of the container ship Atlantic Conveyor, which
is currently in Liverpool Docks has to be carried out. The aim will be to see if the deck offers sufficient space for Harrier embarkment. Squadron Leader Bob Iveson (Flight Commander) and Bruce
Sobey (SENGO) will do this. At the same time preliminary preparations and selections are made from the Harrier fleet by the Engineers as to which, if any, aircraft will deploy.
In the meantime, the wisdom of continuing with a deployment to Canada, planned for 13th April, is queried. HQ Strike Command confirms that the Exercise should continue.
12th April
The Antrim Group departed Ascension with M Coy 42 Commando, and members of Special Forces units embarked, destination the waters around South Georgia.
Task Force Commander Admiral Sandy Woodward reached Ascension with his other ships and was joined on passage by RFA Appleleaf.
13th April
HMS Falmouth which was on the Royal Navy's 'sales list' was brought forward and recommissioned nine days later.
1(F) Sqn deployed as planned to Goose Bay with eight aircraft. For Wg Cdr Peter Squire, the OC of 1(F), it was his first long ferry flight using Air to Air Refuelling (AAR), and it proves to
be a very useful dress rehearsal for what is to come. It is interesting to note that after the 6hr 40mins flight, the INAS (Inertial Navigation and Attack System) on Squires aircraft is less than
1.5nm out without any updates en-route. At Goose Bay the Harriers are handed onto RAFG pilots, and the following day 1(F) fly home in a Nimrod, arriving at Wittering around 22:00.
The recce of Atlantic Conveyor confirms that with some modifications, the deck can be used as a platform for both Harriers and helicopters. Furthermore, it’s five car decks can
also be loaded with enormous quantities of stores.
14th April
Intelligence assessments puts Argentine strength on Falklands at 7,000 men.
US Secretary of State Haig continues his shuttle diplomacy.
At Wittering 1(F) are told the MoD is very keen to obtain publicity photographs of Harrier GR.3s using the ski-jump, the Sqn have aircraft ready to fly to Yeovilton but are as yet to receive CofA
clearance.
At the same time, work is begun on a number of modifications that are essential if the GR.3 is to be operated from the deck of a Carrier. These include shackles on the outriggers, modification of
the nose wheel steering and a means of aligning the INAS platform on a moving deck. 1(F) Sqns engineers under the Sqn SENGO Sqn Ldr Bruce Sobey are backed in this task by RAF Wittering's 625 man
Engineering Wing under Wg Cdr Richard Fitzgerald-Lombard.
15th April
HMS Glamorgan with Admiral Woodward on board met with HMS Hermes. Admiral Woodward transferred his flag to the carrier. Hermes was now in the
company of HMS Alacrity, Broadsword and Yarmouth.
At Wittering with 1(F) Sqn, all postings from the Sqn are frozen and a request for pilot reinforcements to cater for a full deployment is put in to the MoD. The first four to be earmarked all
have recent experience on 1(F). They are Sqn Ldr Peter Harris (CTTO), Flt Lt Ross Boyens (TWU), Flt Lt Jim Arkell (OCU) and Sqn Ldr Tim Smith (3[F] Sqn). In the meantime Lt Cdr Al Craig has been
recalled by the RN and Capt Skip Beasley (USAF) ordered to take no part.
In the afternoon 1(F) receives the CofA release for the GR.3 to use the ski-jump, and the first three pilots deploy to Yeovilton to carry out training.
16th April
Both HMS Hermes and HMS Invincible arrived in Ascension Islands waters, while ashore Wideawake airfield was amongst the busiest in world that day.
At Devonport fitting out of the Cunard container ship Atlantic Conveyor began. Meanwhile at Wittering with 1(F):
Ski-jump training continued at Yeovilton while a planned deployment to Cyprus, filming for the BBC TV programme "Squadron" is cancelled.
Wittering is tasked to deploy up to 12 aircraft on or about 26th April. The modification programme for the aircraft starts in earnest to provide a carrier deck capability. The required
modifications include an I-Band transponder (for IMC recoveries), deck restraint shackles on the main undercarriage, active nose wheel steering, hardened limiters for the JPTL (Jet Pipe Temp
Limiter) system and anti-corrosion treatment. The possibility of an AAM fit is still being considered.
RAF Gütersloh is requested to provide additional aircraft so operational training can continue. Additional pilots will include Flt Lt Clive Loader as of 19th April.
17th April
US Secretary of State Alexander Haig had been holding Peace talks with the Argentine Junta. After further meetings today, the talks break down in deadlock.
C-in-C Fleet, Admiral Fieldhouse, and Major General Moore fly to Ascension to brief Admiral Woodward, Commodore Clapp and Brigadier Thompson on the forthcoming operations and fly back to Britain
on the same day. It was decided that after a period of "blockade" and precursor operations an assault on the Falkland Islands would be mounted in San Carlos water before 24th May.
At Wittering:
In response to requests from higher authority for detailed operational requirements, 1(F) seeks more information on its likely employment. The questions needing to be answered include: what role
(air defence or attack), split between CVs, rates of effort, possible basing ashore? As answers were not forthcoming 1(F) ends up trying to provide support packages to meet all eventualities.
At the same time, 1(F) continued to press for an AIM-9 capability; even if at this stage it was only a cardboard mock up, which if photographed and publicly displayed, could be advantageous.
18th April
The main Carrier Group left Ascension Island waters heading south. Vessels included were:
HMS Hermes
HMS Broadsword
HMS Glamorgan
HMS Yarmouth
HMS Alacrity
RFA Olmeda
RFA Resource
HMS Invincible was delayed leaving Ascension, awaiting urgently-required stores, but sailed later in the day and caught up with the main group with ease.
Six RAF Victor tanker aircraft of 55 and 57 Sqns arrived at Ascension from RAF Marham.
At Wittering 1(F) Sqn receive a signal confirming their deployment, first to Ascension Island and subsequently to the Falkland Islands.
19th April
The Carrier Group commences a routine of defence watches, basically ensuring all mission critical stations are manned 24 hrs a day.
At Wittering 1(F) receives the initial deployment plan. Nine aircraft are to deploy to Ascension Island between 26th and 28th April. Six will join the Task Force and of three will remain at
Ascension Island for air defence duties. Eighteen of the Sqns NCOs will provide GR.3 expertise split between both Carriers, and remainder of the Squadron will follow for subsequent operations
from ashore.
The requested reinforcement pilots began to arrive and the Sqn undertook a training programme of DACT with Hunters from Brawdy.
The eight pilots who are nominated to go south are; Wg Cdr Peter Squire, Sqn Ldr Jerry Pook, Sqn Ldr Bob Iveson, Flt Lt Tony Harper, Flt Lt John Rochfort, Flt Lt Mark Hare, Flt Lt Ross Boyens and
Flt Lt Geoff Glover. Sqn Ldr 'Bomber' Harris and Sqn Ldr Tim Smith will remain at Ascension Island while Sqn Ldr Gavin Mackay commands the remainder of the Squadron.
20th April
The liner Canberra and the Elk arrived at Ascension Island.
Prime Minister Margaret Thatcher orders the recapture of South Georgia, under the name of Operation PARAQUAT. The retaking of the island will be led by the Antrim group consisting of:
HMS Antrim, HMS Plymouth, HMSEndurance, and RFA Tidespring. To the south of this group by a days sailing, the Nuclear submarine
HMS Conquerorwas also in the waters around South Georgia.
At 02.50 Ascension local time, four Victor tankers fully laden with 48 tons of fuel took off. Their plan was to place, six and a half hours later, a single Victor in the vicinity of South
Georgia, some 2,850 miles away. The single aircraft that arrived, piloted by Sqn Ldr John Elliott, cruised to the island at 43,000 ft. Once in the vicinity of the Island the aircraft descended to
18,000ft, the optimum altitude to carry out a radar search. The search took just 90 minutes, but in that time the aircraft searched an area equivalent to England, Scotland, Northern Ireland, and
the Irish Sea, a total area of some 150,000 square miles. The aircraft returned safely to Wideawake in the afternoon of the 20th having been airborne for 14 hours 45 minutes and covering a
distance of more than 7,000 miles making this, at that time, the longest recorded recce mission in aviation history.
The results of the search proved that there were no enemy Naval assets in the waters around the Island, and that there were no dangerous ice flows in the area that could interrupt the retaking of
South Georgia, set for the morning of 21st May 1982.
In the meantime 1(F) Squadron carried out live BL755 Cluster Bomb Unit drops against a splash target off the east coast.
21st April
The Antrim Group arrived off South Georgia and began reconnaissance in preparation for landings to re-take the Islands. At first light Lt Cdr Ian Stanley of 737 NAS launched his Wessex from the
deck of HMS Antrim to fly a reconnaissance of the area around the Fortuna glacier where later in the day it was intended to land British Special Forces Troops to watch the
Argentine positions at Leith and Stromness.
Lt Cdr Stanley returned to Antrim and left later in the company of two transport Wessex from RFA Tidespring. The South Atlantic weather was as usual at its changeable worst and
the three helicopters could find no way through the now low cloud and heavy snow showers, and consequently returned to their respective ships. Around noon conditions did improved and the three
aircraft set off again but soon found themselves again in the grip of low cloud, snow and violent and sudden changes in wind speed and direction. In spite of this all three helicopters reached
their objectives and disgorged their human cargo on to the Glacier.
For the helicopters the problem had abated, they had carried out their insertion successfully, for the troops on the ground it was the start of a nightmare. That night on the Glacier, winds rose
to 80 MPH, as temperatures plummeted, and vital equipment was blown away. By morning with most of the men suffering from exposure they would signal their position was untenable and request
picking up.
The liner Uganda Converted for use as a Hospital ship sailed from Gibraltar.
Wg Cdr Peter Squire attends a meeting at HQ 18 Group. He is briefed on the concept of an amphibious assault followed by the building of a Harrier site ashore. The employment conditions for the
GR.3 are still uncertain but the following assumptions are made:
Sustained period of operations in cold climate from bare base
Fuel/comms/ATC/catering provided
Re-supply within 22 days
12 aircraft in AD role armed with guns and AIM-9
Initial weapons provision 48 AAMs plus 5,760 rounds 30mm
Sortie length 45 minutes
Eight sorties per day.
Notwithstanding the Air Defence employment, Wg Cdr Squire asks for the provisions of LGBs (Laser Guided Bombs).
22nd April
RFA Brambleleaf joins the Antrim Group. HMS Brilliant detaches from the Group she is leading with her two helicopters to support the Antrim
Group at South Georgia. Captain J F T G Salt, commanding HMS Sheffield deputed to lead the Brilliant Group.
Wg Cdr Peter Squire and Sqn Ldr Bob Iveson fly to Yeovilton for a meeting with Captain Mike Layand, who will be the Senior Naval Officer embarked in Atlantic Conveyor. Also there
was Lt Cdr Tim George, CO 809 NAS, whose Sea Harriers will also be loaded onto the ship for the journey south.
Early this morning the position of the Special Forces became untenable due to the atrocious weather conditions they were experiencing on the Fortuna Glacier. Lt Cdr Stanley departed
HMS Antrim in the company of the two transport Wessex from RFA Tidespring. In the area of the Glacier the weather was found to be far worse than that encountered
the previous day when dropping off the troops, with severe turbulence caused by the mountains by the Glacier causing wind speeds of 80 mph interspersed with lulls of a mere 10 mph; challenging
conditions indeed. Fuel shortage required the three to return to their ships and then return for a further attempt at a pick up. This time they made the landing site, and began loading.
No sooner than they had done this than the weather closed in again whipping up the snow around the aircraft. One transport Wessex took off but straight away entered 'white out' conditions, with
no visual references points. The wind took over and pushed the Wessex over far enough for the main rotor to touch the ground, the aircraft fell and slid 50 yards coming to a rest on its side.
Remarkably no one was seriously injured. The personnel onboard made for the remaining two helicopters. Both took off but the second Wessex troop carrier met the same white out conditions,
descended slightly, and stuck the top of a ridge, its rotor blades hitting the ground and smashing down on its side. Lt Cdr Stanley, his aircraft already overloaded, had little alternative and
left the scene and returned to Antrim with his cargo. Having dropped off his human cargo, refuelled, and taken on blankets and medical supplies, Stanley departed Antrim for the Glacier. On the
way in he made radio contact with the men on the ground and was amazed to learn that again there were no serious injuries, despite some of the troops having been involved in two aircraft crashes
within a short space of time. Stanley stayed in the area and made several attempts to collect the men but the weather, in particular the wind, made landing impossible, so he returned to Antrim to
wait for the weather to clear. About an hour later the weather did improve, and this time Lt Cdr Stanley was able to locate, pick up, and return the survivors to Antrim.
Remarkably with the level of activity that had been going on the Glacier the Argentineans were unaware of what went on, although being in the area did complicate matters for the rescuers.
For his determination, skill and bravery, Lt Cdr Stanley was later awarded the Distinguished Service Order (DSO)
Later that day British Special Forces were successfully inserted onto South Georgia by Helicopter and Gemini powered rubber dinghy.
Losses this day:
2 x Wessex of 845 NAS
23rd April
A Sea King helicopter operating from HMS Hermes crashes into the sea, south of Ascension Island, after dark - with the loss of Petty Officer K S Casey
1(F) Sqn is involved in DACT with Mirage and Etendard aircraft of the French Armed Forces. The Mirages operate from RAF Coningsby to retain some anonymity while the Etendard merely fly to a
rendezvous point off the south east coast. It provides good experience and some crews got the chance to fly in the back seat of a Mirage.
Following the successful design, manufacture and fit of an AIM-9 capability for the Harrier GR.3, missiles are allocated for practice firings at the Aberporth Range.
Losses this day:
1 x Sea King of 846 NAS
24th April
Atlantic Conveyor completed her fitting out at Devonport.
HMS Brilliant joined the Antrim Group off South Georgia, in preparation for the retaking of the island, however at the same time a fly appeared in the ointment in the shape of
the Argentine submarine Santa Fe arriving in the waters around South Georgia.
1(F) Sqns deployment date is delayed until at least 1st May. This thankfully will give more time to complete the ongoing modification programme which is enormously manpower intensive. The whole
of RAF Wittering’s Engineering Wing is working round the clock to modify an initial batch of 12 aircraft in order to get nine to Ascension Island. In addition to which the engineers have to
support a daily flying programme, which, while not intensive, is very varied.
25th April
South Georgia is Re-taken
At 08:10 'Humphrey', the Antrim's Wessex, armed with depth-charges and piloted by Lt Cdr Stanley had taken off for an anti-submarine search. Once the Wessex had swept
Cumberland Bay Lt Parry, Humphrey's observer made a single sweep with the radar. He immediately saw a 'blip' and the helicopter went to investigate. The 'blip' was the Santa Fe.
The Antrim launched the first naval air attack on a submarine since World War II. One of the two depth-charges dropped exploded close to the port side of the Santa
Fe, causing enough internal damage to prevent the submarine from diving. The Santa Fe turned to run for the safety of Cumberland Bay and was followed by the Wessex firing
its General-Purpose Machine Gun (GPMG) and HMS Brilliant's Lynx, which first fired a homing torpedo and followed with more GPMG fire. HMS Plymouth's Wasp was scrambled
following the Wessex's sighting of the Santa Fe but was beaten to a firing position by one of Endurance's helicopters piloted by Lt Cdr Ellerbeck. The
helicopter, armed with AS12 missiles, got off her two shots, the first exploding inside the submarine's large fin. The helicopter had returned to the Endurance, reloaded and
returned to the Santa Fe before the Plymouth's Wasp had time to fire. Again one hit and one miss was recorded by the Endurance's Wasp. The Plymouth Wasp had
time to fire only one missile, the return flight to HMS Plymouth being 50 miles. Endurance's second helicopter, piloted by Lt T S Finding was on her way by
10:00 and after encountering machine-gun fire from King Edward Point scored another hit on Santa Fe's fin. Lt Cdr Ellerbeck's third attack was more strongly opposed with
anti-tank rockets, rifle-fire from the shore and at least one machine-gun in action on the Santa Fe. The Wasp escaped damage and scored its most damaging hit, striking the periscope
standards. At 11:00, the Santa Fe was alongside the pier, listing and apparently on fire.
The task group Commander decided to make the most of the offensive, and sustain the effort to recover the island. The first team ashore were a Naval Gunfire Support (NGS) team, landed by Lt Cdr
Ellerbeck's Wasp. The team's spotting officer almost immediately called for gunfire against troops on Brown Mountain which the frigate provided for the next twenty minutes. The first wave of the
assault was landed by HMS Antrim's Wessex and HMSBrilliant's two Lynxes about two miles from Grytviken. The remainder of the landing force was ferried ashore by
the three helicopters, which were later joined by Lt Cdr Ellerbeck's Wasp. HMS Antrim and Plymouth provided fire when called to do so.
The troops stormed Grytviken and very soon the Argentines raised the white flag, sang their national anthem, and lowered the Argentinean flag after just 23 days of occupation at Grytviken.
In London the Prime Minister, Margaret Thatcher, uttered the famous phrase 'just rejoice at that news' to news men gathered outside 10 Downing Street.
26th April
HMS Intrepid and RFA Bayleaf departed UK for Ascension Island. The Argentine submarine Santa Fe, damaged during the recapture of South Georgia
was moved from King Edward Point Jetty to the whaling station.
After a long and involved "battle", clearance is received from Command to carry out operational low flying (down to 100ft AGL). Considering that 1(F) had only recently worked up in preparation
for MAPLE FLAG, where flying to this low level was allowed, this seemed to be a particularly petty problem which in the end required the AOC's personal intervention to overrule SASO (Senior Air
Staff Officer) at Strike Command.
The Sqn flying programme also includes firing rockets from a very shallow angle at low level with level breakouts to avoid the debris hemisphere. 1(F) also received clearance to carry and fire
the Naval 2 inch rocket (36 per pod). Flt Lt Tony Harper flies to Yeovilton to carry out a trial sortie. 1(F) will not be cleared to use the standard RAF SNEB pod while embarked due to possible
dangerous conflicts with the electro magnetic environment on board ship.
The possibility of live firing AIM-9Gs at Aberporth prompts an intensive ground school programme on the weapon and its capability. Sqn Ldr Russ Peart of Boscombe Down briefs crews on the
installation, peculiar to the Harrier, while exchange officer Capt Skip Beasley USAF comes into his own in tutoring on the AIM-9 Sidewinder system as a whole. Indeed Capt Beasley will use his
detailed knowledge and experience of the system to brief and train the whole of the Harrier Force.
27th April
The Norland, a flat bottomed North Sea ferry, with 2 PARA embarked, and RFA Sir Bedivere sailed from the UK. Battling through the Southern Ocean storms in a flat
bottomed ship would lead one Para to wonder "who's side the Navy are on for putting us on this ship"
1(F) carry out a Fire Power Demonstration for 5 Brigade at Senneybridge. 5 Bde will be the follow on forces for the land battle in Falkland Islands.
More aircraft arrive from Germany to sustain the flying programme while more aircraft commence modifications. The latter now includes a jettison facility for the AIM-9s and for FINRAE (Ferranti
Inertial Navigation Reference and Attitude Equipment), which Ferranti hope to have working prior to deployment. FINRAE is the internal equipment which will allow the GR.3 INAS to align on a
moving Aircraft Carrier.
28th April
In the Houses of Parliament Prime Minister Margaret Thatcher tells the House of Commons that the time for diplomacy is fast running out. US Secretary of State Haig has all but given up his
shuttle diplomacy and in private believes that conflict is almost inevitable.
In the seas around South Georgia, the Antrim Group fresh from their part in the retaking of the islands depart to join up with the Task Force main body leaving
HMS Endurance on patrol.
29th April
The Hospital Ship Uganda left Ascension heading south, while HMS Argonaut, HMS Ardent, RFA Regent, RFA Plumleafand the
Forward Repair Ship Stena Seaspread all arrived at Ascension.
The Argentine Fleet which had been at sea continuously since 17th April, and designated Task Force 79, split into two groups to cover the Falklands. The first group comprising the carrier
25 de Mayo, two guided missile destroyers, the Hercules and Santisima Trinidad, and four smaller destroyers and frigates took up a
position just outside of the Maritime Exclusion Zone (MEZ) and to the north west of the islands. The second comprising theGeneral Belgrano and two destroyers took up a similar
position to the south west of the islands.
30th April
The British Naval Task force moved into the Maritime Exclusion Zone, which at dawn was redesignated a Total Exclusion Zone (TEZ) within which any, and all, Argentinean aircraft intercepted would
be attacked without warning. At the same time the Argentinean Junta declared an exclusion zone of its own where any British ships and aircraft would be attacked on sight.
In Washington DC President Ronald Reagan declared the unilateral support of the United States for the United Kingdom
At this point nothing short of a miracle would be able to stop an armed conflict between the two nations.
1(F) Sqn deploy six aircraft to Valley carry out live AIM-9 firings on the Aberporth range. Of the six missiles fired only one fails and, as a result, 1(F) create something of a record on
STCAAME (STrike Command Air to Air Missile Establishment) where the pace of life is normally somewhat slower.
1(F) also received the tanker plan from 1 Group for the deployment to Ascension Island. Concern is expressed that the tankers intend to leave the Harriers 1000nm north of Ascension Island with no
SAR cover for the final leg. 1(F)’s request is considered and a Nimrod MR.2 flying out of Ascension Island will provide the required cover.
1st May
It was decided that there was a need to make a show of force using the naval and air forces at the disposal of Admiral Woodward.
Woodward's Carrier group entered the TEZ, with HMS Invincible launching the first Sea Harrier Combat Air Patrol (CAP) of the conflict. HMS Glamorgan, Alacrity and Arrow headed for
the Falklands protected by the CAP, while HMSBrilliant and Yarmouth headed to the north-west of the Carrier group on anti submarine patrol. By mid-afternoon,
the Glamorgan group came within gun range of Port Stanley airfield. As the Glamorgan group bombarded the airfield they came under attack by three Mirages.
HMS Glamorgan and Alacrity were both near-missed by 1000lb parachute-retarded bombs and strafing caused some superficial damage
to Glamorgan and Arrow, woundingArrow's Seacat aimer. HMS Glamorgan tracked Argentine aircraft and gave warnings to the carriers
for the rest of the day. The Glamorgan group's bombardment of Stanley airfield continued until 01:35 covering the landings of reconnaissance teams at Port Stanley.
Mean while on Ascension Island at about 22:50 local time on the 30th April, 11 fully laden Victor tankers of 55 and 57 Sqn's took to the air, accompanied by two Vulcan bombers. The number of
tankers was required to deliver fuel to one aircraft which would be making the flight all the way to Port Stanley Airport 3,886 miles away, the equivalent of London to Karachi, to deliver its
load of 21 1000lb medium capacity bombs on to the airfield. At the controls of Vulcan XM607, was Flt Lt Martin Withers of 101 Sqn, flying the reserve Vulcan. As they climbed to cruising altitude
it became clear that there was a problem with the lead Vulcan. They could not pressurise the cockpit, a total necessity to reach the cruising altitudes necessary to reach the Falkland Islands and
complete their mission. When told they had the lead of the mission, a long silence fell over the cockpit which was only broken by Martin Withers words "It looks like we’ve got a job of work
fellas".
At 04:30 the air around Port Stanley Airport was ripped by the detonation of XM607’s 21 Bombs hitting the airfield. Their job done XM607 and its crew flew north on the return leg of its epic
mission. Contrary to popular belief the crew did not contact the fleet below, but did radio "Superfuse" the one word message that meant the success of ‘Black Buck 1’.
The news the Vulcan raid had been a success soon reached the fleet and later that morning the Sea Harriers of HMS Hermes and
HMS Invincible were about to get into the action with co-ordinated follow up attacks on Port Stanley airfield and the airstrip at Goose Green, the second largest
in the islands. While 800 Naval Air Squadron (NAS) on Hermes would be the bombers, 801 NAS would provide top cover with their AIM-9 equipped Sea Harriers. BBC
Correspondent Brian Hanrahan made possibly the most famous quote of the whole conflict when reporting this attack. On the return of all the aircraft safely, albeit Lt Dave Morgan’s Harrier had a
hole in the tail from a stray 20mm round, he said "I counted them all out and I counted them all back again".
Inflicting damage was not confined to the bombers with 801 NAS claiming three kills with Sidewinder that day, and 800 NAS one kill.
Losses today:
Argentine Forces
Islander - Port Stanley - Hit by Cluster bomb - Sea Harrier 800 NAS
Pucara (Groupo 3) - Goose Green - Hit by Cluster bomb on take off - Sea Harrier 800 NAS – Lt Jukic Killed
Mirage (Groupo 8) – East Falklands - Damaged by AIM-9 Sea Harrier 801 NAS and shot down by own air defences whilst attempting an emergency landing at Port Stanley - Capt Cuerva killed (Lt Thomas
credited)
Mirage (Groupo 8) - N/W Falklands – AIM-9 - Sea Harrier 801 NAS (Flt Lt Barton credited) Lt Perona killed
Dagger (Groupo 6) - West Falkland – AIM-9 - Sea Harrier 800 NAS (Flt Lt Penfold credited) Lt Ardiles Killed
Canberra (Groupo 2) - N/W Falklands – AIM-9 - Sea Harrier 801 NAS (Lt Curtiss credited) Lt Ibanez and Lt Gonzales Killed
2nd May
Admiral Woodward's Carrier Battle Group is rejoined by the Glamorgan group, with HMS Brilliant and HMSYarmouth.
HMS Glamorgan, Yarmouth, Alacrity and Arrow formed an anti-aircraft and anti-submarine screen protecting the main body of the two
carriers and the RFAs Olmeda and Resource, with the Type 22s goalkeeping for the carriers.
Today saw possibly one of the most controversial of all actions in the Falklands War with the sinking of the Argentine cruiser General Belgrano.
HMS Conqueror tracked the movements of the Argentine cruiser sinking her with torpedoes. Whether or not the Belgrano and her escorting destroyers had posed
an immediate threat to the Task Force would be debated for years afterwards - but the commanding officer of the nuclear-powered Fleet submarine, HMS Conqueror Cdr. Christopher
Wreford-Brown, was in no doubt when he arrived home at the Clyde Submarine Base. He had attacked on direct orders from Fleet headquarters, he said, and though he regretted the loss of life, he
had "saved a considerable loss of life from the British Task force and a potential threat from Exocet missiles with which she was armed."
Further North a very curious Russian spy trawler was sighted close to Ascension, commencing a long game of, us watching them, watching us.
The first five aircraft of 1(F) Sqn deploy to St Mawgan. This will allow four aircraft to launch on Monday in order to get three to Ascension Island. The same pattern will then be repeated be
repeated on Tuesday and Wednesday.
Leaving Wittering is somewhat emotional for the crews. A departure formation fly-past in Box four was carried out by Wg Cdr Squire, Flt Lt Harper, Flt Lt Hare and Flt Lt Rochfort. The fifth
aircraft, flown by Sqn Ldr Jerry Pook, departs as a singleton to carry out an air test en-route).
Losses today:
Argentine Forces
1 x Alouette - (1st Naval Helo Recce Esc) - Went down with the General Belgrano
3rd May
Two Lynx helicopters from HMS Coventry and HMS Glasgow attacked two patrol craft. The patrol craft were actively engaged in the search for the two airmen
from the Canberra shot down the previous day. The Lynx were both armed with the untried Sea Skua missile which had been rushed into service, The Coventry Lynx fired both
missiles and sinks one of the craft. The Glagsow's Lynx targets the Alferez Sobral and launches her two Sea Skua missiles. One of the missiles hits the bridge structure,
killing the commanding officer and several ratings, but she remains afloat. Two days later she would limp into the Argentine main land port of Puerto Deseado. Neither airman from the Canberra was
recovered.
A heavy fog descended over the Carrier Battle Group's operating area.
Following the sinking of the Belgrano, Argentine warships are pulled back to operate in shallower water, where submarines would not follow, but at the same time placing them further
away from their required operational area.
At RAF St Mawgan the launch of the first wave of Harriers of 1(F) Squadron is preceded by lengthy briefings which cover all the Rules of Engagement for maritime forces. Four aircraft launch at
09:30 to rendezvous with three Victor tankers in the overhead at about 25,000ft. The three to go south are Wg Cdr Squire, Flt Lt Harper, and Flt Lt Hare, a fourth aircraft flown by Flt Lt
Rochford is the airborne spare in case of unserviceability.
One of the tankers has difficulty taking on fuel and in the end the Victors renumber. However, the end result is that they have insufficient fuel to get all three GR.3s to Ascension Island; one
must return to Banjul with the last tanker. The tanker is then to proceed on to Ascension Island that night. Wg Cdr Squire decides to send Flt Lts Harper and Hare on while he diverts. This sortie
lasts 9 hours 15 mins which must rank as one of the longest Harrier sorties in history.
At Banjul the Harrier and Victor are met by many eager and interested people. After refuelling the aircraft, there is a chance to have a welcome drink, and plan the leg to Ascension Island, most
of which will be flown in darkness. In the event, there was a lot of medium/high level cloud with frequent electrical storms to add unwanted disorientation. The three refuelling brackets are
successful. With just under 100nm to go Wg Cdr Squire departed the tanker for a straight in approach to the humped runway at Wideawake, eventually landing at 22:15 after eleven hours flying.
Losses today:
Argentine Forces
MB339 – 1st Naval Attack Sqn – Nr Cape Pembroke – Operational Accident crashed into ground returning to Port Stanley in bad weather. Lt Benitez Killed
4th May
Overnight the Carrier Battle Group had moved, the carriers were within 100 miles of Port Stanley with the three Type 42s formed into a picket line.
HMS Sheffield was off the Falkland Islands patrolling the Exclusion Zone when she was hit by one of the most lethal of conventional weapons in the world's armoury. An airborne
Exocet anti-ship missile was launched from an estimated distance of 20 miles by one of a handful of Super Etendard aircraft in Argentine hands. The weapon struck with devastating effect, hitting
the centre of the ship and starting raging fires which quickly spread. For four hours the surviving members of the ship's company fought vainly to save the destroyer, even as part of her hull
glowed white hot. In addition to the 20 men who died in the ship, 24 were injured. The injured and the 242 other survivors were transferred to other ships in the Task Force, including
HMS Hermes.
The Sheffield herself, gutted and deformed by her still burning fires, lingered on for six more days. She was taken in tow but finally sank outside the Exclusion Zone on 10th
May, becoming an official war grave.
Late in the evening of the 3rd May, in a repeat performance of Black Buck 1 eleven Victor tankers take a lone Vulcan, captained by Sqn Ldr John Reeve of 50 Sqn and his crew, to attack Port
Stanley Airfield for a second time, delivering their weapons in the early hours of the 4th May, narrowly missing the western edge of the runway and causing little additional damage.
Later that morning three Sea Harriers of 800 NAS, led by Lt Cdr Gordon Batt with Flt Lt Ted Ball and Lt Nick Taylor, are tasked to re attack the airfield at Goose Green. Lt Cdr Batt and Lt Taylor
were to attack the parked Pucara aircraft with BL755 cluster munitions, while Flt Lt Ball was to run in from another direction and deliver three parachute retarded 1000lb MC bombs to crater the
runway. As Flt Lt Ball rolled in on the target he was searching for Lt Taylor as Taylor had to be clear before Ball could deliver his weapons. Ball saw Taylor exactly where he expected him to be
and then watched in horror as Taylor’s aircraft was hit by a large calibre cannon (believed to be a 35mm Oerlikon) and burst into flames. The aircraft flew on for a short way then crashed in a
large fire ball. Lt Taylor made no attempt to eject and died in his aircraft.
On Ascension Island the members of 1(F) Sqn spend the day looking around the airfield at Wideawake and to an extent the Island. While the officers are accommodated at 'Two Boats', the ground crew
are living at 'English Bay' quite some distance from the airfield. At the airfield there is activity everywhere with helicopters rushing in all directions. Everything has a very makeshift
appearance and the operations room run by Group Captain Jeremy Price and Wg Cdr David Baugh is located in the top of the fire section.
Sqn Ldr Bob Iveson and Sqn Ldr Jerry Pook both arrive that evening but Flt Lt John Rochfort has diverted to Porto Santo! (a Portuguese island 50 km northeast of Madeira Island in the North
Atlantic Ocean) The news that HMSSheffield has been sunk and Lt Nick Taylor killed dampens the atmosphere, and concentrates the minds of those yet to enter the fray.
Losses today:
Royal Navy
1 x Sea Harrier FRS.1 - Goose Green – Anti Aircraft Artillery, possibly radar laid 35mm Oerlikon canon. Lt Taylor killed.
5th May
With the loss of HMS Sheffield the Task Force moved East, the weather closed in and a period of little air activity followed except for normal Recce and Combat Air Patrols
(CAP). Off the Argentine coast however the Argentine Navy was committed to a full blown anti submarine hunt after an Argentine Navy S-2 Tracker aircraft reported a possible submarine contact. An
intensive search revealed nothing, but the incident was enough for the 25 De Mayo to disembark her air component and return to the Argentine naval base at Bahia Blanca and
remain there for the duration of the conflict.
For 1(F) at Ascension the day starts with an enormous thunderstorm, which lasts for three hours. After it subsides Wg Cdr Squire visits the Atlantic Conveyor. There will only be
accommodation for Wg Cdr Squire and Sqn Ldr Iveson on board; the remaining pilots will be housed in the North Sea Ferry Norland, although this has yet to be confirmed. Flt Lt
Brian Mason (JENGO) and the 18 NCOs who have travelled down in Atlantic Conveyor are sleeping in portakabins bolted to the deck. Sqn Ldr Harris, Flt Lt Smith and Flt Lt Glover arrive at Ascension
but Flt Lt Boyens diverts to Banjul in the Gambia. The Sqn brief with 809 NAS the landing procedures for bringing the Harriers aboard Atlantic Conveyor the following day.
6th May
Bad weather continued to dog the Task force with very little opportunity to operate in any area. At 09:00 local time two Sea Harriers of 801 NAS from HMS Invincible were on
Combat Air Patrols (CAPs). A Recce Sea King reported a contact well to the south of the Task Force, and both Sea Harriers were vectored in to investigate. What happened next still remains
surrounded by conjecture and speculation, both aircraft disappeared from radar. Nothing was seen of the aircraft or their pilots again despite an intensive search and rescue effort being mounted.
In what appears to be a million to one freak event it is assumed that the aircraft, in appalling weather, suffered a mid air collision. This reduced the number of available Sea Harriers to 17, a
number that while operationally capable, meant that no more losses could be accepted with out reducing the already stretched air defences of the fleet.
At Ascension Island preparations to embark 1(F) Sqn on to Atlantic Conveyor are well advanced. The plan is to embark the aircraft early in the day when the temperature is low
and, starting with the worst performing engines. Wg Cdr Squire and Sqn Ldr Iveson launch as the first pair and land-on after some formation aerobatics over the Island. Sqn Ldr Iveson has landed
on ships before with the USMC (as had Sqn Ldr Harris and Flt Lt Smith) but Wg Cdr Squire found the shortage of space alarming, especially as the ship is rolling in the swell. Flt Lt Hare has a
particularly tricky time coping with the swell and the lack of space.
Also today, Flt Lt Boyens arrives from Banjul with his aircraft and Flt Lt Rochfort makes it to Ascension from Porto Santo in a C-130 Hercules.
Losses today:
Royal Navy
2 x Sea Harrier – Mid air collision in poor visibility – Lt Cdr Eyton-Jones and Lt Curtiss killed
7th May
In New York a new peace initiative to call an end to the conflict is tabled by United Nations secretary-general, Javier Perez de Cuellar.
The bad weather in the South Atlantic continued to interfere with operations. It did however provide cover for the Argentine forces to re supply the Falklands by air using C-130, Fokker
Friendship, and Lockheed Electra aircraft, which would average two missions a day bringing in vital supplies from the mainland.
The MV Norland, carrying 2 PARA, arrived at Ascension to join Amphibious Task Group.
The loading of Sqn stores for 1(F) on Atlantic Conveyor continued today. Wg Cdr Squire visits Fearless in the morning for an intelligence update. That afternoon Wg Cdr
Squire was sent ashore to obtain Sidewinder missiles, in order to give an air defence capability against the Boeing 707 shadower aircraft that have been snooping around the task force, and may be
expected to try to find the Amphibious Group while travelling south. After a great deal of negotiation he manages to get six missiles and after much rushing about, helicopter transport out
to Atlantic Conveyor. In all the confusion, however, the missile fins go astray and these are eventually found on HMS Intrepid.
In the darkness that night the Amphibious Group leave Ascension Island in radio silence and without lights.
8th May
The bad weather and poor visibility continued, bringing a virtual halt to airborne operations. In the previous four days 800 NAS have flown only four sorties due to the weather. Today
is notable however as being the first day that long-range air supply drops, by C-130, to the Task Force are made
On Board Atlantic Conveyor bagging of the aircraft to give extra protection from the salt water begins today. The bags do not allow for external fuel tanks and so all of these
must be removed. The FINRAE equipment fitted to 1(F) Sqn's Harrier GR.3s is also found to be not working properly; this problem is notified to MOD for further investigation somewhere a
little more stable than a rolling deck. The problem is the FINRAE will not transfer alignment data to the aircraft's Inertial Navigation and Attack System, making the use of the moving map
display impossible and navigation difficult.
Emergency life raft stations are practised, as from tomorrow it is assessed that there will be a potential submarine threat.
9th May
The Narwal, an Argentine fishing vessel being used as a spy ship, was bombed and strafed by two RN Sea Harriers of 800 NAS flown by Lt Cdr Gordon Batt and Flt Lt Dave Morgan.
The Hermes and Invincible flew off three Sea Kings to board and take the ship and capture her crew. Troops abseiled down to the trawler, where once aboard
they found one man had been killed and eleven more injured. More interestingly one of the crew turned out to be an Argentine Naval officer and captured documents confirmed the vessel had been
intelligence gathering. The prisoners were winched up to the Sea Kings, which then took them back to the carriers.
During the day HMS Broadsword and HMS Coventry bombarded positions around Port Stanley. Later in the day HMS Coventry picked up a slow
moving object on radar and engaged it with a Sea Dart missile, shooting down an Argentine Puma helicopter, which crashed killing all on board.
The Argentine forces suffered further losses when, due to poor visibility, two A-4 Skyhawks of Groupo 4 flying at low level to attack Royal Navy ships crashed into the steep sides of South Jason
Island off the North West coast of the Falklands. Both pilots died immediately.
With 1(F) Sqn, the bagging of aircraft on Atlantic Conveyor continues and there was some limited success with the FINRAE. The engineering team find a wiring fault in one of the
looms. This information is relayed to MOD so that future aircraft can be checked.
The Sqn look at and assess deck operations on Atlantic Conveyor with various wind conditions and to assess the best direction for the vertical take-off which will have to be
carried out to transfer to the Carrier. It is of great concern that no-one will have flown for two weeks prior to this important and possibly tricky sortie.
Losses today:
Argentine Forces
2 x A4 Skyhawk - CFIT (Controlled Flight Into Terrain) – South Jason Island – Lt Casco and Lt Faria both Killed
Puma (Army) – Engaged and shot down by HMS Coventry with Sea Dart – Nr Port Stanley – number of fatalities unknown.
10th May
Poor weather and equally poor visibility continued to limit air operations around the Falklands today. In one of the few offensive actions by either side HMS Glasgow bombarded
Argentine positions at Moody Brook near Port Stanley.
On Atlantic Conveyor, 1(F) Squadron carry out more ground training, jointly with 809 NAS. The training revolves around deck operations, standard operating procedures, conduct after
capture etc.
An 809 NAS Sea Harrier is brought to 'Readiness State 5' for a possible interception of a shadowing Boeing 707. If launched the aircraft will perform a vertical take-off, join a tanker which is
close by and attempt to close with the 707. Fuel and performance margins are very slim and, if launched, it will be a very "bold" sortie.
Today was also the birthday of one of the 1(F) Sqn Senior NCOs and the ship's crew have made a birthday cake measuring 18"x14"x7" covered with icing. It turns out to be a highly decorated case of
Carlsberg – apparently a speciality of the galley.
11th May
Ascension Island did not suffer with weather problems to the extent that the Falkland Islands did and this allowed normal operations to continue. Today the RAF demonstrated a new capability,
developed for Operation CORPORATE, for the first time, the Nimrod MR.2 with in-flight refuelling. With a single refuelling a crew from 206 Sqn flew their Nimrod 2,750 miles south–south west of
Ascension Island to provide anti submarine cover to the amphibious assault group. The in-flight refuelling modification however bore all the hall marks of a Heath Robinson Machine. The probes of
the Nimrods had all been scrounged from the Vulcan force (Indeed one example came from a museum exhibit!), and were mounted above the cockpit over what had been the pilot' s escape hatch. Leading
from the rear of the probe, through the cockpit, and fastened to the floor to a point 2/3rds of the way down the inside of the fuselage. Ending at the refuelling gallery, was a length of standard
rubber on canvas refuelling bowser hose, which people treated with a great deal of respect and avoided when walking past. For all its hasty charm the system worked well and allowed the Nimrod
MR.2 to provide a comprehensive radar, electronic reconnaissance and Anti Submarine capability for the task force.
On Atlantic Conveyor the 1(F) Sqn day starts with a call to life raft stations at 06:00. This was only a practice, but later in the day a real alert is sounded in response to a
possible sighting. So far the weather since leaving Ascension had been perfect but the forecast is that this will quickly change in the next few days; at least it had given everyone on the Sqn
the chance to find their sea legs.
Wg Cdr Squire visited HMS Fearless for a further intelligence update including assessments of the Argentine forces capability. That afternoon the SHAR at Readiness State 5 is
scrambled but the launch is subsequently cancelled. It is possible that either the accompanying tanker or Soviet Bear is mistaken for the Argentine 707.
12th May
The QE2 sailed from Southampton with 5 Infantry Brigade embarked.
The weather improved, allowing Hermes to send up a Combat Air Patrol (the first since 9th May).
During the mid-afternoon HMS Brilliant detected four aircraft heading toward her at low level and at high speed. HMS Glasgow's Sea Dart missile loading
system failed safe, she opened fire with her 4.5in gun but this jammed after firing eight rounds. HMS Brilliant's Seawolf system fired three missiles in quick succession; two
of the missiles scoring direct hits and a third Skyhawk flew into the sea while taking violent avoiding action. The fourth Skyhawk released a 1000lb bomb which bounced off the water and over the
top of HMS Glasgow's hangar.
Minutes later another raid was detected, with Glasgow's engineers still fixing the weapons systems. This new wave of Skyhawks approached the ships weaving in order to avoid the
close-range gunner's aim. This also confused Brilliant's Seawolf, at the moment when its missiles should have launched, the system 'sulked' a known problem, and trained its
launchers to their fore and aft positions. The Skyhawks released their bombs at both ships. The weapons bounced right over HMS Brilliant like skimmed stones, but
HMS Glasgow was hit. A 1000lb bomb entered amidships, three feet above the waterline, passed thought the upper part of the Auxiliary Machine Room and exited the ship
through the other side at about the same height. Damage control parties improvised plugs and the ships withdrew on a course to minimise the ship rolling which would have flooded the open
compartments.
Had the Argentines perfected the arming and fusing of their weapons the result of this encounter could have been hugely different. As it was, with the lucky escape of
both Glasgow and Brilliant in mind, Admiral Woodward decreed there would be no further daylight naval bombardment of Port Stanley airfield.
Losses today:
Royal Navy
Sea King – Ditched near to Task Force following mechanical failure – No Injuries.
Argentine Forces
3 x Skyhawk – (Groupo 5) – East of Falklands - Engaged by HMS Brilliant with 'Sea Wolf' scoring two direct hits and causing one to impact the sea while evading all credited to
'Sea Wolf' – Lt Bustos, Lt Nivoli, Lt Ibarlucea all killed.
1 x Skyhawk – (Groupo 5) Goose Green - Having dropped the bomb that holed HMS Glasgow, Lt Gavazzi and his aircraft were engaged and shot down by Argentine Anti Aircraft Artillery at
Goose Green – Lt Gavazzi killed.
13th May
Once again bad weather in the Task Force area prevented the flying of CAPs and strike sorties.
The 1(F) Sqn pilots housed on the MV Norland go across to Atlantic Conveyor, mainly for a change of scenery. That evening there are celebrations to mark the 70th birthday of
both 1(F) and 3(F) Sqn's - represented by Flt Lt John Leeming and Flt Lt Steve Brown who are on loan to 809 NAS. 1(F) presents the ship with a Sqn plaque and receives in return a Cunard
flag.
14th May
Sir Anthony Parsons, Britain's envoy at the United Nations, and Sir Nicholas Henderson, Britain's ambassador to the United States, fly home from the United Nations peace negotiations for urgent
talks with Prime Minister Margaret Thatcher.
Once again operations are dogged and hampered by bad weather, but on the late evening of 14th May this sort of weather was to provide vital cover for a raiding operation, which although small was
of the like not seen since World War Two.
Under the cover of darkness and poor weather, two Sea Kings of 846 NAS with 45 men embarked between them, approached undetected and landed on Pebble Island. Moving swiftly to the airfield, the
troops set up an anti ambush screen to prevent counter attack should they be discovered, before the remainder of the men moved rapidly between the parked aircraft placing demolition charges in
their cockpits, and at various strategic points of the airfields infrastructure. Under the cover of supporting fire the men then withdrew.
When the demolition charges detonated they put out of action every aircraft on the airfield, six Pucaras, four Turbo Mentors, and a Skyvan. The charges severely damaged the airfields capability
to operate, to the extent that not only had one third of the islands based light attack aircraft been destroyed, but the airfield closest to the Argentine mainland was put out off action for the
remainder of the conflict. Only one injury was recorded, a sprained ankle to one of the attacking troops. The whole operation had taken a mere five days from conception to completion of the raid.
On Atlantic Conveyor software modification details for the FINRAE arrive by SATCOM and the engineering team set to work immediately to fix the problem. All the aircraft are
bagged and it will not be possible to prove the system until the aircraft are ready to cross-deck to the Carriers. In this respect it is possible that two aircraft may fly off on Sunday 16th or
Monday 17th.
The weather is also becoming appreciably worse.
Losses today:
Argentine Forces
6 x Pucara Groupo 3
4 x Turbo Mentor 4th Naval Attack Sqn
1 x Skyvan Coast Guard
All destroyed by Special Air Service during ground raid on Pebble Island.
15th May
Bad weather prevented planned photo reconnaissance sorties to cover Port Stanley, Pebble Island and Fox Bay.
801 NAS dropped 1000lb bombs on Port Stanley airfield, Sapper Hill and a helicopter support base near Mount Kent. 800 NAS also dropped six 1000lb bombs on the Port Stanley airfield.
With the main amphibious landings expected to take place in the next few days, the British High Command really needed to be certain that the Argentine Navy was confining itself to its home waters
and ports. The ports were blockaded by British Nuclear Submarines, which while being able to remain undetected and being immensely powerful, their sensors were comparatively short ranged and it
was not impossible that vessels could have crept past, and be lying in wait for the amphibious element of the Task Force. To find out would take a reconnaissance mission of the like never seen
before.
In the cool early morning darkness of the 15th May, a Nimrod MR.2P of 120 Sqn, flown by Wing Commander David Emmerson, departed Ascension Island heading south. Having refuelled from Victor
tankers twice, the Nimrod eventually reached a point about 150 Miles due north of Port Stanley. Here the aircraft turned due West and headed for a point some 60 miles from the Argentine shoreline
where the aircraft turned once again heading north –east and running parallel to the coast. Flying at altitudes between 7,000 and 12,000 ft and using its powerful Searchwater radar the aircraft
was able to reconnoitre an area of ocean 400 miles by 1000 miles in area. Within that zone the crew could say with virtual certainty that there was no vessel larger than a motor launch at sea.
The Nimrod returned to Wideawake Airfield after three air to air refuellings and being airborne for 18 hours and 5 minutes, covering a distance of 8,300 miles. As with the Victor recce 27 days
earlier they returned with only negative information, but this was just what was wanted to be heard. To ensure that the Argentines didn’t change tactics Nimrods from Ascension would repeat this
feat of endurance on seven out of the next ten nights to check that the enemy ships remained in port.
1(F) Sqn spent a quiet day carrying out more ground training. It is now planned that all six GR.3s should cross-deck to HMS Hermes on 18th/19th. This is thought better
than the splitting the aircraft between HMS Hermes and HMS Invincible. The Sea Harriers, however, will split with four going to each carrier. The weather remains
atrocious with the ship riding out the most tremendous storm. With half the stabilisation system out of order the ship rolls and bangs in an alarming fashion.
In the UK, the trial on the active I-Band countermeasures pod commenced. Known as 'Blue Eric' and located in a converted Harrier gun pod it was designed to counter the 'Fledermaus' radar which is
used to control the highly effective 35mm Oerlikon Anti Aircraft Artillery Cannons. Work also starts on the ALE-40 Chaff and Flare dispenser modification programme begins. The equipment has been
provided by our European allies with the parts from USA.
16th May
Sir Anthony Parsons, Britain's envoy at the United Nations, and Sir Nicholas Henderson, Britain's ambassador to the United States, returned to the USA.
801 NAS dropped more bombs on Port Stanley airfield. An Argentine freighter, the Rio Carcarana, spotted off Port King was bombed and strafed. The crew abandoned ship and made their
way to Port Howard. The naval auxiliaryBahia Buen Suceso, moored near the civilian settlement at Fox Bay was strafed by the Sea Harriers of 800 NAS. They encountered some resistance,
Anti Aircraft fire was quite heavy and one of the aircraft returned with a bullet hole in its fin.
Late in the afternoon 800 NAS mounted a sortie to photograph the damaged ships, Port Darwin, Moody Brook and Port Stanley airfield. The photographs showed another bomb crater on Port Stanley
airfield runway. This had been created by the Argentine Air Force unit who had begun to simulate bomb craters using bulldozers to build piles of mud which could be removed at night allowing
aircraft to land.
Under the cover of darkness HMS Glamorgan was sent inshore to continue the naval bombardment bombardment. She fired 130 rounds at targets in Port Stanley, Darwin and Fitzroy.
The object of this being to convince the Argentineans that landings were to take place to the south of Port Stanley.
That night there was to have been a further Black Buck Vulcan raid to knock out the runway at Port Stanley but the forecast was for extreme head winds so the operation was cancelled.
17th May
Today, 17th May, is Argentina's 'Navy Day', and it was believed that this would be the catalyst for some form of major offensive action.
HMS Invincible's first Combat Air Patrol of the day dropped a couple of 1000lb bombs on the Port Stanley airfield, just to keep some pressure on the occupants.
800 NAS carried out a photo reconnaissance mission, bringing back pictures of Fox Bay, Goose Green, Port King and settlements in Lafonia (an area of West Falkland).
The Argentine Navy attempted to launch an attack using Exocet missiles and Super Etendards but they had not been able to maintain an accurate plot of the Battle Group's movements. The deception
measures put in place by the senior aviators on the British carriers meant that when the pair of Super Etendards popped up to target their Exocets, their radars swept only empty sea.
HMS Hermes left her group in the mid-afternoon in order to rendezvous outside the TEZ with Atlantic Conveyorwith a view to enabling the cross decking of the
Harriers. One of Hermes' Sea King 5s was lost in the evening in a non combat incident; the aircraft was ditched due to instrument malfunction.
Argentine Air Force commander Brigadier Lami Dozo warns that the British Task Force will receive "a massive attack" if it sails within range of Argentine weapons.
The EEC renewed sanctions against Argentina for another week: Italy and Ireland lift them altogether.
On board Atlantic Conveyor the aircraft are in the process of being debagged in preparation for the cross-decking to HMS Hermes. Initial FINRAE trials with the
debagged GR.3s look hopeful.
Losses today:
Royal Navy
Sea King – East of Falklands – Ditched due to technical failure – no injuries
18th May
Once again, to maintain the pressure on the occupiers HMS Invincible’s first three CAP missions dropped six 1000lb bombs on Port Stanley airfield.
The Carrier Battle Group and Amphibious Group rendezvous in the evening and although the Argentine Air Force missed this, they were soon provided with the information by the BBC Overseas Service.
1(F) Sqn are awoken to a practice emergency at 08:00 with a call to life raft stations. There are further false alarms - including a 'blue-on-blue' - at 09:00 and 11:00.
HMS Hermes and HMS Invincible close up with the amphibious group, and Atlantic Conveyor, in order to cross deck aircraft well out of range the
enemy. In the end only four GR.3s make it as two went unserviceable; these are flown by Wg Cdr Squire, Sqn Ldr Pook, Sqn Ldr Harris and Flt Lt Rochfort. The VTO is straight forward as is the
landing on. Flt Lt Harper remains on Atlantic Conveyor and Flt Lt Rochfort returns to transfer the remaining two aircraft when they are serviceable. The long process of
cross-decking of troops, remaining pilots and Sqn stores will take hours.
19th May
In London Margaret Thatcher’s Cabinet give their approval for landings to reoccupy the Falkland Islands to take place.
HMS Glamorgan spends the night of the 18/19 bombarding targets between Port Stanley and Lively Island.
The Royal Fleet Auxiliary Fort Austin disembarked four specially equipped Lynx helicopters. These aircraft were fitted with electronic countermeasure equipment designed by the
Royal Air Force to outwit the Exocet missile system. Two Lynx went to each carrier and from their arrival until the end of the conflict one Lynx was held on deck at immediate readiness for
launch.
That night a Sea King helicopter of 846 NAS with Special Forces personnel on board, being cross decked to another ship, ditched having hit a large bird (possibly an Albatross) with its tail
rotor. HMS Brilliant was swiftly on the scene but 22 lives were lost in the accident.
Meanwhile HMS Hermes had made a high speed dash to the west of the Falklands. Here she flew off a single Sea King of 846 NAS. Speculation as to the mission it was involved in
was, and remains today, shrouded in secrecy. What is clear is the aircraft was landed on the Chilean mainland in the vicinity of Punta Arenas, where it was destroyed by its crew, who then went
into hiding for three days before handing themselves over to Chilean authorities.
For 1(F) Sqn the day was set aside for operational training and they achieve 15 sorties of Air Combat Training (ACT). Although they practiced air combat, it has been decided that the GR.3s will
be used for ground attack missions.
Flt Lt Glover and Wg Cdr Squire fly the first ACT mission and, shortly after getting airborne, are vectored to the North East in an attempt to intercept the shadowing Boeing 707. They are armed
with AIM-9s but the Rules of Engagement (RoE) are only to intercept and shadow. At 180nm from the carrier they are outside radar and radio contact, they find nothing and return to the ship.
The FINRAE along with many other Sqn stores have yet to arrive on board Hermes. The aircraft are therefore being flown in pre-align and without any navigation aids. Aircrew are also
finding the position of the sun - both southern hemisphere and time zone - also confusing.
Flt Lt Harper arrives with the fifth aircraft from Atlantic Conveyor having refuelled on HMS Invincible en-route. Flt Lt Harper, Sqn Ldr Harris and Flt Lt Glover then carried
out night landings at the end of the day.
1(F) shares the Ready Room with 800 NAS. The lack of a Ground Liaison Officer is going to be a severe limitation. With very little room 1(F) bag a nearby cabin to put up maps and hold briefings.
One advantage of the 'planning room' is that it allows them to hold meetings in private. Much of the first 'Operations' Group is spent talking of the wartime approach to the job - the acceptance
of unserviceable aircraft, the parameters to which they fly etc. Wg Cdr Squire briefs everyone that he will authorise all sorties, if necessary, at the end of the day and that authorisation will
not specify any minimum height.
The main pre-occupation in the Ready Room is the Rubic Cube. There are a number of schools with different methods, one of which is available on an OHP slide.
The Captain calls Wg Cdr Squire to his cabin/ops room to brief him on the squadron's first operational mission - an attack on the POL storage area at Fox Bay - the next day.
Losses today:
Royal Navy
Sea King – 846 NAS – Cross decking Special Forces troops suffers a catastrophic bird strike and ditches – 22 killed
Sea King – 846 NAS – Burnt out by her own crew on the ground in Chile near Punta Arenas – The reason for these actions remain secret.
20th May
During the night of 19th/20th HMS Glamorgan went inshore to bombard targets between the entrance to Choiseul Sound and Cape Pembroke. The purpose was to divert attention from
events developing in Falkland Sound.
On board HMS Hermes with 1(F). After a quiet night the weather today is pretty grim. However, Flt Lt Rochfort manages to make it aboard in the sixth aircraft and by the evening
the remaining Sqn troops have also arrived.
The bad weather and the ship's working time zone (Zulu) give the pilots hours in which to plan the attack at Fox Bay. Sqn Ldr Iveson, Sqn Ldr Pook and Wg Cdr Squire are to carry out the first
mission and spend time pouring over maps in the dining room. The plan is to fly in having three different routes to take account of bad weather.
The three aircraft launch at 14:30, becoming the first offensive mission flown by the RAF from an aircraft carrier since October 1918. The Harriers are armed with nine BL755 Cluster Bomb Units,
three per aircraft. The run to the target is in a Hi-Lo-Hi profile, flying battle formation', a wide, flat 'V' formation with about one mile separation between aircraft which works as planned.
While en route Lt Cdr Sharky Ward of 801 NAS hears the formation transiting into the target area as "GREEN Ldr/2/3" and asks after Wg Cdr Squire by name! The response to this is not recorded, but
can be imagined.
The target was easily acquired, the arrangement of jerry cans and 40 gallon drums had been set out to avoid all being destroyed by a single bomb, this however meant that they were laid out in a
pattern ideal for engagement with Cluster bombs. Wg Cdr Squire led the attack, followed by Sqn Ldr Iveson who attacked on a heading about 30 degrees off Squires. Sqn Ldr Iveson reported seeing
Squires weapons cause extensive secondary explosions on the target. Sqn Ldr Pook attacked on a heading nearly the same as Wg Cdr Squires and laid his weapons down on the target. During the attack
none of the pilots saw anything in the way of defensive fire. All three land back safely on Hermes at 15:40.
The invasion to retake the Falkland Islands, codenamed Operation SUTTON, is certain for tomorrow and it is likely to be a very busy day.
21st May
00:01hrs - HMS Fearless and HMS Intrepid lead the fleet into Falkland Sound while HMS Hermes and HMS Invinciblesteamed south
to launch air and sea attacks. Providing close escort to the Amphibious Group during the passage were HMS Antrim, HMS Broadsword, HMS Brilliant,
HMS Plymouth, HMS Yarmouth, HMS Argonaut, HMS Ardent and RFA Fort Austin.
The ships of the Task Force ran in under the watchful gaze of a Nimrod MR.2P, once again searching the Argentine coast for signs of naval activity and finding none. The aircraft would be airborne
18hrs and 51 minutes and cover 8,453 miles at the time the record holder for the longest operational reconnaissance mission ever undertaken.
From 02:00 the Task Force landed several thousand troops at San Carlos Water, 50 miles west of Port Stanley. The British bridgehead was established totally unopposed at Port San Carlos, with a
combined total of 2,500 Royal Marines and Paras put ashore.
Deployment:
40 Commando RM - San Carlos
45 Commando RM - Ajax Bay
2 PARA - Sussex Mountains
3 PARA - Port San Carlos
42 Commando RM - initially held in reserve.
A diversionary attack on Goose Green, was carried out by some forty members of the Special Air Service, and lasted through the night. So effective was this diversion that the Argentines estimated
the attacking strength to be that of a Battalion. A typical Battalion consists of around 600 men; the Special Air Service gave excellent value for money that night.
Dawn broke with British forces well established ashore and sending out patrols to secure the high ground. A brief skirmish occurred with a small force of Argentines troops, who up to that point,
appeared happy to avoid contact with the Marines and Paras. As they withdrew, they opened fire on two Royal Marine Gazelles shooting them both down with small arms fire near Port San Carlos. The
crews were killed.
The first Argentine response to the arrival of the Task Force was to send a Pucara on a dawn reconnaissance. Unfortunately the pilot, Captain Benitez, over flew a Special Air Service patrol
withdrawing from contact at Goose Green and received a Stinger missile from behind. The first Captain Benitez knew of the attack was the missile impacting one of his engine exhausts, causing
sufficient damage to make the aircraft become more and more uncontrollable. He ejected shortly afterward, and having landed safely began the walk to Goose Green which he completed early that
evening.
Also just after first light HMS Hermes and HMS Invincible launched their Sea Harriers to place a barrier between the Task Force and the approach of attacking
aircraft from the mainland.
The first air attack came at about 10:00 from a single MB339 based at Port Stanley. Lt Crippa swept low over the hills surrounding San Carlos water and found himself face to face with what he
described as "looked like the whole British fleet". Braving withering fire he launched an attack on HMS Argonaut, with 30mm cannon and fired four 5 inch rockets, damaging some upper
deck fittings and injuring three crew members. For this lone attack he was awarded the 'Argentine Medal for Heroism and Bravery' the highest decoration to be awarded in the Argentine Navy during
the conflict.
Some 30 minutes later six Daggers of Groupo 6 arrived from the mainland, to carry out an armed reconnaissance. The aircraft led by Major Martinez sighted ships in Falkland Sound. Martinez went
for HMS Broadsword, two went for HMS Argonaut and the remaining three went for HMS Antrim. The Daggers attacked with 1000lb bombs and 30mm cannon.
The ships defended themselves and one Dagger was hit with a Sea Cat missile, the aircraft hitting the sea, no one being seen to eject. The remaining Daggers went supersonic and turned for home,
chased by Sea Harriers directed on to them by HMS Brilliant, but the speed differential was too great and they made good their escape. HMS Antrim was the most
severely damaged and had a 1000lb bomb lodged in her stern, she moved in to San Carlos Water to afford herself some protection while work went on to remove the unexploded bomb.
HMS Argonaut, HMS Brilliant, and HMS Broadsword all moved close to the inlet of San Carlos Water to give each other mutual support against further
air attacks.
The next air action occurred at around noon when two Pucaras of Groupo 3, flown by Major Tomba and Lt Micheloud, took off from Goose Green intending to attack the beachhead area.
HMS Ardent engaged the pair at long range with her 4.5 inch gun, scoring no hits. They initially turned away and then turned as if to attack. AgainArdent fired
her 4.5 inch gun and with the range reducing fired a Sea Cat missile, neither hitting its target. HMSBrilliant had been watching the slow moving targets on radar and vectored three
801 NAS Sea Harriers in to investigate. The three aircraft, led by Lt Cdr Sharkey Ward, with Lt Thomas, and Lt Craig descended into the fray, chasing the now violently manoeuvring Pucaras. Thomas
and Craig attacked the Pucara of Tomba but were moving to fast to score hits, and flew past. In the confusion Lt Micheloud made good his escape. Tomba now had Lt Cdr Ward closing on his tail.
Ward fired his 30mm Aden cannon, and hit the Pucaras left aileron shooting it to pieces, the aircraft flew on. Ward climbed, turned, and re-attacked, this time lowering his flaps to slow even
further. Firing again Ward hit the aircrafts right engine and observed bits to come off the wing, but still the aircraft flew on. On his third pass Ward hit the left engine which started to burn
and large pieces came of the fuselage and around the cockpit. As he turned away Ward was convinced the aircraft would never go down when he saw Major Tomba eject, the Pucara drop and slide over
the peat to a halt. Major Tomba landed uninjured not far from his downed aircraft and began the walk back to Goose Green.
As Lt Cdr Blissett and Lt Cdr Thomas of 800 NAS arrived on station above Falkland Sound they were vectored by HMS Brilliant to attack a Skyhawk which had just attacked but
caused no damage to HMS Ardent. The pair descended and accelerated, but never saw the single Skyhawk; instead just by Chartres Settlement they came across a flight of four Skyhawks
flying from left to right in front of them. Seeing the Sea Harriers the Skyhawks accelerated and turned to starboard, at the same time jettisoning their under wing tanks and bombs. Lt Cdr
Blissett was the first to achieve a firing solution, and launched an AIM-9 Sidewinder. Blissett was then distracted as a Sidewinder, fired by his wingman Lt Cdr Thomas, appeared over his left
shoulder and made chase after its own target. Lt Cdr Blissett recalls seeing "a huge fireball in front of me" as his missile impacted and destroyed his Skyhawk. Lt Cdr Thomas’ missile had a
similar effect on his targeted Skyhawk and Blissett observed it as it spiralled to the ground on fire. Lt Cdr Blissett then exhausted his 30mm ammunition in short bursts at one of the remaining
Skyhawks before turning home for HMS Hermes very short on fuel.
With the time approaching 14:30 the mainland based aircraft had returned to base and debriefed, allowing the Argentines to prepare more thoroughly for the next wave. British forces recognised
this possibility and stepped up their Sea Harrier sorties from two pairs per hour to three pairs per hour.
Lt Cdr 'Fred' Frederiksen and Lt Andy George of 800 NAS had just started their patrol when one of the first new wave of raids came in: four Daggers had been seen on radar before the dropped to
low level. HMS Brilliantdirected Frederiksen and George to the west to intercept. At about 2,500ft over the settlement at Chartres, Frederiksen saw the four Daggers as they crossed
the coast about three miles away. Lt Cdr Frederiksen put his number two Lt George into a one mile trail behind himself to keep an eye open for escorts, as he accelerated and went for the left
hand element of the formation, with Lt George, having checked that there were no escorts taking the right hand element. Frederiksen went for the tail end Dagger of Lt Luna, getting a lock on, and
launching an AIM-9 Sidewinder which impacted Luna’s Dagger in the tail area. Losing control Luna instinctively pulled back on the control column, but due to the damage the Dagger entered a
violent roll. With no time to consider anything else he pulled the ejection seat handle. A split second after Luna left the doomed Dagger it smashed into the ground, so close that Luna could feel
the heat and blast. Moments later Luna was dumped on the ground, surrounded by burning wreckage, he had a dislocated shoulder and sprained knee. Releasing his parachute, he crawled clear of the
remnants of what moments before had been his aircraft. Frederiksen then engaged the element leader with his 30mm cannon but scored no hits. The Daggers having seen the loss of a comrade but not
having seen either of the Sea Harriers, pressed on towards their target. Lt Cdr Frederiksen and Lt George last saw the remaining three Daggers as they entered cloud.
While Lt Cdr Frederiksen and Lt George had been engaging the Daggers over West Falkland, a force of Skyhawks had managed to arrive uninterrupted at Falklands Sound. Six of these aircraft singled
out HMS Argonaut for their attention, and she was hit by two 1000lb bombs. One smashed her hull just above the waterline just between the engine room and boiler room, causing a
boiler to explode and wrecking her steering gear. The second impacted below the water line, travelled through two fuel tanks, through the sonar room and lodged itself in the ships forward Sea Cat
magazine where it caused two missiles to explode killing two crew. Although the bombs had caused secondary explosions neither had detonated. Argonaut was now in the position
that she had no steering gear and her engines were running at high speed, pushing the ship at speed towards Fanning Head. Realising what was happening Sub Lieutenant Peter Morgan grabbed a couple
of men, and ran across the exposed foredeck where they successfully released the anchor bringing the ship to a halt. Morgan would later receive the Distinguished Service Order for his Actions.
HMS Argonaut was now stuck fast, in an extremely exposed position with around three hours of daylight left.
Almost immediately HMS Ardent became the centre of attention of the remaining three Daggers of Groupo 6 that had avoided Frederiksen and George. As the aircraft closed on their
target from the stern her Captain Alan West tried to manoeuvre her to bring her 4.5 inch gun to bear. He also expected to see a Sea Cat missile leave the launcher but for some reason it refused
to fire. Unable to bring her 4.5 inch gun to bear, and her missiles failing to launch, left Ardent defended only by 20mm cannon and light machine guns. Being virtually
distracted, the Argentine pilots were able to release their weapons from an altitude that allowed the bombs to arm in flight. One bomb impacted the stern of the ship and exploded. It impacted
close to the Lynx hangar blowing off the roof and folding it over the starboard side, and destroying the Lynx. Several crew members had been killed or injured,Ardent had an
unexploded bomb lodged aft, she had taken severe damage and had several fires but the damage control teams had them under control, there was no serious flooding and the ships steering and engines
still operated, Ardent was far from finished. Cdr West signalled that Ardent could float and move, but due to the damage to her systems she could hardly fight. West was ordered
to move north-west where Ardent could receive mutual protection from the other warships there.
The time was now about 14:45 and HMS Brilliant suffered a strafing run with 30mm cannon causing injuries from shell splinters. Further aircraft, Skyhawks of Groupo 5, ran into
San Carlos Water, and engaged HMS Ardent again as she pulled out of Grantham Sound, hitting her with two more bombs that detonated in the area of the
stern,Ardent was now in a bad way.
Over the valley between Mount Maria and Mount Jock, Lt Cdr Ward and Lt Thomas were patrolling, as the valley had been used previously in the day by attacking aircraft. Thomas caught sight of a
pair of Daggers below them, their yellow identification panels showing up clearly. Thomas dove into attack, locked a Sidewinder on the rearmost aircraft and fired; the missile struck the Dagger
and blew it apart. Thomas then turned his attention to the second Dagger, again locked up the target and fired his second Sidewinder. This followed the Dagger around the corner and exploded with
a bright flash but the aircraft didn’t explode. Argentine records show this aircraft crashed shortly afterwards from damage inflicted by the Sidewinder. While watching Thomas engaging his Daggers
Lt Cdr Ward saw a third Dagger heading west. He called Thomas to say he had a third aircraft in sight and gave chase pulling the Sea Harrier round hard, obtaining a lock and firing a Sidewinder.
The missile impacted the aircraft and sent it cart wheeling to the ground. Remarkably all three Argentine pilots ejected safely.
At Falkland Sound three Skyhawks of 3rd Naval Fighter and Attack Escuadrillia descended to low level before entering San Carlos Water. The Aircraft made a bee line towards
HMS Ardent, and once again Ardent was struck by bombs, but not before Petty Officer John Leake, Ardents NAAFI manager, had hit one of the Skyhawks with small arms fire, stitching a
row of holes in the aircrafts wing. By now HMS Ardent was fatally crippled, and with HMS Yarmouth along side Cdr West would give the order to abandon ship,
Cdr Alan West being the last man to leave this brave little ship. Twenty two of the ships company had been killed and thirty injured. HMS Ardent, having been hit by seven 1000lb and
500lb bombs finally sank six hours later.
For the three attacking Skyhawks all was not well. Over Goose Green at 10,000ft were Lt Morrell and Flt Lt Leeming of 800 NAS on route to start their patrol. Both heard the radio reports of the
attack on Ardent. Morrell had seen the bombs explode and thought that the attackers would try to escape down the Sound to the south-west. Morrell looked where he thought they should be and lo and
behold through a hole in the cloud appeared three Skyhawks. The Sea Harriers rolled and dived at full throttle towards their prey. Morrell manoeuvred behind one Skyhawk and having got a lock
fired a Sidewinder which tracked to the Skyhawks tail and exploded. The Skyhawk pitched violently and as it went out of control its pilot ejected. Morrell tried to fire a second Sidewinder at
another of the Skyhawks but it refused to come off the rail. Morrell switched to his 30mm cannon and emptied his magazines at the Skyhawk but saw no hits, he then switched back to missiles and
this time the AIM-9 fired of its own accord, but then lost interest stopped guiding and fell into the sea. One Skyhawk appeared not to see Flt Lt Leeming coming up behind him. Leeming selected
Guns and fired a few tentative bursts at the Skyhawk. The third burst splashed into the sea near to the Skyhawk and the pilot must have then realised what was happening as he attempted to
manoeuvre. By then it was too late, Leeming was within 200 yards and had the sight on the cockpit area of the Skyhawk, he fired and as the first cannon shells impacted the aircraft exploded.
Leeming later stated he believed the engine must have broken up as the Skyhawk just disintegrated. The third Skyhawk had a lucky escape when Morrell’s second Sidewinder failed to guide, but that
is where his luck ran out. This was the aircraft of Lt Arca, which had been hit by the machine gun fire of Petty Officer Leake. It had also been hit by some of Morrellls 30mm cannon rounds.
Arca’s aircraft was losing fuel so rapidly that he would never reach his home base of Rio Grande or the C-130 tanker orbiting off the coast. His only alternative was to land his crippled jet at
Port Stanley Airfield, but when he got there he found he could not lower his undercarriage. Lt Arca ejected from his aircraft and landed in the sea from where he was picked up by helicopter.
For 1(F) Sqn the conflict starts with mixed fortunes. The Sqn's first mission of the day is flown by Sqn Ldr Pook and Flt Lt Hare carrying out an armed reconnaissance for a helicopter forward
operating base in the area of Mount Kent. Each Harrier is armed with a pair of BL755 Cluster bombs and 30mm cannon. The pair arrived at the target area just as it was getting light, to find a
Chinook, two Pumas and a Bell UH-1 sitting on the ground well spaced apart. On the initial attack run neither pilot was able to score any hits so they pulled a hard left turn around Mount Kent
and re attacked. Flt Lt Hare lined up on the Chinook and opened fire with his 30mm cannon, walking the rounds onto the target, the helicopter explode in flames. The pair continued to attack and
each managed to set fire to a Puma, the UH-1 was almost impossible to target in the half light and it lived to fight another day. While on his last run Hare felt a thud on his aircraft and on
returning to Hermes found three bullet holes in his aircraft.
Shortly after Sqn Ldr Pook and Flt Lt Hare landed back on, Wg Cdr Squire and Flt Lt Glover took off briefed to provide support to troops in the landing area. Almost straight away the mission
dissolved. Wg Cdr Squire was unable to retract the undercarriage on his aircraft and was fridge to return to Hermes. Flt Lt Glover went on alone. On arriving in the San Carlos are
he asked the Forward Air Controller for a target for his BL755 Cluster bombs. The reply came back that there appeared to be no enemy troops in the vicinity and Glover was asked to fly to Port
Howard, about 20 miles away, and attack enemy positions there. Glover made a high speed low level run through the area but saw nothing to indicate a presence. Shots were fired at Glover but
didn’t hit and without Glover knowing. Reporting back he had seen nothing he was requested to photograph the area so positions could be identified for future attack. Returning to an area just
over flown is fraught with danger, so Glover headed for West Falkland to allow things to quieten down. Returning about 15 minutes after the first run he flew low and fast over the settlement, his
camera clicking and seeing nothing of the enemy. The first indication of their presence was his aircraft shuddering under the impact of exploding cannon shells, three in all and likely 20mm. The
aircraft flicked into an uncontrollable roll to the right and with little other thought than survival Glover ejected into the 600mph air stream, losing consciousness. Glover came to in the water
with a broken left arm, shoulder and collar bone. Almost immediately he was picked up by boat and given medical aid.
1(F) Sqn had suffered its first loss of the conflict and although it hit home hard, their fears were somewhat relieved when an Argentine signal was intercepted that referred to a Flt Lt William
Glover.
Flt Lt Dave Morgan probably summed up the day when he said "May 21st was a heavy day".
Losses today:
Royal Air Force/Royal Navy
2 x Gazelles – Royal Marines – Port San Carlos - Shot down by small arms fire during initial landings – both crews killed.
Harrier GR.3 – 1(F) Squadron – Port Howard – Shot down by Anti Aircraft Fire possibly 20mm – Flt Lt Glover ejected, and taken Prisoner of War.
Argentine Forces
Chinook (Army) – Mount Kent – Destroyed on the ground by 30mm cannon fire from 1(F) Sqn Harrier GR.3 flown by Flt Lt Hare.
Puma (Army) – Mount Kent – Destroyed on the ground by 30mm cannon fire from 1(F) Sqn Harrier GR.3 flown by Flt Lt Hare.
Puma (Army) – Mount Kent – Destroyed on the ground by 30mm cannon fire from 1(F) Sqn Harrier GR.3 flown by Sqn Ldr Pook.
Pucara - Groupo 3 – Sussex Mountains – Shot down by ‘Stinger’ ManPAD fired by Special Air Service troops. Capt Benitez ejected.
Dagger – Groupo 6 – Nr Fanning Head, Falkland Sound – Engaged by Sea Cat missiles from HMS Plymouth and HMS Argonaut, aircraft crashed into the sea
killing its pilot Lt Bean.
Pucara – Groupo 3 – Nr Darwin – Engaged by Sea Harriers of 801 NAS flown by Lt Cdr Ward, Lt Cdr Craig and Lt Thomas, Shot Down with 30mm cannon fire, credited to Ward. The pilot Major Tomba
ejected.
Skyhawk - Groupo 4 - Nr Chartres, West Falkland - Engaged by Sea Harrier of 800 NAS flown by Lt Cdr Blissett - Shot down with AIM-9L Sidewinder. Lt Lopez killed.
Skyhawk - Groupo 4 - Nr Chartres, West Falkland - Engaged by Sea Harrier of 800 NAS flown by Lt Cdr Thomas. Both shot down with AIM-9L Sidewinder. Lt Manzotti killed.
Dagger – Groupo 6 – South East of Mount Robinson – Shot Down by AIM-9L Sidewinder fired from Sea Harrier flown by Lt Cdr Frederiksen of 800 NAS. Lt Luna ejected with injuries.
3 x Dagger – Groupo 6 – North of Port Howard – Two Shot down by Lt Thomas, and one shot down by Lt Cdr Ward of 801 NAS – All shot down with AIM-9L Sidewinder. Major Piuma, Captain Donadille and
Lt Senn all ejected.
Skyhawk – 3rd Naval Fighter Attack Squadron – Falkland sound – Shot down by AIM-9L Sidewinder fired from 800 NAS Sea Harrier by Lt Morrell. The Pilot Lt Cdr Phillippi ejected.
Skyhawk – 3rd Naval Fighter Attack Squadron – Falkland Sound – Shot Down by 30mm cannon fire from 800 NAS Sea Harrier flown by Flt Lt Leeming. The pilot, Lt Marquez was killed.
Skyhawk – 3rd Naval Fighter Attack Squadron – Falkland sound & Port Stanley – Damaged by small arms while attacking HMS Ardent – Further damaged by 30mm cannon fire from
800 NAS sea Harrier flown By Lt Morrell – Attempted emergency landing at Port Stanley Airfield but undercarriage was inoperative and would not lower – Pilot Lt Arca elected to abandon the
aircraft and ejected to safety.
22nd May
An Argentine Air Force Boeing 707 on a reconnaissance mission narrowly avoided being hit by Sea Dart missile from HMS Coventry as a flash-door failed safe, preventing the
missile loading on the launcher.
A second 707 approached the HMS Bristol Group later in the morning. RFA Tidespring had reported the aircraft's presence and HMS Cardiff dropped back from the
group. When the 707 came within her range, HMS Cardiff fired a Sea Dart salvo. One missile was seen to burst close to the target which broke away in a high speed dive and
returned to Argentine airspace. HMS Broadsword later joined HMS Coventry on the missile trap station off Pebble Island.
Both Carriers maintained a strong CAP, with sixty sorties being flown. However due to extremely bad weather on the mainland prevented the Argentine Forces launching any air strikes until later in
the day when a pair of Skyhawks ran through San Carlos Water at last light, dropped their weapons with no effect and sped clear.
During the first CAP of the day launched from HMS Hermes, Lt Cdr Frederiksen and Lt McHale were approaching Goose Green when they sighted the Argentine Coast Guard patrol boat Rio
Iguazu on its way to deliver supplies to the argentine troops garrisoned there. After receiving permission the pair dived on the boat and strafed it with 30mm cannon fire, leaving it burning. The
boat was later that afternoon aground among the kelp having been abandoned by its crew.
HMS Brilliant and HMS Yarmouth transited south. Shortly before midnight a Lynx was flown to investigate a radar contact made in Lively Sound; the vessel was
identified as the Argentine coaster Monsunnen. The crew ran the fully serviceable ship aground among the kelp and escaped over the rocks.
Today also saw the setting up of the Field Hospital in the old freezer buildings at Ajax Bay. Known to the troops and the 'Red and Green Life Machine' the painting of Red Cross markings would do
little in the coming days to ensure its safety from attack.
For 1(F) Sqn, although the operation to retake the islands continues, there was no requirement for Close Air Support. A pre-planned four ship sortie is carried against Goose Green,
which is heavily defended, along with one armed recce sortie.
The first mission was tasked as a four aircraft attack on tented positions and possible dispersed Pucaras at Goose Green. The pilots selected for this mission were Sqn Ldr Pook, Sqn Ldr
Iveson, Sqn Ldr Harris, and Flt Lt Rochfort.
Reconnaissance photographs of the airfield were available and heavy Anti Aircraft Artillery (AAA) was known to be in the area. The attack was therefore planned as a simultaneous attack from the
East. Low cloud on the transit to the target necessitated the Harriers ingressed at Ultra Low Level. At 2km from the target area Sqn Ldr Pook eased up to 200ft and dropped chaff as briefed. He
saw nothing at his pre-briefed target marker so attacked a camouflaged box-bodied vehicle on the rear edge of the airstrip. Sqn Ldr Iveson attacked a line of fox-holes on the Northern edge of the
field and saw Sqn Ldr Pook's weapons cause secondary explosions. Both pilots saw considerable Anti Aircraft Artillery (AAA), which appeared to be aimed at them.
On his run-in Sqn Ldr Harris was locked-up by a Fledermaus radar but this was broken by a hard jink and releasing chaff. Despite a considerable barrage of AAA he continued his attack but his
cluster bombs hung-up. Flt Lt Rochfort dropped his weapons on his briefed target. All four aircraft then ran-out to the West at Ultra Low Level and reformed for the uneventful recovery
to Hermes.
During the mid afternoon; and while preparing to launch an armed recce mission the Sqn receive confirmation that Flt Lt Glover is a Prisoner of War, albeit injured. The Squadron cannot
communicate this to UK owing to a possible compromise of sources and they have to hope that the Red Cross get in on the act as soon as possible. It will in fact be some days before official
information is received regarding the status of Glover as a Prisoner of War.
The late mission, flown by Wg Cdr Squire and Flt Lt Harper, was to carry out an armed recce of the airstrip at Weddell Island. During the transit a strong radar lock from astern forced the pair
into an early descent. In retrospect this was probably Sea Harrier radar, and resulted in both aircraft having minimum fuel available in the target area. While en-route at low-level a commercial
freighter, later identified as the MV Monsunnen, was seen on a heading of 140 degrees. The two aircraft were short on fuel and were also unsure of the Rules of Engagement so
continued to the West. The armed recce was carried out but nothing was seen so the pair returned to the Carrier.
Generally, it had been a quiet day. The Argentines appeared to be attempting to re-supply their forces, but other than that following the debacle of the 21st today was somewhat of an anticlimax.
23rd May
The first air activity of the day was by 1(F) Sqn and was a four aircraft attack on Dunnose Head airstrip in West Falkland which might be a Forward Operating Base for Pucara aircraft or
possibly even Hercules. The weapons used are a mixture of CBUs and 1000lb bombs to reduce the time over target. The aircrew for the sortie are Wg Cdr Squire, Sqn Ldr Harris, Flt Lt Hare and Flt
Lt A Harper. The aircraft all delivered their weapons on the airfield but there were no troops or aircraft in the area. Flt Lt Mark Hare is hit by the CBU furniture of his leader and drops his
bombs late. Sadly this caused damage to local houses. After the conflict was over Flt Lt Hare went ashore with a group of 1(F) Sqn members to help repair the damage. Here he met the farm manager
Jimmy Forster who remarked dryly, "If you wanted the runway destroyed why didn’t you tell us? We’d have ploughed it up for you!."
Shortly after the attack on Dunnose Head, Flt Lt Morgan and Flt Lt Leeming of 800 NAS were flying a CAP at 8000 ft over Falkland Sound when Morgan noticed the rotating disk of a helicopter below
him in Shag Cove. A former Helicopter pilot Morgan realised that the pilot had made a fundamental blunder in crossing the water which is normally avoided. With Leeming following, Morgan dived
down to identify the aircraft. The aircraft dropped close to the ground and at about 500 yards Morgan recognised the helicopter as a Puma, he also realised that the British forces didn’t have any
in theatre, so it had to be a 'Hostile'. As he called it Hostile to Flt Lt Leeming, Leeming replied "There are four of them" Morgan then saw a further two Pumas behind the first and these were
followed by an Augusta 109. Morgan attempted to engage the lead Puma but was to close, so he pulled a hard climbing turn to re-engage. On looking back the Puma he had over flown was smashed out
of control into a hill side and exploded in a ball of flame. Either the pilot had lost control trying to evade, or the Harriers slipstream had caused the helicopter to crash. Post conflict
examination showed that the aircraft was heavily laden with mortar bombs which may have contributed to the aircrafts demise. In the meantime the A.109 had landed and the crew were making their
escape on foot. The Sea Harriers strafed the target and set it on fire. Just as they were about to depart Flt Lt Leeming spotted the other Pumas on the ground further up the valley. He and Morgan
engaged them with cannon fire but had to depart leaving one of them intact due to lack of ammunition, However while climbing out to return to the carrier they gave the position to the control
ship who vectored a pair of 801 NAS Sea Harriers to the position, where they shot up the last Puma. All four helicopters were destroyed.
Later that day news is received that Flt Lt Glover is to be transferred by helicopter from Goose Green to Stanley. All helicopters are removed from the ROE until the following day.
In the vicinity of the beach head there was little in the way of air activity until after mid day. On this day however a new Argentine unit appeared. The Fenix Escuadron flew HS.125 and Learjet
aircraft in the decoy role trying to draw the defending Sea Harriers away from the fleet. They also provided communications between the radars at Port Stanley and the attacking Daggers and
Skyhawks, providing the locations of the Sea Harrier CAPs.
The first attack came around 14:00, when small formations of Skyhawks managed to evade the defending Sea Harriers. During one of these attacks Lt Filipini of Groupo 5 flew so low that he hit the
mast of HMS Antelopecollapsing it. Another aircraft of the same unit was not so lucky; almost as it released its weapons it was hit virtually simultaneously by a Sea Wolf Missile
from HMS Broadsword and a shore based Rapier. The pilot Lt Guadagnini was killed.
A period of relative quiet then descended for about two hours, then a flight of Daggers made an unsuccessful attack around 16:00. Lt Cdr Auld and Lt Hale were flying CAP when Hale saw a Dagger
running out west at high speed over Pebble Island. Lt Hale pulled into a firing position but the opening distance was too great. However as he looked around he spotted the Daggers number two
about a mile and a half in trail. The Dagger tried to out accelerate Hale, but Hale dropped in behind the aircraft at a range of about half a mile, got a good tone and fired a Sidewinder. The
missile tracked all the way up the Daggers tail Pipe where it exploded destroying the aircraft and sending it into Horseshoe Bay
Later that night 800 NAS launched four aircraft to loft bombs on Stanley airfield. The aircraft with Lt Cdr Batt piloting it flew into the sea shortly after take-off and exploded. Lt Cdr
Batt was killed.
In San Carlos Water that night one of the bombs lodged in HMS Antelope exploded while an Army bomb disposal team worked to make it safe. One man was killed the other seriously
injured. The weapons explosive power blew a hole in the ships side from water line to funnel starting a ferocious and uncontrollable fire that burnt its way to the main magazine, which exploded
en masse. After several secondary explosions Antelope's fire burnt out and she sank early the next morning.
Of all the bombs that had hit the ships about 50% had failed to explode. To the Royal Navy keeping this fact concealed was vital. It was to the Royal Navy’s great consternation that during news
bulletins on the 23rd May the BBC World Service the Argentines were told their weapons were not exploding and being defused! At the time many servicemen held the BBC to be responsible of High
Treason, and it almost certainly led the Argentine forces to review the fusing arrangements in their weapons.
Losses today:
Royal Navy
Sea Harrier – 800 NAS - East of Falklands – Crashed into sea shortly after take off – Lt Cdr Batt Killed
Argentine Forces
Puma – Army – Nr Shag Cove – Flew into ground evading 800 NAS Sea Harrier flown by Flt Lt Morgan – Credited to Morgan
Augusta 109 – Army - Nr Shag Cove – Strafed by Sea Harrier 30mm Cannon on ground – Shared between Morgan and Leeming
Puma – Army – Nr Shag Cove – Strafed by Sea Harrier 30mm cannon on ground – credited to Flt Lt Morgan
Puma – Army – Nr Shag Cove – Strafed by 801 NAS Sea Harrier 30mm cannon on ground – Shared by Lt Cdr Gedge and Lt Cdr Braithwaite
Skyhawk – Groupo 5 – San Carlos Water – Shot down by combined weapons fire. Claims for this day:- HMSBroadsword, one with Sea Wolf, one with 40mm Bofors. HMS Antelope, one
with Sea Cat. Rapier claimed three, Blowpipe operators also claimed. Lt Guadagnini killed
Dagger – Groupo 6 – Pebble Island - Shot down by Sidewinder fired by Lt Hale of 800 NAS – Lt Volponi killed
24th May
Just after first light, two Sea Harriers of 800 NAS and four Harrier GR.3s of 1(F) Sqn, carried out a co-ordinated attack on the airfield at Port Stanley with the intention of putting it out of
use. The Sea Harriers flown by Lt Cdr Blissett and Lt Cdr Thomas approached from the north east and each delivered two 1000lb radar fused bombs set to airburst to distract the defences. Almost
immediately afterward two Harrier GR.3s piloted by Sqn Ldr Iveson and Flt Lt Harper attacked the airfield from the northwest, each delivering three 1000lb parachute retarded bombs. The pair
delivered their weapons with little interference from the defences. By the time Wg Cdr Squire and Flt Lt Hare arrived from the west they not only had to contend with the debris thrown up by the
previous pair but the defences were now fully awake and concentrating their fire on them. In spite of these distractions the pair delivered their weapons and departed at high speed at low level.
It later became evident that the attack had failed to damage the airfield. Two bombs damaged the edge of the runway while others hit it square but failed to detonate, the Argentines weren’t the
only ones to suffer with fusing problems. All the Harriers returned safely with two receiving minor small arms damage.
About 100 miles to the west of Port Stanley moves were afoot to improve the early warning radar coverage of the islands, and Port San Carlos in particular. This had necessitated the destroyer
HMS Coventry and the frigate HMS Broadsword moving north-west from the Task force to a position adjacent to Pebble Island. Late that morning the new disposition of the ships
brought rewards.
Lt Cdr Auld and Lt Smith 800 NAS were on CAP when Broadsword detected targets inbound to the islands. The pair were vectored to the targets by
HMS Broadsword and straight away Lt Cdr Auld spotted a flight of four Daggers from Groupo 6 running in low and fast. Pulling hard he attained a firing position in their six
o'clock, getting a lock on first one then as second he fired both his sidewinders and destroyed two of the Daggers. Lt Smith picked up the number three and again locked up a sidewinder and
engaged his target destroying it. The fourth Dagger had turned for home and was now exiting the area low and fast to the west. Although both aircraft followed the range, speed differential, and
running low on fuel for the Harriers meant it would live to fight another day.
Three Skyhawks of Groupo 4 were also in action in San Carlos Water that morning. Having attacked the fleet and scoring no hits the aircraft were engaged by multiple weapons both afloat and
ashore. All the Skyhawks were hit, but the aircraft of Lt Bono was worst hit with a serious fuel leak. Although he flew on for some time, while in the ascent to altitude to return to the mainland
his aircraft entered a descending turn and impacted the sea. No one was seen to eject.
That night having delivered cargo to Port Stanley a C-130 Hercules left the airfield with Flt Lt Glover on board. Throughout his captivity his treatment was always correct and sometimes even
friendly. Having been shot down on the evening of the 22nd he was flown to Goose Green by helicopter, on the 23rd he was flown again by helicopter from Goose Green to Port Stanley. Flt Lt Glover
later commented that his biggest worry was the C-130 being intercepted by Sea Harriers and being shot down by his own side. The C-130 was not intercepted and three hours later he landed at the
Argentine airbase of Commodoro Rividavia.
Losses today:
Argentine Forces
3 x Dagger – Groupo 6 – Nr Pebble Island – Two Shot down by Sidewinder fired by Lt Cdr Auld of 800 NAS – One shot down by Sidewinder fired by Lt Smith of 800NAS. Lt Castillo Killed, Capt Diaz and
Maj Puga ejected.
Skyhawk – Groupo 4 – West of West Falkland – Crashed into the sea having been engaged by multiple weapons. Claims this day: HMS Argonaut one with Seas Cat one with 40mm Bofors,
HMS Fearless one with Sea Cat, Rapier claimed three and multiple 'Blowpipe' operators claimed.
25th May
May the 25th is the Argentine national day and consequently the Task Force expected a special effort to be made today against the forces in and around the beachhead.
During the morning an Argentine Learjet, of Air Photographic Escuadron 1, part of Groupo 2, flew a high altitude reconnaissance of the San Carlos area at 40,000ft. As the aircraft passed
HMS Coventry tried to engage it with Sea Dart missiles but before they could be launched the Learjet passed out of range.
Around late morning and at midday Small groups of Skyhawks penetrated the trough to the landing area. The attacks were however ineffective and costly with no hits scored by any of the Skyhawks
mainly due to the fierce reception they received from sea and shore based weapons systems. Two Groupo 4 aircraft were lost on San Carlos water due to this heavy fire. Only one pilot ejected, Lt
Lucero, the other Lt Garcia being killed. A third Skyhawk, this time of Groupo 5, was shot down but was an 'Own Goal' being hit by the Argentine Anti Aircraft gun crews at Goose Green.
At midday a mission was tasked as a six aircraft attack on the runway at Port Stanley Airfield. Each pair of GR.3s was lead by a Sea Harrier. The 1(F) pilots flying the mission were Wg Cdr
Squire, Sqn Ldr Pook, Sqn Ldr Harris, and Flt Lt Rochfort. The attack was carried out with the GR.3s formatting on Sea Harriers in loose vic formation for simultaneous release of bombs. Following
the release of his weapons Sqn Ldr Pook climbed into the airfield overhead to observe 'fall of shot'. Bombs from the first three aircraft were seen to impact on the West end of the airfield
whilst those from the second wave fell approximately 100 yards north of the Eastern threshold. Whilst in the overhead, Sqn Ldr Pook was locked up by Roland and saw the missile in flight. It
peaked at about 15,000ft - some distance below him. He also saw a Tiger Cat launched against the second wave; this too fell short.
Sqn Ldr Harris and Flt Lt Hare later carried out a further similar mission to drop free-fall 1000lb bombs against Port Stanley Airfield runway from a level delivery at 20,000ft. The bombs were
dropped singly, but aiming for this method of delivery is imprecise, the fall of only 3 bombs being seen and these fell in Yorke Bay. Harris and Hare both saw AAA and Roland fired during the
attacks but their aircraft remained out of range.
Sqn Ldr Harris flew a final late singleton mission to carry out a further medium-level bombing of Port Stanley Airfield runway but owing to the weather, this was changed to 30-degree loft. All 3
bombs fell short of their target.
At around 14:00 a force of four Skyhawks of Groupo 5 arrived with the sole intention of attacking the radar picket ships near Pebble Island. Two of the Skyhawks closed rapidly on
HMS Broadsword, pursued by Lt Cdr Thomas of 800 NAS and his wingman. Thomas was told to break off from his attack as they were in danger of enteringBroadswords MEG
(Missile Engagement Zone). Just as The Sea Harriers broke away HMS Broadswords missile control radar tripped out and broke lock, leaving the frigate virtually undefended, all
the crew could do was brace themselves for the inevitable impact. Three of the four weapons missed, the fourth bounced off the surface of the water like a skimmed stone, travelled up hitting the
ships hangar deck, on the way through it destroyed the nose of the Lynx helicopter and exited the other side before falling harmlessly into the sea.
At about the same time a second pair of Skyhawks about ten miles away from HMS Coventry were attacking at maximum speed. Again the Sea Harriers gave chase, again Broadsword
locked up the targets with Sea Wolf and again the Sea Harriers were ordered to break away. Coventry fired a Sea Dart and opened fire with her 4.5 inch gun missing with
both. Broadsword was just on the point of engaging the incoming aircraft when the manoeuvringCoventry cut across her bow and shielded the Skyhawks
from Broadsword causing her missile control radar to break lock again.
In war survival can often be dictated by having 'a little luck'. Today lady luck deserted HMS Coventry. Three bombs impacted Coventry penetrating deep into her
and exploding, blasting a great hole in her side. She was on fire, flooding, had lost all power and her communications were gone. Sea King and Wessex helicopters surrounded her like flies and
winched many men to safety, while boats from Broadsword picked up others. That afternoon 238 men were plucked to safety as Coventry rolled over and sank. 19
men died in the initial attack.
The loss of HMS Coventry was bad enough for the Task Force to bear but worse was yet to be inflicted upon them.
Late in the afternoon, closing on the Task Force at their attack speed of 630mph was a pair of Exocet armed Super Etendards. Their pilots engaged their radar and climbed to search for targets.
Almost straight away they saw their targets on radar, selected their missiles destinations and launched their deadly load, before descending and turning sharply to return home. The frigate
HMS Ambuscade was the first to raise the alarm when its sensors detected the Etendards radar transmissions. Ambuscade flashed a warning message to the fleet,
their crews were brought to readiness, chaff fired and the adapted Lynx helicopters on Hermes and Invincible took off to attempt to deceive the inbound
missiles. There is evidence to suggest that either the Lynx or the Chaff were successful in decoying the missiles away from the carriers, but one Exocet appears to have re-locked onto
theAtlantic Conveyor, while the other simply ran on until, its fuel spent, it fell into the sea. Seen from HMS Hermes, the missile ran in at wave top height leaving a trail
of smoke behind and smashed into the port side of Atlantic Conveyor where its warhead exploded. Helicopters were scrambled to pick up survivors and to assist in what ever way
they could but the situation on board would ultimately prove to be hopeless.
As a result of the attack on Atlantic Conveyor twelve men including her master, Captain Ian North perished. There were hopes that some stores might be recovered from the vessel
but before anything could be done she foundered and sank on the 30th May.
At the time she was hit Atlantic Conveyor had managed to fly off all the Harrier GR.3s and Sea Harriers she had brought south, as well as one Chinook and one Wessex. The spread
of the fires was so rapid that even if had all the remaining helicopters been readied for flight it is doubtful they could have been got off. This meant the loss of six Wessex, three Chinook
and a Lynx - important helicopters, all of which were destroyed. It also meant the loss of other vital supplies such as spare parts for aircraft, around 200 Cluster bomb units,
numerous vehicles, thousands of tents, and scores of metal plates to be used to construct a runway on the islands.
On the 25th May the Argentine Forces demonstrated that although they had taken serious losses they could still hit back hard.
New additions for the Task force were in the process of coming on line and some would soon make their combat debut. 'Blue Eric' the ECM pod was now available, as was a 'Shrike' missile
configuration on the Ascension based Vulcans. Until now the Nimrod MR.2Ps had been carrying out their recce missions alone and unarmed. Now, to provide a limited self protection and an anti
Boeing 707 capability, several were modified to carry up to four AIM-9 Sidewinder missiles, two under each wing. Finally RAF Hercules transport aircraft carried out long range delivery missions
from Ascension to the Task Force and delivered to 1(F) Sqn special kits for the nose and tails of their standard 1000lb bombs that would allow them to become Laser Guided Bombs allowing attacks
with precision accuracy.
The build up of land forces was complete with some 5,000 tons of stores ashore and 5,500 men ready to break out of the bridgehead.
Losses today:
Royal Air Force/Royal Navy
Lynx – 816 NAS – Off Pebble Island – Went down with HMS Coventry following air attack.
1 x Lynx, 3 x Chinook, 6 x Wessex – North East of the Falklands – lost aboard Atlantic Conveyor following Exocet attack.
Argentine Forces
Skyhawk – Groupo 4 – San Carlos Water – Shot down by multiple weapons – Lt Lucero ejected and injured.
Skyhawk – Groupo 4 – San Carlos Water – Shot down by multiple weapons – Lt Garcia killed.
Skyhawk – Groupo 5 – Nr Goose Green – Shot down by own Anti Aircraft gunners – Lt Palava killed.
26th May
Today produced a day of very little air activity. 1(F) put up seven sorties in support of the Parachute Regiment and Royal Marines who are beginning to move out of their beachhead areas. Of note
is 2 Para who are moving south towards Goose Green and the Argentine garrison there.
Several of the sorties end as armed recce’s as no weapons were expended, pilots having been unable to find their targets as they had moved etc. Having had to spend time modifying their approach
due to low cloud Sqn Ldr Iveson and Flt Lt Harper attacked a position at Port Howard using Cluster bombs. Good results were observed by a Sea Harrier at altitude but neither could re-attack as
they were both running low on fuel.
The final sortie of the day, flown by Sqn Ldr Pook and Flt Lt Hare, resulted in the successful destruction of another enemy Puma helicopter while carrying out an armed reconnaissance of the Mount
Kent area. Both pilots saw nothing on their first run through the area from West to East although both aircraft were locked up by Fledermaus radar in the Two Sisters area. Both aircraft then
turned about and started a low level run back through the area. On the Northern slopes of Mount Kent Sqn Ldr Pook saw what appeared to be a damaged helicopter and, supposing it to be one of those
attacked on the morning of the invasion, he flew past to get a photograph. While doing so Flt Lt Hare reported small arms fire and also that the helicopter appeared to be undamaged. Sqn Ldr Pook
then elected to carry out a further recce which confirmed that the Puma was undamaged but for his trouble during this run a Blowpipe SAM was fired at his aircraft and exploded just above it. Flt
Lt Hare was unable to attack the Puma and consequently both aircraft departed from the immediate area and returned using terrain screening where Sqn Ldr Pook manoeuvred for a further attack, with
Cluster bombs. The Puma was bracketed in the mid-pattern of the Cluster Bomb and several secondary explosions were seen. While Sqn Ldr Pook was carrying out his attack Flt Lt Hare saw further
evidence of AAA and Small Arms fire and both aircraft departed from the target area to the North. On recovery to the carrier the only damage noted to the attacking aircraft was a hole found in
Sqn Ldr Pook's starboard drop tank.
Losses today:
Argentine Forces
Puma – Army – Nr Mount Kent – Destroyed by Cluster Bomb delivered by Sqn Ldr Pook of 1(F) Sqn.
27th May
Early in the morning of the 27th May 2nd Battalion of the Parachute Regiment commenced their attack on Darwin and Goose Green. In a period of hard and bloody fighting, often at close quarters,
Colonel 'H' Jones would win the Victoria Cross, and many others would be decorated for their bravery.
In the morning over the Beachhead the clear skies allow the Learjets of Photographic Escuadron 1 to carry out a reconnaissance of the British positions and return with their photographs to the
mainland uninterrupted.
At sea there is heavy fog and no flying is possible before 10:00 local. 1(F) are tasked to support the Paras but suffer all the known problems associated with using a Forward Air Controller, poor
communications, the aircraft have to orbit at 7000ft or above to make contact, poor choice of the Initial Point, it is located in cloud! small targets making for poor or late target acquisition
and no laser target-marking.
Shortly after midday Sqn Ldr Iveson and Flt Lt Hare arrive in the area to attack reported enemy positions. Both aircraft are locked up at the Initial Point and all chance of surprise is lost.
Target identification, as the targets are well camouflaged, is very difficult and first run attacks are impossible.
On the second pass both pilots released their weapons (Cluster bombs) on a company position with troops dug in and departed. Turning for a third run they beat up the same area with 30mm cannon
fire and again. As Sqn Ldr Iveson dropped down to low level at 100ft he felt and heard two large bangs in very close succession. The whole aircraft started to shake, the controls quickly went
dead, and the nose of the aircraft started to drop. With no other option Sqn Ldr Iveson ejected. It is almost certain that the aircraft had been hit by 35mm Oerlikon cannon fire, the same weapon
system that had shot down a Sea Harrier three weeks earlier. Iveson hit the ground hard but quickly recovered and made his way to cover to avoid possible capture, dropping his seat mounted
survival kit. Just after dark Iveson made it to a small house which was unoccupied but contained beds sleeping bags and food, much better than the survival kit he had left behind. Some time after
Iveson is shot down, 1(F) try to find their lost pilot when Sqn Ldr Pook carried out a recce mission to attempt to find any sign of him. Apart from being shot at he is unable to see or hear
anything of Iveson.
While Iveson’s aircraft burned on the ground Near Goose Green, a pair of Skyhawks of Groupo 5 was leaving Rio Gallegos with orders to attack a stores dump near the old refrigeration plant at Ajax
Bay. The pilots achieved complete surprise and released their weapons on the target. The refrigeration plant was one of the few buildings in the area and since the landings had been pressed into
service as a hospital, cookhouse and stores area. The bombs exploded killing five and injuring twenty six. Four bombs did not explode, two which were inside the building, adjacent to the hospital
operating theatres, and two in the open. The two in the open were detonated shortly afterwards by disposal officers, but the two internally caused a problem. The building could either be
evacuated, which in the freezing conditions could have killed more men than it saved, or they could be left in situ hoping that they were not delayed fused. In a piece of typical British contempt
for this hazardous situation, the bomb disposal officer, Flt Lt Alan Swan, and his team bedded down in the plant, sleeping right next to the unexploded ordnance. Later Swan would admit that he
was a lot less sure about his decision than he would allow others to realise at the time. He later received the Queens Gallantry Medal.
As the pair of Skyhawks tried to exit the area they were targeted by the Bofors gunners on HMS Intrepid and HMSFearless, one aircraft was hit, and although it flew on
for a short time, with its hydraulic system failing and its rear fuselage on fire its demise was quickly upon it. The pilot Lt Velasco ejected from the aircraft over West Falkland some where
between Fox Bay and Port Howard.
Losses today:
Royal Air Force/Royal Navy
Harrier GR.3 – 1(F) Squadron – Goose Green – Anti Aircraft Fire – Sqn Ldr Iveson ejected.
Argentine Forces
Skyhawk – Groupo 5 – Hit by 40mm Bofors fire in San Carlos Water – Crashed between Port Howard and Fox Bay - Lt Velasco ejected.
28th May
Throughout the night of the 27th - 28th May the Para's continued their advance. With the approach of day light however it became clear that the Para’s were up against a bigger, stronger and
better equipped force than they had been led to believe would be at their destination of Goose Green. For much of the day low cloud and rain would prevent 1(F) giving air support.
The low cloud and rain were less of a problem for the slower and more manoeuvrable Pucaras and during the day they would appear in twos or threes making harassing attacks on the British troops.
These contacts were far from one sided and whenever the Pucaras came with range the Para’s would reply with heavy small arms fire and Blowpipe Surface to Air Missiles.
Throughout the day Army Air Corps and Royal Marine Scout helicopters had been extremely busy supplying the front line with ammunition, and flying out the wounded. It was around midday that a pair
of these Scout helicopters were found by Pucaras and attacked. One was shot down killing Lt Nunn RM and wounding his crewman, the other flown by Capt Nesbitt managed to evade the attackers and
make good his escape.
By late in the afternoon the advance of 2 Para had virtually ground to a halt just outside Goose Green. Still the Pucaras came in to attack the Para’s positions this time with Napalm, narrowly
missing the Para’s forward positions. From his command post on Darwin Hill Major Chris Keeble, the Officer Commanding 2 Para since the death of Colonel Jones watched as Royal Marine Strange stood
up, and ignoring the enemy fire, launched a Blowpipe missile at one of the attacking Pucaras and guide it to its target. The Pucara was hit hard, and the pilot, Lt Argonaraz, found himself at
about 50 feet over the peaty landscape with no control over the aircraft, he ejected to safety. During the day Groupo 3 were to lose a further pair of Pucaras, one near Goose Green, flown by Lt
Cruzado, was lost to small arms fire. The third aircraft piloted by Lt Gimenez was missing in action, and was thought to have crashed into high ground while returning to Port Stanley. The body of
Lt Giminez would be found, recovered and repatriated in 1986. A MB339 of 1st Naval Attack Escuadron based in Port Stanley also entered the fray around Goose Green and was also dispatched by a
Blowpipe Surface to Air Missile, the pilot Lt Miguel was killed.
As the day was drawing to a close the Para’s had several problems confronting them. They were going to have to close in on the settlement from three different directions at once, they had
insufficient ammunition left to clear the settlement in house to house fighting, and the didn’t want to carry this out particularly at night. There was an Argentine artillery battery that had not
been found and the Para’s could not be accurate with their counter battery fire as they did not want to hit the settlement. And finally the Argentines were using three of their 35mm Oerlikon Anti
Aircraft cannons in the direct fire role, firing from the tip of the peninsula in front of them.
The weather around the Carriers had deteriorated during the day to the point that the ship was pitching violently in gale force winds under low cloud by the time Major Keebles request for air
support arrived. Sqn Ldr Harris and Flt Lt Harper were tasked for the mission, and when he heard about it Sqn Ldr Pook volunteered to go as well. The three Harriers approached from the North West
and descended to low level while they flew down the side of Grantham Sound. The Forward Air Controller, Capt Kevin Arnold, briefed the pilots on the target and the use the guns against the
Para’s. Sqn Ldr Harris later described this "as a highly unsocial act".
The Harriers discovered the cloud base had lifted slightly in the area as they accelerated into the target area running in at between 50 and 100 feet. Target acquisition was easy as the
promontory at Goose Green is such an easily identifiable feature. Harris ran in first followed by Harper and Pook. Harris’s Cluster bombs hit the target square on. As he was running through the
target area he saw movement to his right, he called Flt Lt Harper and told him to put his weapons to the right of his own and about 300 yards behind. Harper had just enough time to adjust and
delivered his weapons. As Harper left the target area Sqn Ldr Pook ran in from the north and delivered two pods of 2 inch rockets, 72 in all, at the area of the promontory not covered by the
Cluster bombs.
The attack was carried out with total surprise and no return fire was seen. 1(F) had just demonstrated a textbook close air support mission, a hard hitting surprise attack destroying a target of
great importance to the enemy and launched at a crucial time in the battle for Goose Green which was devastating to one side but gave the other a strengthened resolve.
As darkness fell, fighting ceased as both side took stock of their positions. In the early hours of 29th May Major Keeble would open surrender negotiations with the Argentine troops at Goose
Green, and later accept the surrender of all Argentine forces there.
To the surprise of the Para’s the force they took captive was twice the size of there own and amply supplied with ammunition, weapons, and other supplies.
Losses today:
Royal Air Force/Royal Navy
Scout – Royal Marines – Goose Green – Shot down by Pucaras of Groupo 3 – Lt Nunn killed.
Argentine Forces
MB339 – 1st Naval Attack Escuadron – Goose Green – Shot down by Blowpipe Surface to Air Missile
Pucara - Groupo 3 – Goose Green – Shot down by Blowpipe Surface to Air Missile – Lt Araganaraz ejected.
Pucara – Groupo 3 – Goose Green – Shot down by small arms fire – Lt Cruzado ejected.
Pucara - Grupo 3 – Not Known – Operational accident – lost during transit between Goose Green and Port Stanley in bad weather, thought to have crashed into high ground. Lt Gimenez’s remains
discovered and repatriated in 1986.
29th May
Poor weather heavily restricted air operations today. 1(F) Squadron now reduced to just four Harrier GR.3s, put only four sorties up. Two aircraft carried out an unsuccessful hunt for radars in
the area north of Port Stanley. The second pair flown by Wg Cdr Squire and Flt Lt Hare are tasked to attack an enemy Observation Post on the West face and dug-in defensive positions on the
Northern slopes of Mount Kent. A rocket attack consisting of four pods of 2 inch rockets was carried out against the Observation Post, and strafe attacks by 30mm cannon against the defensive
positions but nothing was seen at either target. Neither of the pilots reported Anti Aircraft or small-arms fire, although both aircraft did receive Radar Warning Receiver indications of search
radar.
Argentine aircraft only briefly appeared in the late afternoon when daggers of Groupo 6 arrived over San Carlos Water but failed to inflict any damage. One Dagger was not so fortunate and was
felled by a Rapier Surface to Air Missile. The pilot Lt Bernhardt was killed.
HMS Invincible was also involved in a bizarre accident to one of her embarked Sea Harriers. Lt Cdr Broadwater was preparing to take off in very bad weather when the ship went
into a tight turn and healed over. The Sea Harrier slid across the deck of the Carrier and fell over the side. As the aircraft was on the point of going over Lt Cdr Broadwater initiated ejection
and was rescued from the sea shortly afterwards by Sea King.
The only other air action that day took place far to the north east of the islands. The British Wye, a 15,000 ton ship carrying fuel for the Task Force, came under attack from a modified C-130
Hercules of Groupo 1, about 830 miles due east of Buenos Aires. The improvised bomber released eight bombs, all of which missed except one which struck the ships superstructure and bounced off
harmlessly without exploding.
Losses today:
Royal Air Force/Royal Navy
Sea Harrier – East of Falklands – Operational accident – slid of the deck of HMS Invincible during turn in poor weather, aircraft slid across deck into water – Lt Cdr
Broadwater ejected.
Argentine Forces
Dagger - Groupo 6 – San Carlos Water – Shot down by Rapier Surface to Air Missile – Pilot Lt Bernhardt killed.
30th May
Today saw a marked improvement in the weather and there was a surge of air operations around the islands. 1(F) Sqn mounted six sorties and during one of these lost another aircraft. Wg Cdr Squire
and Flt Lt Hare carried out two missions one to Mount Kent attacking infantry positions and one to the coast road near Mount Challenger. Nothing was seen at the second target area so they pressed
on and attacked the infantry position on Mount Kent. Sqn Ldr Pook and Flt Lt Harper attacked radar positions on Mount Round and Mount Low but with little to indicate success. During the egress
from the target both were illuminated by Fledermaus radar from Port Stanley but no Anti Aircraft fire was seen. Flt Lt Harper and Sqn Ldr Harris attempted to use the Harriers LRMOUNTS (Laser
Rangefinder and Marked Target Seeker) to designate targets for laser guided bombs over Port Stanley Airfield but with no success.
Sqn Ldr Pook and Flt Lt Rochfort were initially tasked as a pair against artillery positions on Mount Wall but this was subsequently changed to helicopters on the ground some 14km to the East.
Ingress to the target was made was from the South crossing the main road which runs into Stanley. As Sqn Ldr Pook's aircraft crossed the road it was hit by small arms fire from troops on the
road. Pook felt the impact of the small arms but everything felt alright and the pair pressed on. Neither pilot saw any sign of helicopters at the revised target but Flt lt Rochfort clearly saw
the heavy artillery originally tasked. This he attacked with 2 inch rockets. Sqn Ldr Pook, who had pulled wide from his search for helicopters and seen Flt Lt Rochfort's fall of shot, which had
landed in the middle of the guns and soft skinned vehicles, now attacked the same position with his 2 inch rockets, also hitting the target.
Once clear of the target area the formation climbed for its recovery to Hermes. Rochfort noticed the leak and reported it to Pook. Pook's fuel gauges indicated 4,000lbs remaining
which was well in excess of the fuel required to recover safely. However, at this stage he suffered a total radio failure and also noticed that his fuel was decreasing rapidly. Pook jettisoned
his empty tanks and rocket pods to reduce drag and climbed to 25,000ft. Whilst in the climb he also experienced a partial hydraulic failure. Sqn Ldr Pook was joined by his No 2 at the top of his
climb and they flew as fast as possible towards Hermes with Flt Lt Rochfort alerting the SAR facilities of an imminent ejection. When Pook's engine flamed out he continued in a high speed glide
towards the ship and, at 10,000ft and 250kts, he ejected; approximately 30nm from the ship. The SAR helicopter was on the spot straight away and Sqn Ldr Pook was rescued after around ten minutes
in the water. His only injuries were a stiff neck and some minor burns to his face from the firing of the Miniature Detonation Cord (MDC)
At the same time as Sqn Ldr Pook was in a helicopter back to Hermes another Helicopter was delivering Sqn Ldr Iveson back on board after being picked up by 2 Para near Goose Green earlier in the
day.
As the two Harrier pilots were making their way back to their ship, the fleet came under attack threat again. Two Super Etendards, one of which carried Argentina’s last remaining Exocet missile,
and four Skyhawks were heading towards the Task Force. The two Etendards climbed and launched their single Exocet before turning for home leaving the four Skyhawks to follow the missiles smoke
trail to the fleet. In the end the Skyhawks did not attack the carriers but the destroyer HMS Exeter and the Frigate HMS Avenger. The two ships were some twenty
miles south of the main group and had been misidentified by the Argentine pilots as Carriers. Both ships had picked up the Etendards radar signals and had fired chaff to decoy the missile. This
process was repeated throughout the whole Task Group.
HMS Exeter then engaged two fast moving aircraft targets at low level with Sea Dart shooting down both, no ejections were seen and both pilots were killed.
HMS Avenger then claimed to have engaged and shot down the Exocet missile with her 4.5 inch gun at a range of eight miles, a magnificent piece of marksmanship if true. Whether
the 4.5 inch round hit the missile or whether it exploded due to the chaff is not known, but either way that was the end of the Argentine Exocet threat to the Task Force.
To this day controversy surrounds this episode. The Argentine pilots are convinced they engaged HMS Invinciblecausing serious damage.
Invincible was never hit and the only explanation was the misidentification of the frigate Avenger and her destroyer counterpart Exeter. The
Argentine pilots waited listening to BBC World Service broadcasts to confirm their hitting of a British capital ship, but this never came, this was then construed as a cover up to prevent
knowledge of a major loss to the Royal Navy.
Losses today:
Royal Air Force/Royal Navy
Harrier GR.3 – Into the sea off East Falkland – Hit by small arms fire and ran out of fuel returning to Carrier – Sqn Ldr Pook ejected and picked up ten minutes later by Sea King
Argentine Forces
2 x Skyhawk – Groupo 2 – East of Falkland Islands – Shot Down by Sea Dart Missiles fired by HMS Exeter – Lt Vasquez and Lt Castillo both killed.
31st May
In the early hours of 31st May another Vulcan was heading towards the Falklands from Ascension Island. This time the targets would be the Argentine long range early warning radars around Port
Stanley, and as a consequence the aircraft carried a pair of 'Shrike' anti radiation missiles.
With only a little annoying turbulence at one of the refuelling points to contend with the Vulcan flown by Sqn Ldr McDougall of 50 Sqn and his crew reached the target area without difficulty. The
aircraft approached from the North East at low level before pulling up to 16,000 feet for its attack run. As they closed on the town a couple of Fledermaus radars locked onto the aircraft but
they were well above the danger zone for these weapons, to be on the safe side the Air Electronics Operator, Flt Lt Rod Trevaskus, released a couple of bundles of chaff to 'keep them interested'.
McDougall and his crew had to be certain which radar was which, they had orders to avoid the one in Port Stanley to prevent collateral damage, all other radars were fair game. McDougall flew a
complex pattern over the Islands to identify the targets and make sure they knew which was which. Heading towards the target from the North West McDougall lowered the nose and shortly afterward
Trevaskus fired both 'Shrikes' about four seconds apart. McDougall saw a flash on the ground at the same time as the navigator, who was timing the missiles flight, said "now". McDougall turned
his aircraft North East and headed for Ascension where he landed eight hours later. While it initially appeared successful the radar set escaped with little serious damage.
The Argentines during the day put up little in the way of any air activity over the islands. 1(F) Sqn put up several missions today. Wg Cdr Squire and Flt Lt Hare made a further attempt to
designate for Laser Guided Bombs using the Harrier GR.3’s Laser Rangefinder and Marked Target Seeker. The weapons were released at 25,000ft, but no weapon impacts were seen. The pair then
conducted a low level photo recce of high ground from Mount Low to Long Island. Neither pilot saw anything visually but scrutiny of the film showed a 30mm Anti aircraft position. Sqn Ldr Harris,
Flt Lt Harper, and Flt Lt Rochfort carried out an attack on the airfield at Port Stanley, co-ordinated with Sea Harriers who were to toss radar fused 1000lb bombs as defence suppression. This
task arose as a knee jerk reaction to a report of swept wing aircraft, possibly Etendards, being parked adjacent to the eastern threshold. The run in to the target was at low-level with Sea
Harriers leading. However, the Sea Harriers allowed themselves to be illuminated by climbing in order to check their position on radar; this removed any hope of surprise. The formation split into
two elements at McBride Head and the attack was carried out as per the previous co-ordinated mission. All three Harrier GR.3s carried two 2 inch rocket pods. The weapons were fired from a level
delivery at briefed targets, which appeared to be straight-winged aircraft. Earlier photos indicated that they might be A-4 Skyhawk decoys, but post-war recce showed them to have been MB339s.
Considerable small-arms fire was seen during the attack. During both missions aircraft suffered damage including cracked front canopy screens, both Wg Cdr Squire's drop tanks were holed and Flt
Lt Hare suffered a bird-strike.
1st June
While it was still dark early in the morning of the 1st, four Canberra’s of Groupo 2 ran in at high altitude and bombed targets in the area around San Carlos. Lt McHarg of 800 NAS was scrambled
to intercept, and managed to get about four miles from one of the Canberras heading West, which was dropping chaff and flares, and manoeuvring hard before he ran short of fuel and had to halt his
pursuit.
As dawn broke the day was very dull and overcast. On its return trip to the mainland from Port Stanley a C-130 of Groupo 1 popped up North of San Carlos Water to make a brief sweep of the area
for British ships, to aid targeting of the attack aircraft.
Air Contact between the two sides had diminished considerably over the previous few days, but Sea Harrier patrols were almost at the same level as they had been at the height of the fighting. As
the C-130 rose up about twenty miles north of San Carlos Water she was picked up on the radar of the air control ship for that day, the frigate HMS Minerva.
Immediately Minerva vectored two Sea Harriers of 801 NAS flown by Lt Cdr Ward and Lt Thomas to intercept. Both fighters ran towards their target and were getting low on fuel to
the extent the assault ships HMS Fearless and HMS Intrepid cleared their helicopter decks should the pair need to refuel afterwards. Lt Cdr Ward picked up
the aircraft on radar and then descended through the cloud layer to engage leaving his wing man Lt Thomas above the cloud at 3,000ft, just in case the C-130 had 'friends' flying top cover. Lt Cdr
Ward then called Lt Thomas to join him below the cloud as he had the aircraft in sight at about six miles. As Thomas broke cloud, he saw a Sidewinder leave the wing of Ward's Sea Harrier, and go
after the C-130 which was going flat out at about 200ft altitude. Fired at extreme range the missile almost reached the aircraft but fell away into the sea. By now both Sea Harriers had closed on
the target and Lt Cdr Ward fired his second Sidewinder. This missile guided all the way to the target and hit between the engines on the right wing, straight away causing a fire. The C-130
continued to fly on so Lt Cdr Ward closed on the aircraft and then emptied his 30mm cannon magazines into it. The C-130 went into a descending right hand turn, the right wingtip impacted the
water surface, and the aircraft then cart wheeled and broke up. Capt Martel and his six man crew were all killed and following this incident Groupo 1 never hazarded one of its aircraft in this
way again.
By now, following the losses over the previous days, 1(F) is down to just three Harriers and of these only one is available for tasking. Wg Cdr Squire was not happy for singleton tasking at low
level, following Flt Lt Glover's experience, and asks for a Sea Harrier escort for the armed recce from Bluff Cove to Goose Green that he is about to carry out. After a great deal of
consideration this is approved with the proviso that the Sea Harrier does not go below 10,000ft! (some escort!) In the event the Sea Harrier pilot is Flt Lt Ball who flies as any good No 2
should. In the event although Wg Cdr Squire delivered his strafe attack on the target area no damage was observed. The shortage of Harrier GR.3s was however about to receive a welcome boost.
Flt Lt Beech and Flt Lt Macleod departed Ascension Island in the company of eight Victor tankers, four each, to refuel them all the way down the South Atlantic to HMS Hermes,
8 hours and 25 minutes flying time away. With no diversion available the only safety feature was the helicopter carrier HMS Engadine being positioned approximately half
way along the route, a long wait for rescue should one ditch. In the event she is not needed and both Flt Lt Beech and Flt Lt Macleod make their first deck landings on a Carrier as they arrive
aboard Hermes. The 800 NAS diarist noted their arrival with the entry "two sore arsed crabs arrive aboard". Later Flt Lt Macleod stated he found the start of the journey the most challenging as
he had to mount his jet in pile underwear, beneath a rubber immersion suit in temperatures of 85 degrees Fahrenheit.
Although the bad weather precluded all but the one low level sortie, Sea Harrier missions continued above the cloud. It was during one of these missions 801 NAS would lose an aircraft to a
Surface to Air Missile.
Flt Lt Mortimer was flying his Sea Harrier at 13,000 ft on an armed recce to the south of Port Stanley, keeping a weather eye out for Pucara or transport aircraft movements from the airfield.
Noticing movement on the ground near the runway he closed to investigate, an error that was to prove near fatal. Mortimer spotted a bright flash on the ground and a fast moving smoke trail; a
Roland Surface to Air Missile was heading his way. At the time the Sea Harrier was about seven miles to the south of Port Stanley over the sea and Mortimer was sure that he was out of the
missiles range. Turning away he raised the nose of the aircraft and tried to outrun it. Passing out of his sight several thousand feet below he looked for the missile out to the front of his
aircraft were he expected it to appear as it fell away into the sea.
The missile exploded devastating the aircraft, Mortimer’s memory of the moment is the immense violence of it all, as the cockpit with him still aboard tumbled through the sky. Almost by second
nature he pulled the ejection handle and was thrown from the cockpit to relative safety. Flt Lt Mortimer now had to endure a ten minute descent under his parachute until he landed in the water;
he successfully inflated his life saving jacket, then his dinghy, which he climbed aboard, releasing his parachute. Using the emergency radio contained in life jacket he made a short
broadcast: "Mayday, Mayday, Mayday, Silver Leader, shot down by Roland 5 miles due south of Port Stanley", he received a muffled reply in English before turning off the radio to prevent enemy
direction finding equipment locating him.
While sat in his dinghy he saw a helicopter and a twin engined aircraft take off and began looking for him. Although they headed straight for, and over flew him at one point, they soon turned for
home and raced back to Port Stanley.
Alone in his dinghy Mortimer began to bail out the water that had collected in his life boat, took a couple of sea sickness pills and prepared for darkness which was approaching fast. Turning on
his radio locator beacon for two minutes every half hour gave him something to concentrate his mind, and he was sure that the Carriers would be sending helicopters to look for him. Shortly after
midnight he heard the throb of helicopter rotor blades and switched on his strobe light to mark his position. He later admitted that he was "not entirely sure that the approaching helicopter was
British but by this time I was so cold that I wasn’t really fussed who picked me up". After spending nine hours in the dinghy he was beginning to "see himself spending the rest of his days
floating around the South Atlantic which at that point looked to be about one and a half".
Within 30 seconds the Sea King of 820 NAS was hovering above Mortimer and in its searchlight he could see the smiling face of his friend Leading Aircrewman Finucane coming towards him. He was
soon on board the helicopter and speeding back to HMS Invincible.
Losses today:
Royal Navy
Sea Harrier – 801 NAS – Shot down by Roland Surface to Air Missile south of Port Stanley. Flt Lt Mortimer ejected and rescued from sea.
Argentine Forces
Hercules – Groupo 1 – 50 miles North of Pebble Island – Shot down by Sea Harrier of 801 NAS flown by Lt Cdr Ward using both Sidewinder and 30mm cannon.
2nd June
There was very little in the way of aircraft activity from the main bases in Argentina, the Carriers or the Falklands due to the extremely poor weather.
One item of note that did occur was in the area of Port San Carlos. Here members of the Royal Engineers had finished the construction of a Harrier operating strip consisting of a runway some 285
yards long for take offs, and a 23 yard square 'pad' for vertical landings made from hand laid metal plates each about 10 feet long by 2 feet wide. The original plan was to have sufficient
parking space for a dozen Harriers, however with the loss of the Atlantic Conveyor the parking area was reduced to an area for just four aircraft. Known to the Navy as
HMSSheathbill this name rapidly fell into disuse as the Forward Operating Base came to be known as 'Sids Strip' nicknamed after its Commanding Officer Sqn Ldr Sid Morris. Due to the
appalling weather it would be several days before the strip could be used.
3rd June
Once again there was little flying over the Falklands and from the Argentine mainland bases due to the poor weather.
The only offensive air action over the islands was a further Vulcan mission, this time carrying four Shrike Anti Radiation missiles, with the intention of taking out radars around Port Stanley.
Once again Sqn Ldr McDougall approached the islands from the North East from low level, and then climbed to around 16,000ft to begin his attack. But learning from previous experience that an
aircraft behaving in this way was a threat, the Argentine radar operators began turning off their radar sets. As the aircraft approached at about nine miles they would turn them off and wait
until the aircraft had passed then turn them on again. Sqn Ldr McDougall flew around for 40 minutes while the Argentine radar operators switched their radars on and off.
On the final run before the Vulcan had to turn for home Sqn Ldr McDougall changed his tactics, He decided to go into a descent towards Port Stanley Airfield to tempt the radar operators into
turning them back on to have a go at the Vulcan. The aircraft got down to about 10,000 feet and was approaching Sapper Hill, when one of the radars flashed on. Moments later the guns started
firing and McDougall saw the explosions from four shells below them. Behind McDougall the Air Electronics Operator, Flt Lt Trevaskus, locked two Shrikes onto the radar emissions and opened fire.
As McDougall pulled up the nose of the Vulcan, to avoid going too low, he saw a flash in the mist on the ground. One of the Shrikes had impacted close to a Skyguard fire control radar, causing
severe damage and killing three of its crew members.
The Vulcan climbed away from the area and headed north but the crews adventures that night were far from over. About four hours later they arrived at their final rendezvous with a Victor tanker
off the coast of Brazil. This was the final refuel to get them home to Ascension, and there was as ever no back up. On this occasion McDougall had made a good contact with the Victors refuelling
basket, fuel was just beginning to flow when disaster struck, the Vulcan’s refuelling probe broke sending gallons of Avtur spraying over the Vulcan’s windscreen before the airflow cleared it
away.
The aircraft and its crew were now in serious trouble. The Vulcans tanks were nearly empty, it could not refuel in flight, and the nearest usable runway was in Rio de Janerio more than 400 miles
away. McDougall straight away swung the nose of the Vulcan west towards Brazil, he ordered the spare pilot Flt Lt Gardner to gather all the secret documents and target information documents and
prepare to dump them overboard. He ordered Flt Lt Trevaskus to jettison the remaining two Shrikes as he had no wish to land with them on board. At the same time the co-pilot having made some
quick fuel burn calculations announced to the crew that at their present fuel burn rate they would not reach Rio. McDougall climbed the aircraft to 40,000 feet to improve the fuel burnt by the
four Olympus engines but it was still going to be marginal. As they reached the top of the climb Gardner had collected all the secret documents and placed them in a navigators holdall weighed
down with a couple of ground locks. The Vulcan’s cabin was depressurised and the crew door on the underside of the aircraft opened, as it opened the documents bag, locks and all disappeared into
the Atlantic. The next problem to arise concerned the door, having managed to open it Gardner found it impossible to close.
By now McDougall had declared a full 'Mayday' emergency but although he was in contact with controllers at Rio de Janeiro he could not make himself understood. This was not because he was
speaking English, far from it, but because the crew was suffering the effects of pressure breathing oxygen at 40,000feet in an unpressurised cockpit. This has a similar effect to deep sea divers
breathing Helium, everyone sounds like Donald Duck. Another more experienced English speaking controller came on the air just as Flt Lt Gardner managed to close the crew door and the cabin
repressurised returning the speech to something approaching normality.
The Vulcan pressed on and was finally asked if they could see an airfield in front of them, when they replied "yes" the crew were given permission to land as they were critically low on fuel. At
that time the Vulcan had some 3000lbs of fuel left and a Vulcan needed 2,500lbs to do a circuit. In other words if they missed the approach they would run out of fuel and crash.
At this point the Vulcan was at about six miles from the airport at an altitude of about four miles. To get the aircraft on the ground Sqn Ldr McDougall would need every ounce of his twenty years
experience on the Vulcan. Pulling the throttles shut he extended the airbrakes, then wound the aircraft into an almost vertical bank, and took her down in a steep descending orbit. At the end of
the carefully judged manoeuvre the aircraft was at 800 feet one and a half miles from touchdown, with an airspeed of about 300mph, far to high to land. To compensate McDougall lifted the nose of
the aircraft to 'mush off' the speed with the giant delta wing. When he levelled out he was at 155mph at 250 feet with three quarters of a mile to go to touchdown. With the gear lowered McDougall
made a text book landing, he didn’t even stream the brake ‘chute.
McDougall taxied the Vulcan off the runway and closed the aircraft down. It would later be revealed that the total fuel volume in the aircraft was only 2,000lbs.
The Vulcan crew remained in Brazil with their impounded aircraft and left the wheels of diplomacy to turn while they settled down to make the best of things. For this mission Sqn Ldr McDougall
would later receive the Distinguished Flying Cross
4th June
The poor weather over the whole of the area prevented air activity by either side. The only flying that was carried out was by helicopters re-supplying the ground forces. During the day a flight
refuelled Ascension based C-130 managed to air drop high priority supplies next to a ship of the task force to the east of the Falklands.
5th June
During the morning of the 5th the weather cleared sufficiently for Harrier GR.3s and Sea Harriers from the Carriers, to take off mount patrols and then land at the forward operating base at 'Sids
Strip' at Port San Carlos. For the fighter and ground attack Harriers this ability to land and refuel gave a considerable increase in operational performance.
For Sea Harriers the normal sortie duration of 75 minutes meant 65 minutes getting to and from the patrol line with ten minutes on task. Now the Sea Harriers could transit to the patrol line in
about 30 minutes, spend about 35 minutes on the patrol line, and then fly five minutes to 'Sids Strip' to refuel. If the aircraft still had missiles aboard they could then fly the same mission in
reverse landing back on the carriers.
For 1(F) the pilots could wait in the cockpit or beside the aircraft for tasking from the Forward Air Controllers, they could then take off and move in at low altitude to attack. The biggest boon
of 'Sids Strip' for the GR.3s was the ability to use its built in inertial navigation system to its full capacity.
The first to land at 'Sids Strip' were Lt Cdr Andy Auld and Lt Hargreaves of 800 NAS, closely followed by Sqn Ldr Iveson, back to flying albeit with a sore back following his ejection the
preceding week, and Flt Lt Harper of 1(F) Sqn. The weather that day was never the best and 1(F) only mounted two attacks both direct from the carriers, the first a photo recce from Bluff Cove to
Hooker Pont looking for land based Exocet launchers, flown by Sqn Ldr Pook and Flt Lt Hare. Nothing significant was seen during the run and no SAM/AAA was in evidence. The film did reveal some
defensive positions to the South of Port Stanley, but nothing more. The second sortie, flown by Wg Cdr Squire and Flt Lt Beech, was a mission tasked as an armed recce of Pebble Island, Keppel
Island, Rat Castle Shanty, Dunnose Head and Spring Point Hill for enemy activity.
The recce of Pebble Island revealed what was thought to be two new Pucara aircraft and these were attacked with rockets and strafe. (Later reports indicated that aircraft were already damaged.)
The recce of Keppel Island revealed no enemy activity, and the sortie was terminated due to low fuel.
Heavy fog descended over the Task Force that night making things very interesting for Lt Cantan of 801 NAS when he returned to and landed aboard HMS Invincible. Using his Sea
Harrier's radar he decelerated into a 200ft hover instead of the normal 70ft in the thick fog and moved slowly towards the carrier until he saw a searchlight shining vertically through the gloom,
he continued down and landed on the deck of HMS Invincible with visibility less than 50 Yards. In weather conditions such as these it is doubtful any other fixed wing carrier
aircraft could have made it back aboard.
As Harriers pilots are fond of saying, "It’s easier to stop and land than land and stop".
6th June
Once again the weather was that poor that it heavily curtailed air operations around the Islands. A C-130 Hercules again flight refuelled from Ascension dropped more high priority supplies to the
Task Force.
Around the Carriers Sea King helicopters carried out their anti submarine patrols as they had done since before the fighting had started. Other helicopters were carrying troops and supplies in
support of the ground forces. It was one of these aircraft, a Gazelle of 656 Sqn Army Air Corps, which was involved in a tragic 'blue on blue' encounter to the West of Fitzroy. It was not until
some time after the conflict that it could be confirmed that the Gazelle had been shot down by a Surface to Air Missile launched from a British ship in the area of Choiseul sound, crashing some
where just North of Mount Pleasant Peak. All aboard the helicopter were lost.
Losses today:
Army Air Corps
Gazelle – 656 Sqn – Shot down West of Fitzroy by British warship – All on board killed.
7th June
The weather finally cleared today allowing a full programme of sorties to be flown, and the use of the Forward Operating Base of 'Sids Strip' at Port San Carlos.
For 1(F) the major problem being encountered was a supply of suitable targets. As the British troops advanced on Port Stanley they were having very little contact with Argentine forces and
consequently the GR.3s spent a lot of time on the ground waiting for tasking that didn’t come. The only mission of note was one flown by Sqn Ldr Pook and Flt Lt Rochfort against an artillery
position near Sapper Hill to the west of Stanley. Both aircraft fired two pods of 2 inch rockets into the target. No Surface to Air Missile/Anti Aircraft Artillery was seen in the target area by
either pilot but on landing, Sqn Ldr Pook's aircraft was found to have been hit by small arms on the nose cone. A Sea Harrier pilot observed the attack from high level and reported what appeared
to be a Surface to Air Missile fired at the two aircraft as they departed to the South. The SAM was seen to explode before reaching the aircraft.
The Argentines were in a similar position with regard to targeting as the British, they simply couldn’t find targets for their attack aircraft. On the morning of the 7th Lt Col De La Colina led
all four of his Learjet reconnaissance aircraft of Photographic Escuadron 1 on a mission to find targets. Flying in over the islands at 40,000ft they flew parallel tracks some miles apart to give
overlapping photographic cover of the ground below. If this mission was as successful as previous ones the new Forward Operating Base at Port San Carlos would almost certainly be detected and
become the centre of much unwanted, high priority attention from the Argentine fighter bombers.
Previous missions by the Learjets had not encountered much in the way of resistance to their missions from the British forces below. Today however was to be different. Sat in San Carlos Water was
the Destroyer HMS Exeter, whose mission was to provide air defence cover. Her radar operators watched the Learjets approach and when they were in
range Exeter fired a pair of Sea Dart missiles. One of the missiles impacted De La Colina’s aircraft blowing off the tail. The aircraft, a converted executive jet, had no
escape systems for its crew, even if they had parachutes there was no way of exiting the aircraft, and it took an agonising two minutes for the crew to meet their demise on the peaty terrain of
Pebble Island. All five aboard lost their lives.
Air activity had been relatively quiet over the previous two weeks in comparison to the activity around the 25th May, but while the Argentine naval aircraft were feeling the strain the Air Force
still had a sizeable force of aircraft. With the return of clear weather the Argentine Air Forces would now mount attacks in an attempt to give their beleaguered Army comrades some support on the
Islands.
Losses today:
Argentine Forces
Learjet – Groupo 2 – Pebble Island – Shot down by Sea Dart from HMS Exeter while on high altitude photo reconnaissance mission. Lt Col De La Colina and four crew killed.
8th June
For the second day in a row the weather over the Islands was clear blue skies, and both the Harrier GR.3s and the Sea Harriers planned sorties to make full use of the Forward operating base at
Port San Carlos, or 'Sids Strip' as it was known. This allowed the two Carriers, HMS Hermes and HMS Invincible, to move further to the east to place them outside
of Super Etendard carried Exocet missile range. Unknown to the Task Force the Argentines had shot their bolt as they had already delivered their fifth and last missile disarming themselves in the
process. Argentina continued efforts to re-supply themselves via the weapons 'black market' until the end of the conflict without success. The intelligence men however were overwhelmed with
rumour that weapons had been procured and prudence dictated the Task Force remain on high alert to this threat.
During the morning 1(F) Sqn sent up two pairs of Harrier GR.3s to operate over the Islands but lacking suitable targets they headed for Port San Carlos and the Forward Operating Base to await
tasking. Two of the aircraft arrive and land safely but Wg Cdr Squire was about to have an unpleasant experience.
Flying with Flt Lt Mark Hare as his number two, Wg Cdr Squire is flying a Harrier with a number of known defects. On take-off he had to go through the Jet Pipe Temperature (JPT) limiter to
gain sufficient engine thrust to avoid sinking off the ski ramp of HMS Hermes. This was to be a worrying precursor of future events...As Wg Cdr Squire approached the FOB he
misjudged his height going across the side of the pad and lifted some of the metal planking. In order to see what damage had been done he commences an overshoot which goes well until he reached
about 90kts at which point he suffered a marked drop in engine thrust which this time is not corrected by pushing through the JPT limiter. As a result of the rate of descent and the fact that he
was pointing directly at a Rapier Fire Unit, Squire elected not to eject and the aircraft hit the ground very hard - the undercarriage is broken off and canopy shatters around him. The aircraft,
still under power, comes to a rest at the end of the strip, whereupon Wg Cdr Squire shut the engine down and carried out a rapid egress of the aircraft. Flt Lt Hare orbited the strip until the
pad is clear of metal and then lands, refuels and returns to Hermes.
The aircraft was damaged beyond repair and ground crews began stripping the seriously damaged airframe of components to keep the other jets flying. By far the most serious consequence of the
accident was the fact the FOB strip was now out of action until repairs could be completed, and these would take several hours to complete.
With this incident a series of unrelated factors were coming together that would have a decisive influence on events later in the day.
Also that morning the landing ship RFA Sir Galahad arrived off Fitzroy carrying The Welsh Guards to reinforce 5 Brigade who were preparing to advance on Port Stanley. A similar
ship, the RAF Sir Tristram, was already at anchor and off loading ammunition. A couple of days previously these two ships would have been supported and protected by four Rapier Fire
Units, but these had been moved to provide coverage for the main Brigade maintenance area at Bluff Cove. The ships had no air defence from attacking aircraft apart from some small arms, and the
whole off loading operation was going on under the watchful gaze of the Argentine positions on the high ground a few miles to the north east.
Reports of the ships positions were relayed first to Port Stanley and from Stanley to the Mainland in short order. Groupo 6 put up Daggers and Groupo 5 put up Skyhawks to attempt to attack
the almost defenceless ships.
The Daggers arrived first and were making their way to Fitzroy and had to cross Falkland Sound to get there, as they did so they were spotted by HMS Plymouth which had just set
out from San Carlos Water to bombard Argentine positions. With the element of surprise lost the Daggers quickly revised their attack plans and targeted HMS Plymouth. The Daggers ran
in towards their target through a hail of small arms, 20mm cannon, Sea Cat missiles, replying with their own 30mm cannons, before dropping their weapons and running at high speed south to escape.
HMS Plymouth was hit by four bombs, none of which actually detonated. One passed spectacularly through the funnel of the ship and caused no further damage, two bounced of the
seas surface and on reaching the ship smashed through the anti submarine launcher before carrying on and falling into the water, the forth however bounced off the flight deck but in passing hit
an armed depth charge readied for fitting to the ships helicopter which exploded. Most of the blast went upwards into the air but the explosion caused serious fires which took some time to bring
under control. Five personnel from the ship suffered injuries during the attack.
As the Daggers sped away to the mainland, the Skyhawks were approaching the anchorage at Fitzroy. As they flew down the waters edge they could not see any ships but were engaged by troops as they
flew on. Just as the force of five aircraft was turning to return to base the trailing aircraft saw the ships and the formation quickly readjusted, to attack the grey ships. Three Skyhawks
targeted Sir Galahad and two of their pilots saw their bombs hit the target, the remaining two targeted Sir Tristram and both saw weapons hits on her. With
no need to jink or hug the waters surface to avoid anti aircraft fire the Skyhawks were able to carry out accurate attacks from sufficient altitude to allow their weapons to arm. The bombs
detonated and Sir Galahad was immediately engulfed in flames, her crew and the embarked troops rapidly attempting to abandon the stricken vessel in any way they
could. Sir Tristram, although not so badly hit, was on fire and this would inflict crippling damage, with the fires raging and taking a considerable time to control and extinguish.
Almost straight away helicopters appeared and began the daunting task of assisting with the evacuation from the ships to dry land. Almost before this was finished Sea King helicopters were flying
the seriously injured the 40 miles west to the hospital at the refrigeration plant at Ajax Bay, and when stabilised on to the hospital shipUganda stationed to the north of the
Islands.
In all fifty-one men lost their lives and forty six were injured, the worst single loss of life inflicted on British forces during the conflict, all because a calculated risk had gone desperately
wrong.
Shortly after 17:00hrs local time a further group of Skyhawks of Groupo 4 attempted to enter the area around Fitzroy to carryout a follow up attack. On this occasion the troops on the ground gave
them a hot reception with small arms fire, and Blowpipe and Rapier Surface to Air Missiles. One of the pilots Ensign Codrington recalls seeing "no fewer than six missiles in flight". The Skyhawks
scored no hits and two were so damaged that they had to remain plugged into the tanker until in sight of their home airbase to be able to make it back.
For the remainder of the afternoon Sea Harriers carried out Combat Air Patrols in a race track pattern over Choiseul Sound, and Fitzroy, but with the Carriers so far to the east and ‘Sids Strip’
out of action following the earlier Harrier crash, there were bound to be gaps in the coverage. With dusk fast approaching, Flt Lt Morgan and Lt Smith of 800 NAS had just arrived on station, at
about 10,000 ft and with the twin columns of black smoke ten miles away clearly visible as a sobering reminder of the earlier horrors.
Below the aircraft as they patrolled Morgan saw a landing craft leave the sound. Checking with the control ship as to its identity, Morgan looked back and saw the landing craft being approached
at high speed and low level by an attacking aircraft. A bomb from the aircraft exploded about 20 yards astern the landing craft but the next weapon was a direct hit, and in the process killed six
men on board, the remainder would be rescued before the craft sank.
Morgan, with Smith in tow, went to full power, rolled on his back, and dived after the attacker. While in the dive Morgan sighted another two aircraft, and when approaching 2,000ft he sighted a
fourth, and decided that this would be his first target. In the half light Morgan misidentified the Skyhawks as Mirages, but that was immaterial in what was to follow. With his speed very nearly
the speed of sound and with a high rate of closure Flt Lt Morgan manoeuvred behind the Skyhawk, got a lock at about 1500 yards and fired his first Sidewinder at a range of 1000yards. The missile
tracked, all the way to the aircrafts tail where it detonated, the aircraft exploded in a fireball and fell into the sea. The remaining three aircraft made no reaction to the loss of one of their
comrades, and still closing very rapidly Morgan selected another aircraft in the formation, and locked on the target. The aircraft Morgan was tracking began to turn to the left just as he fired
his second and last Sidewinder. It is possible the pilot saw it coming and he rapidly reversed his turn, so did the Sidewinder which closed rapidly and hit the aircraft removing everything to the
rear of where the vertical fin joins the fuselage. The aircraft yawed violently and again fell into the sea
There were now only two Skyhawks left and from his position supporting Flt Lt Morgan, Lt Smith had a grandstand seat to see both Morgan’s Missiles destroy their targets. As Flt Lt Morgan fired
his 30mm cannon at the two retreating aircraft Smith picked them up from the fall of shot and the water splashing around them from the cannon fire. With his ammunition spent Flt Lt Morgan put his
aircraft into a near vertical climb to clear the way for Lt Smith to engage. Smith selected a target, got a lock and launched a Sidewinder. The missile flew after its target, although Smith had
reservations it would actually reach its intended victim. The near darkness was then lit up by the simultaneous flash of the missiles impact and the exploding fireball that was once an aircraft
as it hit the ground, so low was the altitude of the target aircraft.
The fourth aircraft, flown by Lt Sanchez, jettisoned it’s under wing tanks and pushing the throttle hard forward while holding the aircraft as low as he dare, he ran and escaped the area as
quickly as possible.
From start to finish this piece of air combat had taken a mere 90 seconds.
At about the same time that Morgan and Smith were achieving their kills there was a rare appearance from the Argentines air to air missile armed Mirages of Groupo 8, who had decided to enter the
fray and provide top cover for the attacking fighter bombers at low level. While this would concentrate the mind of the airborne Sea Harriers pilots, the Argentines appeared to not wish to mix it
with the Sea Harriers and turned away at about ten miles from them to head home, having presided over the loss of three Skyhawks.
Today was not all bad news for 1(F) Sqn, as although they had lost one aircraft they had received two replacements from Ascension Island. Flt Lt Boyens and Flt Lt Gilchrist arrive on Hermes with
two more aircraft. 1(F) now had four Harrier GR.3s equipped with the ALE 40 chaff and flare dispenser system and the Blue Eric active I-Band jamming pod and one aircraft capable of firing Shrike
Anti Radiation Missiles.
Losses today:
Royal Air Force
Harrier GR.3 – 1(F) Sqn – Port San Carlos Forward Operating Base – Lost after engine malfunction during nozzle borne flight – Wg Cdr Squire escaped unhurt.
Argentine Forces
3 x Skyhawk – Groupo 5 – Choiseul Sound – Shot down by Sea Harriers of 800 NAS – two credited to Flt Lt Morgan, one credited to Lt Smith – Lt Arraras, Lt Bolzan, and Ensign Vazquez killed.
9th June
The weather again played a part in the days air operations. The weather over the Argentine mainland was what can only be termed as typically British clag, low solid cloud and lousy visibility.
Over the islands themselves the weather was far better with clearing skies and excellent visibility allowing operations to continue.
Operating from both the strip and the carriers 1(F) Squadron carried out two aircraft sorties. The first pair of Wg Cdr Squire (who stole Flt Lt Harpers seat) and Flt Lt Boyens on his first
combat sortie since arriving, carried out an attack on artillery positions on the northern slopes of Mount Longdon with two pods of 2 inch rockets each. Ingress to the target was at low-level
from the North West. Both aircraft fired at the target although nothing was seen. As the aircraft departed the target area at low level small arms fire directed at the pair was seen from the area
of Wireless Ridge.
The second pair of Harrier GR3s flown by Sqn Ldr Harris and Flt Lt Macleod were tasked as a pair against a 155mm gun position adjacent to Sapper Hill. The approach to this target was also at low
level but from the north. Although the target was not visually identified the target area was attacked by both aircraft with two pods of 2 inch rockets from a level delivery. Both pilots noted
seeing moderate Anti Aircraft Artillery fire in the target area and the aircraft of Flt Lt Macleod was hit by shrapnel on the egress from the target. This did not manifest itself until his
arrival back at HMS Hermes. On turning finals and lowering the undercarriage and flaps for landing, Macleod noticed that the normal cockpit indications were not showing, so he
initiated a go around. At the same time he contacted 'Flyco' and asked were everything was. The reply told Macleod that the out riggers were half way down and but the main and nose gear had
remained retracted in their respective bays. Macleod continued around a circuit and on finals selected undercarriage down using the Nitrogen emergency blow down system, the undercarriage
deployed, locked down and Flt Lt Macleod made a safe landing on the deck of Hermes. Macleod later recalled that "There were six or seven shrapnel holes in the aircraft and the
hydraulic lines in the wing and fuselage had been cut. The holes were from shell splinters and were mainly on the upper surfaces of the wings, we had been flying fairly low".
During this phase the helicopter force was working flat out to re-supply the front line troops with stores and ammunition, in support of the advance on Port Stanley. The Sea Kings of 825 and 846
NAS, the Wessex of 845, 847, and 848 NAS, and the lone Chinook of 18 Squadron RAF, 'Bravo November', were all earning there keep. In the case of the Sea King the main load was usually under slung
and weighed anywhere between two and a half and three tons and usually consisted of ammunition. With this amount of cargo the aircraft were all working at or near their maximum all up weight and
there was very little in the power margin should a problem develop.
Sqn Ldr Dick Langworthy, 'Bravo November’s' pilot was constantly worried about being spotted and attacked from the air. In his own words: "We stuck out like a dogs balls. In a Pucara I could have
shot down any helicopter, no trouble at all. Had I been the Argentine Commander I would have said, there are the troops, there is their base, and the helicopters must be between them, go and
shoot them down! They could have had a field day with us, but I never saw any enemy aircraft in the air; the only Pucaras I ever saw were lying on the ground wrecked".
10th June
Today again, the weather was atrocious over the Argentine mainland bases but good over the Falklands. 1(F) Sqn sent a pair of Harrier GR.3s to the FOB at 'Sids Strip' where they waited all
through the morning at readiness for tasking, but the forward troops had little contact with the enemy that required their intervention, and there were no requests for air strikes.
During the morning Wg Cdr Squire and Flt Lt Hare carried out an armed recce in front of the advancing British forces. The pair ‘coasted in’ at Fitzroy and then split up. Wg Cdr Squire flew east
towards Port Stanley then turned onto a northern heading to take him hard against the Argentine defences at the eastern end of Port Stanley. Meanwhile Flt Lt Hare flew north-east past the two
prominent features of Two Sisters and Mount Longdon. Both aircraft flew through the areas with there cameras clicking taking in the scene around them. For the pilots it was a very different
story, their concentration levels were high as they ran through at near maximum speed. Flt Lt Hare later commented "I didn’t see much. When you are on a photographic reconnaissance mission you
concentrate on flying as low as possible and avoiding the ground by as little as possible. It was mid morning; my heading took me almost straight into the sun. So flying was a bit difficult, I
was concentrating on the 'staying alive' bit". Wg Cdr Squire then bravely flew his aircraft at 300 feet past the west end of Port Stanley, in full view of the defensive positions to photograph
them. On this occasion his luck held and his aircraft was not damaged.
Once safely back aboard the film was developed and the Photographic Interpreters then came into their own. The Argentine troops had several weeks to prepare and conceal their positions, and had
they not given themselves away they would possibly have remained undiscovered. The conscripts had lit peat fires to dry out and keep warm, and the rising whispy smoke from these fires was clearly
seen when the photos were examined. The film from Flt Lt Hare’s aircraft also showed a remarkable shot of an Argentine Surface to Air Missile team struggling to bring their Blowpipe launcher to
bear on his speeding aircraft. It was perhaps a blessing that Flt Lt Hare knew nothing of this until shown the photograph.
Following Squires and Hares sortie, Sqn Ldr Harris and Flt Lt Macleod flew a messy sortie that began as an attack in support of Special Forces at Port Howard, but they could not make contact with
the Forward Air Controller because of confusion over the TOT (Time On Target). The pair ended the sortie with an armed recce of the Port Howard area and finding no targets they returned
to Hermes.
At around 16:30 Flt Lt Harper and Flt Lt Rochfort carried out a sortie with Harper’s aircraft carrying 1000 lb bombs converted to Laser guidance. Due to a problem with co-ordinating with the
Forward Air Controller who was to designate the target the weapons were not released and Flt Lt Harper returned to Hermes with his valuable cargo.
Finally at about 18:55 Wg Cdr Squire and Flt Lt Macleod carried out a mission tasked, as a result of the analysis of the photo’s from the previous recce sortie, against enemy positions about 400
yards South of Moody Brook Road.
Both aircraft approached the target at Ultra Low Level from the direction of Estancia House. Both pilots heard search radar scanning them on their Radar Warning Receiver audio during the run-in.
The target area was easily identified but individual targets were hard to see in the rapidly failing light. The briefed target areas were struck with four Cluster Bomb Units, two from each
Harrier, and several secondary explosions were seen from Squire's weapons.
The pair departed the target, again at Ultra Low Level, to the North. Considerable Anti Aircraft Artillery was seen by both pilots during the run-out. The only damage that occurred during the
attack was to Flt Lt MacLeod's front canopy screen which was hit and badly cracked by a rifle calibre round.
11th June
The Sea Harriers of 800 and 801 NAS continued to carry out their almost aloof Combat Air Patrols over the Islands, although there was little in the way of Argentine air activity and few
opportunities presented themselves for air combat.
On occasions the Sea Harriers changed to an offensive role but rarely put themselves to close to the action. Today was to be such a day. Lt Cdr Auld of 800 NAS led four aircraft in an attack on
the airfield at Port Stanley, at low level using radar fused ‘air burst’ bombs in a loft/toss attack profile.
As the aircraft closed on their target they became aware of a growing glow in the distance which, on closer inspection, was the light from thousands of rounds of tracer being fired by the
Argentine defenders. Four miles from the airfield, the four Sea Harriers pulled up and released their weapons, rolled through 120 degrees, pulled around tightly and descended close to the sea to
return to the Carrier. As the aircraft retreated they could see the raid was a success from the growing fires around the airfield.
Most of the offensive air action was carried out by the Harrier GR.3s of 1(F) Sqn, flying five missions around the Islands, all at low level over defended areas with intensive return fire at them
from the ground.
During the late morning Flt Lt Harper and Flt Lt Gilchrist were tasked with the delivery of two Laser Guided Bombs (LGB). Unfortunately the Forward Air Controllers Laser Targeting device was
unserviceable and so the LGBs were delivered using a manual 30-degree loft/toss attack into the area of Mount Tumbledown. The results of weapon impact were not seen. Both pilots saw considerable
AAA from the Port Stanley area but both aircraft remained out of range.
At around 14:30hrs Flt Lt Boyens and Flt Lt Rochfort were tasked as a pair against enemy position on the slopes of Two Sisters. The target area was attacked with CBUs by Flt Lt Boyens while Flt
Lt Rochfort, who had to jettison his weapons and fuel tanks on take-off due to poor engine performance, strafed the target with 30mm cannon fire. Both pilots saw camp fires and troop movements
amongst the fall of shot. Neither of the pilots saw any AAA, but Flt Lt Boyens was locked up by Argentine search radar but on release of chaff the radar immediately released its lock. This was
the first serious use of the ALE40 chaff and flares dispenser by the Royal Air Force.
Just after this attack at about 14:50, Sqn Ldr Pook and Flt Lt Beech launched to carry out an attack against artillery and mortar positions on Mount Harriet. The pair approached the target from
the south. Neither pilot saw AAA or SAMs. The targets were attacked with CBUs and Beech saw a soft skinned Vehicle (possibly a Land Rover) at his target position. Both pilots’ weapons caused
damage. This pair was not radar locked during the attack, but both aircraft’s Radar Warning Receivers picked up I-Band search radar during the run-in to the target.
Launching at about 18:10 Sqn Ldr Harris and Flt Lt Gilchrist took off tasked as a pair with CBUs against Argentine troop and gun positions on Mount Longdon. Both aircraft approached the target
from the north at low level. On unmasking from low level, Sqn Ldr Harris turned right to attack the western set of targets with the Flt Lt Gilchrist fanning out to attack the eastern targets.
Following the attack the pair made a high speed low level egress to the North West back to the Carrier. Small arms fire and AAA were observed by both pilots south of the target area.
The final sorties of the day were flown by Wg Cdr Squire and Flt Lt Hare. The pair was tasked against artillery and HQ positions on the eastern slope of Mount Tumbledown. The selection of 1000lb
bombs, with retard tails and variably timed fuses, was aimed at negating the use of prepared positions if only occupied at night. This was a questionable decision as retard bombs, if not
instantaneously fused, will tend to bounce and roll beyond the target. The approach to the target was from the south using terrain masking to provide minimum exposure. However on approaching the
area, Squire's aircraft was hit by small arms fire and the cockpit holed; his bombs dropped in the enemy barracks area. Flt Lt Hare's bombs were also delivered long.
In the event the bombs were dropped 'freefall' as the retard tails had not been properly set. Fortunately they did not have time to arm, with the attendant dangers of blast damage to the
delivering aircraft, and fell as UXBs (unexploded bombs).
On the way out of the target area, Blowpipe SAMs were fired at both aircraft. The weapon aimed at Wg Cdr Squire fell short, but Flt Lt Hare had to take evasive towards his and it exploded about
100 feet above his canopy.
Although several aircraft took some form of damage they all returned to the Carrier safely.
Also that afternoon the airport at Rio de Janeiro was hushed by the sound of four Rolls Royce Olympus engines as, ten days after their arrival, Sqn Ldr McDougall and his crew, now released by the
Argentines, departed to Ascension Island.
12th June
As Sqn Ldr McDougall and his crew made their way home to Ascension, Flt Lt Withers and his crew were preparing to head south on another Black Buck mission. This time during the early hours of the
12th they attacked Argentine positions to the south of Port Stanley airfield using radar fused 'air burst' 1000lb bombs.
During the previous day under the cover of darkness the Argentine Air Force C-130 Hercules transports had continued their re-supply missions. While the Etendard force had expended all its Exocet
missiles, the Argentines still had several ship based Exocet launchers fully operational and these were brought to the Islands mounted on a trailer. With one of these the defenders were able to
hit back at one of the Royal Navy ships that had been carrying out nightly naval bombardments of the Port Stanley area, and making life so miserable for those based there. Just before dawn on the
12th the Argentine troops fired a single missile, at a range of about 18 miles, at the destroyer HMS Glamorgan. The Missile struck Glamorgan hard in the stern,
and although the missile failed to detonate, it caused severe damage to the ships superstructure, destroyed the ships Wessex helicopter, killed thirteen and injured seventeen members of her crew.
The push towards Port Stanley begins today, with the first day's objectives of Mount Longdon, Two Sisters and Mount Harriet being achieved. 1(F) Sqn feel at home with their aircraft being tasked
for the familiar CAS role.
During the morning Flt Lt Boyens and Flt Lt Beech are tasked as a pair against an enemy gun position on the rear of Sapper Hill, which overlooks Port Stanley. Both aircraft attacked the target
area with CBUs although nothing was seen by either pilot. AAA was seen from the Moody Brook area and enemy troops were seen during the approach to the target on the road south of Mount William.
On the way out of the target area, full use of chaff and flares was made and this seemed to confuse the AAA coming from the area around Moody Brook.
During the afternoon four aircraft were tasked on two missions. The first mission, flown by Flt Lt Harper and Flt Lt Gilchrist, was for an armed recce of the road east of Mount Harriet. The pair
flew into the target area at low level from the south west. As they reached the target area troops in the open were seen and attacked with CBUs and 30mm cannon during a single pass. The pair
departed at low level and high speed to the south while deploying chaff and flares.
During the attack Flt Lt Harper's aircraft was hit by two small arms rounds and AAA splinters, which caused superficial damage to the port wing leading edge and airbrake.
The second mission of the afternoon was flown by Wg Cdr Squire and Flt Lt Macleod. Tasked as a pair against a 155mm gun position on Sapper Hill, both aircraft were each loaded with a brace of
CBUs. The pair flew into the target area at low level through the hills to the West, approaching Sapper Hill from close abeam Mount Harriet and Mount William. Smoke as seen coming from just south
east of the targets position and an attack was made with Cluster bombs, the target being damaged. During the attack, Flt Lt Macleod's aircraft was hit by shrapnel which penetrated the rear
equipment bay area of the aircraft and fractured the aft reaction control air pipe. On decelerating to the hover during the recovery, the bleed air at about 350 degrees Celsius was blasted from
the holed reaction control pipe, causing a fire to start in the rear equipment bay and smoke as seen coming from the aircraft. Flt Lt MacLeod decided to stay with the aircraft and executed a very
quick and professional landing on the Carriers deck. Having landed-on, the fire was quickly blanketed with foam by the ground crew.
Flt Lt Macleod was now beginning to have the regularity with which he was being hit weigh a little heavy. In his words "it was the third time on the trot my aircraft had been hit and that was
getting to be a bit tedious". He went onto say to his colleagues as he entered the ready room "this is getting past a joke!".
Many of the RN personnel on board HMS Hermes could not understand why the RAF Harriers were constantly coming back with holes in them of varying sizes, while the high flying
Sea Harriers were rarely getting even scratched. They seemed unable to appreciate what was meant "by going in low". Things finally came to a head and as a way of demonstrating the point a copy of
Flt Lt Hares 'Blowpipe Operator' on Mount Longdon was pinned to the wall in the Chief Petty Officers mess. After that the RN seemed to understand that when the RAF said "low" they meant "LOW".
Argentine air activity was very subdued during the day. One of the few Argentine missions was to attack the British positions near Darwin. With a mere two minutes to run to the target the
formation spotted, silhouetted against cloud, a pair of Sea Harriers. Their only means of defence was escape, and so jettisoning their weapons, weapon racks, and external fuel tanks, the aircraft
turned and accelerated for home, and safety.
Losses today:
Royal Navy
Wessex – 737 NAS – Off Port Stanley – Wrecked when Exocet missile hit the Destroyer HMS Glamorgan.
13th June
By first light today, and after fierce close quarter fighting, British forces controlled the majority of the high ground surrounding Port Stanley. During the day the troops regrouped and
re-supplied in preparation for a further large scale assault on the Argentine positions that night.
The Argentine air forces on the mainland launched a dozen aircraft in an attempt to stiffen the resolve of the slowly collapsing Argentine resistance by attacking British positions. The force
flew east across the Falklands to Port Stanley at low level before turning and heading west and attacked British positions at Mount Kent. The Argentine pilots could see camouflaged vehicles and
command positions, and even spotted a couple of helicopters on the ground. While aiming their weapons at the positions and the helicopters it initially appeared that they had taken the British
troops by surprise, but this was not to last long as they soon found themselves targeted by heavy but accurate small arms fire, mostly of rifle calibre.
The attack had indeed come as a surprise to the British and was only a small piece of luck away from inflicting a grievous mauling on the British ground forces command elements. The Argentines
had found and targeted the Headquarters of 3 Commando Brigade on the western slopes of Mount Kent, complete with General Moore, his staff, and all his unit commanders who were attending 'orders'
for the nights operations. The Argentines dropped parachute retarded bombs around the positions, but the majority fell harmlessly away from the troops, and most of the blast was absorbed by the
peaty ground that they dropped into. The only casualties were not human, a Gazelle and a Scout suffered some very minor damage which did not stop them operating.
At the same time four Skyhawks were carrying out a similar unsuccessful attack on the Parachute Regiment’s positions on Mount Longdon; again the only damage was a 30mm round going through an 846
NAS Sea King’s rotor blade, the crew called for a new blade to be delivered to them, which it was and within a couple of hours it had been manhandled into to place and the Sea King was flying
again.
By now FACs were in position on several of the hills overlooking the Argentine positions. Previous troubles with the FACs and the vagaries of the Naval tasking system, meant that so far the
Harriers GR.3s had not been able to deliver their Precision Guided Munitions. The major problem with the FACs was they had, in the past, lacked a fully charged battery to power their Laser Target
Marker equipment. Today that was all about to change, and at last 1(F) Sqn could utilise its new weapon and in the process become the first RAF Sqn to use LGBs in a conflict.
At around 14:30 Wg Cdr Squire took off from Hermes in the company of Flt Lt Hare. Squire’s aircraft was loaded with two 1000lb bombs converted to laser guidance, Hares aircraft was armed to give
mutual support and carried CBUs.
The Laser Guided Bombs were delivered in a similar toss bombing fashion to the weapons delivered by the Sea Harriers in the early days of the conflict, a low level approach at high speed followed
by a pull up at a pre calculated point and weapon release. The weapon climbed about 3000ft before dropping in a steep dive towards the target and was 'tossed' into an imaginary 'basket' produced
by the emissions of the Laser Target Marker. It should be remembered that prior to the conflict neither the pilots nor the FACs had ever practised the illumination or delivery of this type of
weapon; this was on the job training at its sharpest. With the target illuminated by Major Mike Howles, Wg Cdr Squire carried out his first attack on a company headquarters position, and the
weapon fell just short of its intended target location. Squire repositioned to attack the same target minutes later and carried out a second attack minutes later and this time scoring a direct
hit.
Later that day, Sqn Ldr Pook would attack an artillery position near to Mount Tumbledown with Flt Lt Beech flying cover for him. Pook scored a direct hit on the artillery position and destroyed
it with his first bomb, and narrowly missed the target with his second. Neither pilot saw any opposition during the mission although both heard 'Fledermaus' radar on their audio Radar Warning
Receivers.
Once again on the 13th June 1(F) Sqn had lived up to its motto of "in omnibus princes" which translates to "In All Things First".
There was drama that afternoon at 'Sid’s Strip', when the sole Chinook 'Bravo November' approached the strip and the powerful down wash lifted the alloy plates and threw them to one side. Once
again the strip was out of action for repairs, and at the worst possible time. Lt Thomas and Lt Hargreaves were just entering Falkland Sound on route to 'Sid’s Strip' to refuel, when they
received a radio call to 'return to mother', a proposition that was impossible to fulfil with only ten minutes of fuel remaining. With supreme speed the flight decks of
HMSFearless and HMS Intrepid, both anchored in San Carlos Water, were cleared and the Sea Harriers landed aboard to refuel, Thomas to Fearless and
Hargreaves to Intrepid. The Sea Harrier could not take off with two Sidewinders and its tanks full so both aircraft were only partially filled to give them sufficient fuel to get to
the strip once the required repairs had been carried out.
Just as the strip became operational again, an Air Raid Warning Red was sounded, and the once welcome Sea Harriers were now a liability to the ships and told to "Buzz off" as the decks were
needed for helicopters. Both Sea Harriers scrambled into the air and once airborne discovered that it was a false alarm, so landed at the strip to refuel before continuing their mission.
After dark, Canberra bombers of Groupo 2 returned to the islands, but not with out loss. One of the aircraft flown by Capt Pastran was engaged by Sea Dart missile from the Destroyer
HMS Exeter. Flying at about 40,000 and having just dropped their bombs on Mount Kent the aircraft was hit without warning by the Sea Dart. The Canberra went into a spin and Pastran
shouted to his navigator Capt Casado to eject but received no response. Having waited as long as he could Pastran ejected at about 6000 feet and fell into the sea, where he boarded his life raft.
With a northerly wind he was blown ashore after several hours on the northern coast of East Falkland.
Losses today:
Argentine Forces
Canberra – Groupo 2 – North of Port Stanley - Shot down by Sea Dart missile fired by the Destroyer HMS Exeter – Capt Pastran ejected, Capt Casado killed.
14th June
By dawn today Wireless Ridge, which overlooked the town of Port Stanley, was in British hands, but fierce fighting continued on and around the western slopes of Mount Tumbledown which was heavily
defended by the Argentine 5th Marine Battalion, against the forward pressure of the Scots Guards.
Throughout the day Scout helicopters of the Army Air Corps went about their dangerous business, of bringing forward ammunition and returning with casualties. During one of these missions Capt
Drennan of 656 Sqn Army Air Corps, picked up an injured member of the Scots Guards and a Member of the Gurka Rifles, from within the minor impediment of a minefield.
Drennan and his crewman returned to the Mountain six times to collect the wounded and take them to safety. At one point his helicopter was being fired over by the Scots Guards with M79 grenade
launchers at a sniper a mere 50 metres away from Drennan. He later remarked "I don’t know how he could have missed us – maybe all those grenades landing around him put him off a bit". After the
conflict for these and other missions Capt Drennan was awarded the Distinguished Flying Cross (DFC).
Later that morning Scout helicopters had a chance to go on the offensive for a change. Capt Greenhalgh accompanied by two Scouts of the Royal Marines ran in to attack Argentine positions to the
west of Port Stanley. Each helicopter carried four SS-11 anti tank, wire guided missiles, with a range of around 3,000 yards. Approaching the Argentine positions in line abreast the Scouts found
three bunkers and proceeded to place the missiles accurately into the bunkers. One of the bunkers contained a 105mm howitzer and this was thrown on its side by the missile as it entered and
detonated. However the Argentines did not put up with the impertinent interference of the Scouts for long and Artillery positions soon rained air burst shells on the area. Cpl Gammon, Capt
Greenhalgh’s crewman later commented "we decided it was time to make a tactical withdrawal". All three helicopters left the scene undamaged and their crews were uninjured.
By midday the weather over the islands was clearing sufficiently for 1(F) Sqn to launch Sqn Ldr Harris and Flt Lt Gilchrist to carry out further precision attacks with their Laser Guided weapons.
Harris’s Harrier was armed with two 1000lb LGBs, while Gilchrist's was armed with two CBUs to deliver follow up attacks if required.
At about 12:25hrs the pair arrived in the orbit at 30,000 feet over their target area of Wireless Ridge, and made radio contact with their controller before engaging their targets. As they called
in, the RAF liaison officer with General Moores Headquarters on Mount Kent Wg Cdr Trowern received a frantic message from Brigadier Thompson of 3 Brigade about the air strike:-
"For Christ’s sake hold it!.....the Argies are standing up on Sapper Hill and I think there’s a white flag……..yes there’s a white flag……….there’s another white flag…….it looks as though they’re
giving in. For Christ’s sake stop that attack!".
Wg Cdr Trowern told Lt Cdr Callaghan the Naval Liaison Officer to tell the Harriers to hold off and advise how long they could remain on station over their potential targets.
At 30,000 feet over Port Stanley it felt to Sqn Ldr Harris as if there was something odd going on that he was not party to. He held off his attack and then queried as to what was happening. He
received the reply "We think they’re giving in! At the moment we don’t want to do anything that might make them stop and change their minds". In the cruise at high altitude the Harriers had fuel
to remain on station for about 30 minutes, but after just 15 minutes they were ordered to stand down and return to the Carrier, with the news "for your information the people on the target you
were going for have already given in; and there’s a white flag over Stanley".
Sqn Ldr Harris and Flt Lt Gilchrist returned to HMS Hermes the bearers of the best sort of news that any fighting man can hear. The Harriers GR.3s of 1(F) Sqn would carry out
no more ground attack missions, but the Sea Harriers continued their Combat Air Patrols, and the GR.3s were soon re-equipped with Sidewinder missiles to join them.
Flt Lt Nick Gilchrist perhaps summed up this part of the day, and the beginning of the end of the conflict as a whole, the best: "We thought that this would be the most dangerous time.
Menendes and his troops on the Falklands had had enough and were giving in. But we thought it might just be the time for Galtieri to launch on last ditch air strike from the main land to show the
war was not really over".
"There was no victory Hooley, we just drifted out of the war".
15th June
By the 15th of June Argentinean forces in the Falkland Islands had surrendered unconditionally but the Task Force was poised and awaiting the mainland reaction. This would never materialise. The
major problem initially for the British would be the logistics of caring for the Prisoners of War of which there would appear to have been some 15,000. Many would have to make do with whatever
shelter they could find, as a consequence of the sinking of the Atlantic Conveyor which had carried among other things the tented accommodation and equipment destined for use
as a Prisoner of War facility.
During early July 1(F) Sqn would move ashore to the freezing comforts of a very austere base at Port Stanley where they would stand guard over the Falklands on Quick Reaction Alert with their
Sidewinder equipped Harrier GR.3s, while the Navy sailed home, and many felt their early return was for back slaps, medals and to claim all the glory. Indeed such was the Navy’s determination to
marginalise the RAF efforts in the air with its Harriers, and to disguise the fact that many of the Sea Harriers that had defended the fleet and shot down Argentine aircraft had in fact been
flown by RAF pilots, that when the Sea Harriers were flown off to their home base at RNAS Yeovilton efforts were made to ensure that the Navy Pilots were to the fore, to the extent that the one
RAF pilot that did make it ashore was sidelined and kept away from the assembled media.
The rotation plot indicated that 1(F) Sqn would remain until mid-August with the first down south going back to the UK in mid-July. There would be no shortage of anger within the Sqn when no
sooner had the first personnel home come back off two weeks leave than they were warned that they would be returning to the Falklands shortly. This rankled with 1(F) Sqn as the already overmanned
RAF Germany Sqns were demonstrating their inability within the Harrier community to be team players and release aircrew to the Southern detachment.
The conflict was short at 75 days from start to finish, and was fought using only a small proportion of either sides armed forces, in the main relying on what forces either side could carry to,
and sustain, there.
In the air the forces were further limited. For the British this limited its aircraft based in the combat zone to those that could take off and land vertically on the decks of ships. This limited
the force to a combined Sea Harrier and Harrier GR.3 total of 34 aircraft and a total of 172 assorted helicopters from all three services. Due to the limited number of tanker aircraft available
only one air refuelled operational sortie from Ascension Island could be placed into the combat zone each day. For the Argentines the geography of the conflict also limited her air forces to
those who could operate from her Carrier, the 25th De Mayo, those aircraft with a combat radius of about 450 miles, light attack and helicopters based in theatre on the Falklands
and a few transports and converted light executive jets, making a total of 256 in all. When looking at the operations flown by these aircraft the only really intensive flying days were the 1st ,
21st , 23rd , 24th , & 25th May, and the 8th June.
The conflict was unique in several ways, in that it was the first to have air operations conducted over distances that were greater than ever before and even today stand the test of time for
distance and duration. It was the first time that air to air refuelling made a regular impact on both sides operational capabilities. It saw the first combat use of a short take off and landing
jet aircraft, the first time a ground force on the advance had been almost totally logistically re-supplied by a helicopter fleet, and was the first time that the sea skimming missile was used
against warships.
The Sea Harrier performed particularly well and raised its profile to a level it might not have previously expected. With only a force of 25 aircraft they took on an enemy force of almost three
times more, and in air combat recorded a kill rate with 30mm cannon and Sidewinder missile of 23 for the loss of none. It is unsurprising to find that in the media fed frenzy prior to the arrival
of the Task Force in foreign waters, much was made of the Harriers ability to 'VIFF' or thrust Vectored in Forward Flight. It is therefore something of a let down to many editors that in all the
air combat in the Falklands conflict the Sea Harriers never used this capability at all. It is further very surprising to learn that the Sea Harrier never actually performed an intercept using
its onboard radar, but was vectored to targets by control ships using principles that would have been understood by pilots from a very different era just over 40 years earlier during the Battle
of Britain. One very interesting facet of the air combat experienced by the Sea Harrier is that the American AIM-9L Sidewinder all aspect heat seeking missile performed just the way it was stated
it would in the manufacturer’s brochure.
The Harrier GR.3s of 1(F) Sqn also came out of the conflict well. They arrived in theatre and for many their first deck landing was as they arrived on board HMS Hermes, from where
they would carry out a total of 126 missions. Often derided, by certain quarters, due to its small size when compared to other ground attack types the Harrier GR.3 was regarded as a bit of
curiosity rather than a serious attack platform. The Falklands conflict silenced those doubters, indeed all things being equal it could be argued that a small well piloted aircraft like the
Harrier meant it took less hits than its larger counterparts, it was well camouflaged, and its engine was relatively smoke free, which combined with the terrain masking tactics that 1(F) used
made for a hard to spot target for the enemy. It demonstrated the ability to take battle damage and continue flying and there is no evidence to show that a Harrier was lost to enemy action when a
comparable ground attack aircraft would have survived similar damage. It is also a credit to the talents and hard work of the RAF engineers that when an aircraft was hit, such as Squires taking a
rifle calibre round through the cockpit which destroyed wiring or the devastating fire to Macleod’s aircrafts avionics bay caused by a damaged Reaction Control Vent hot air pipe, that there was
no occasion where an aircraft was not available for tasking again within three days having been repaired using only the ships resources.
If any criticism were to be pointed at the Harrier ground attack operations during the conflict this would have to come from the direction of poor operational planning and the almost total lack
of understanding of the use of tactical reconnaissance and intelligence to select targets by the controlling authority, the Royal Navy. They again and again sent RAF Harriers to attack targets
that were either ill defined, unsuitable, and in several cases just not there! There is an old Army adage that states "Time spent on reconnaissance is seldom wasted", this is particularly true of
ground attack operations.
It is clear that had more pure reconnaissance missions, as opposed to the RN love of the "Armed Reconnaissance" mission which were useless to the point of being a waste of valuable fuel, been
flown then targets of higher tactical and strategic value could have been identified which could have then been attacked in 'set piece' Close Air Support missions as demonstrated by the
successful 1(F) Sqn dusk three aircraft attack on the 35mm Anti Aircraft gun positions at Goose Green.
The Harrier GR.3s also received several modifications to operate on board ship, including the Ferranti FINRAE equipment, 'Blue Eric' electronic countermeasures pod, ALE 40 chaff and flare
dispensers, and a fit for Shrike Anti Radar Missiles. Some were more successful than others. The FINRAE equipment that was supposed to align the Harriers Inertial Navigation system often
malfunctioned and occasionally led to the aircraft having no head up display at vital moments. The 'Blue Eric' countermeasures pod was a limited success but demonstrated just what could be
achieved by the Forces and industry when 'needs must'. The ALE 40 Chaff and Flare dispenser was a popular addition and on several occasions was used to outwit radar systems trying to lock on to
the aircraft. A major problem during the conflict was the operation and use of the Identification Friend or Foe (IFF) system fitted to the Harrier. This piece of equipment was so unreliable as to
be useless and force the fixed wing pilots to return to the Carriers through the Task Forces Missile Engagement Zone (MEZ) with no identifiers of who they were except for approaching at a speed
below 250 knots, hardly a speed to be flying in a hostile environment! It is interesting to note that having had this experience and identified a requirement, that just eight short years later
aircraft of the Royal Air Force would take part in Operation Desert Shield/Storm with IFF equipment that was just as unreliably dangerous.
One of the crowning achievements of 1(F) Sqn must be the delivering of Precision Guided Munitions for the first time by a RAF aircraft during a combat situation. This is all the more noteworthy
when one considers the fact that the Sqn learnt to use the weapons in a conflict environment, that in peace time would have taken moths of planning and preparation. This was not with out its
hiccups though, as the Sqn had been told initially that the Harriers Laser Rangefinder and Marked Target Seeker (LRMOUNTS) could be used for the purpose of designating the bombs target. It was
only after several unsuccessful sorties that the information filtered through from the UK that this was not actually possible, and that the target had to be designated from the ground. Due to the
poor target planning by the controlling authority, the Royal Navy, several attempts by 1(F) to use the weapons were frustrated by time on targets being missed, changed or notified way to late to
be able to get to the position, this was compounded by the Laser Target Marker being 'battery hungry' and on a couple of occasions the targets could not be designated due to flat batteries.
Several other innovations were deployed during the conflict for the first time and some were rather 'Heath' Robinson’ to get the capability in service as quickly as possible. The Vulcan got back
its re-fuelling probe, and along with the Victor tanker was fitted with 'Omega' and 'Carousel' navigation aids. The Vulcan was also fitted with under wing pylons to carry the Shrike Anti
Radiation Missile, and the ALQ101 Electronic Countermeasures pod. The Nimrod received a probe and a twin Sidewinder missile rail under each wing for self defence, and to engage the troublesome
Argentinean Boeing 707 recce aircraft if they were encountered. The Hercules received a re-fuelling probe and several were converted to single point drogue refuellers for self supporting
operations by the Hercules fleet and later fast jet operations from the Islands themselves.
1(F) Sqn lost four aircraft during the conflict, three as a result of ground fire and one as a result of an operational accident at the forward operating strip at Port San Carlos, and were to
consider themselves lucky that they suffered no fatalities.
Flt Lt Geoff Glover ejected from XZ972
Sqn Ldr Bob Iveson ejected from XZ988
Wg Cdr Peter Squire crashed landed in XZ989
Sqn Ldr Jerry Pook ejected from XZ963
Others on both sides were not so lucky, and many men would not see there homeland again. It is somewhat disturbing, 25 years on, to think that the Sabre rattling of Argentina over sovereignty
continues to this day, requiring a continued alert presence in the Falkland Islands by the present members of all three services of Her Majesties Armed Forces.
Let us hope that today’s diplomacy will be more effective than that which failed in the dark days of 1982.
The South Atlantic Harrier and Aircrew Roll of Honour
The following documents the Pilots and Harrier GR.3 airframes of 1(F) Sqn, and the Pilots and Sea Harriers of 800, 801 and 899 NAS that, embarked on HMS Hermes and
HMS Invincible saw service in the South Atlantic during the re-taking of the Falkland Islands as part of Operation CORPORATE.
The Pilots of 1(F) Squadron
Wg Cdr Peter Squire (OC)
Sqn Ldrs Bob Iveson, Peter Harris and Jeffrey Pook
Flt Lts Mike Beech, Ross Boyens, Nick Gilchrist, Jeff Glover, Mark Hare, Tony Harper, Murdo MacLeod, and John Rochfort,
The BAe Harrier GR.3
XV762
ALE-40 chaff dispensers fitted. Arrived in theatre by ship to late for combat but remained on the Islands until 20/8/83 when the 'Hardet' became 1453 Flt
XV778
Flew directly from Ascension to Hermes piloted by Flt Lt Murdo MacLeod
The cockpit wiring was severely damaged by small arms fire whilst being flown by Flt Lt Murdo MacLeod in a CBU attack on Port Stanley on 10/6/82.
The aircraft was disembarked to RAF Stanley on 4/7/82, remaining on the islands until 20/8/83 when 'Hardet' became 1453 Flt
XV789
ALE-40 not fitted.
Embarked on Atlantic Conveyor on 6/5/82.
Flown off to Hermes, on 18/5/82 piloted by Flt Lt John Rochfort.
Damaged whilst being flown by Wg Cdr Squire during a rocket attack in the Port Stanley area on 31/5/82. Repairs and the only engine change of the war completed aboard HMS Hermes.
Returned to Gutersloh and IV(AC) Sqn before 'Hardet' became 1435 Flt
XW767
Arrived in theatre by ship to late for combat but remained on the Islands until 6/11/82 when it crashed into the sea off Cape Pembroke after engine failure Wg Cdr Squire (who had returned to the
Islands) ejected safely.
XW919
Flew from Wittering to St Mawgan and then on to Wideawake Airfield Ascension Island arriving on 5/5/82. Damaged by small arms fire whilst being flown by Flt Lt Murdo MacLeod in an attack on
Sapper Hill on 12/6/82, part of the rear fuselage catching fire on finals to HMS Hermes. The aircraft landed safely, the fire extinguished and the aircraft was repaired but took no
further part in the conflict.
The aircraft sailed for the UK on 13/7/82 having transferred to the transport ship Contender Bezant, arriving at Wittering on 2/8/82.
XW924
Arrived in theatre by ship to late for combat but remained on the Islands until returning to Wittering on 11/1/83 aboard a Heavylift Shorts Belfast having been shipped to Ascension.
XZ129
Arrived in theatre by ship to late for combat but remained on the Islands until returning to Wittering on 26/1/83 aboard a Heavylift Shorts Belfast having been shipped to Ascension.
XZ132
04.05.82 - flown from Wittering to St Mawgan and from there from on 5/5/82 to Banjul then Wideawake Airfield Ascension Island on 6/5/82. The aircraft suffered from incurable fuel leaks; and was
returned to Wittering but the exact date is unknown.
XZ133
It was flown directly from Ascension to Hermes by Flt Lt Mike Beech on 3/6/82.
Flown by Flt Lt Nick Gilchrist it flew on 1(F) Sqn's last sortie of the war, accompanying Sqn Ldr Peter Harris. The attack on Sapper Hill was called off by the FAC when white flags were seen in
Port Stanley. The aircraft disembarked to RAF Stanley to join the shore detachment on 4/7/82 but was to suffer Cat 4 damage on 28/7/82 when a portable hangar collapsed in bad weather on top of
it. Airlifted by Chinook onto HMS Invincible to return to the UK on 25/8/82, it was airlifted off the carrier to Culdrose on 16/9/82 finally returning home to Wittering on
13/10/82.
XZ963
ALE-40 not fitted.
The aircraft was embarked on Atlantic Conveyor on 6/5/82 being flown off to HMS Hermes, on the 19/5/82, the fifth Harrier to land on the carrier and piloted by Flt Lt Tony
Harper.
The aircraft was hit by small arms fire whilst searching for helicopters reportedly near Port Stanley on 30/5/82; Sqn Ldr Jerry Pook noted that fuel was leaking and was forced to eject some 30
miles short of HMS Hermes.
XZ972
ALE-40 not fitted
The aircraft was embarked on Atlantic Conveyor on 6/5/82 being flown off to HMS Hermes, on the 18/5/82, the first Harrier to land on the carrier and piloted by Wg
Cdr Peter Squire. On 21/5/82 this aircraft became 1(F) Sqn's first casualty, Flt Lt Jeff Glover being hit by a Blowpipe missile whilst on a solo armed reconnaissance over Port Howard. Flt Lt
Glover ejected safely, becoming a PoW and was released on 08.07.82.
XZ988
The aircraft was embarked on Atlantic Conveyor on 6/5/82 and flown off to HMS Hermes on the 18/5/82, the fourth Harrier to land on the carrier and piloted by Sqn Ldr Pete
Harris. The aircraft was flown by Sqn Ldr Bob Iveson in support of 2 Para's advance at Goose Green on 27/5/82, hit by AAA on it third attack run, Sqn Ldr Iveson ejected safely and avoided capture
until picked up three days later.
XZ989
The aircraft was embarked on Atlantic Conveyor on 6/5/82 and flown off to HMS Hermes on the 20/5/82, the sixth Harrier to land on the carrier and piloted by
Flt Lt John Rochfort. On 8/6/82 the aircraft suffered a loss of power whilst going around at Port San Carlos FOB, the aircraft hit the strip hard and skidded to a halt, its pilot Wg Cdr Peter
Squire being shaken but unhurt. Damaged beyond the resources of the local Battle Damage Repair team it was used as a spares resource; ultimately returning to Wittering on 23.11.82, eventually
being classified CAT.5. (destroyed).
XZ992
ALE-40 chaff dispensers fitted.
It was flown directly from Ascension to HMS Hermes on 8/6/82 by Flt Lt Nick Gilchrist. It disembarked from Hermesto RAF Stanley on 4/7/82 to join the shore
detachment, returning to Wittering by Heavylift Shorts Belfast on 16.11.82 after being shipped to Ascension.
XV997
The aircraft was embarked on Atlantic Conveyor on 6/5/82 and flown off to HMS Hermes 18/5/82, the third Harrier to land on the carrier and piloted by Sqn Ldr
Jerry Pook.
On returning from an armed reconnaissance over San Carlos on 21/5/82 the aircraft was landed by Flt Lt John Rochfort too close to the edge of the deck and ended up with its port-outrigger in the
catwalk; it was recovered undamaged and was being flown again a few hours later. On the 13/6/82 the aircraft carried out the first successful LGB sortie when Wg Cdr Peter Squire attacked a
Company HQ on Mount Tumbledown, scoring a direct hit with his second bomb.
While being flown by Sqn Ldr Peter Harris on 14/6/82 it flew 1(F) Sqn's last sortie of the war. The attack on Sapper Hill was called off the FAC when white flags were seen in Port Stanley, the
two Harriers returning to the ship with their loads intact at 16:25Z.
On the 4/7/82 the aircraft disembarked to RAF Stanley to join the shore detachment, and returned to Gutersloh and IV(AC) Sqn sometime before 20/8/83.
And Finally……………..
It may be of interest to note that the two Harrier GR.3s that flew the last 1(F) Sqn mission of the conflict over Wireless Ridge are both safely preserved for posterity. XZ133 is in the safe
hands of the Imperial War Museum at Duxford and XZ997 is displayed in the 'Milestones of Flight' hall at the Royal Air Force Museum Hendon.
The fate of the other aircraft is however not such good reading
XV762 - Crashed in Lafonia, an area of the Falkland Islands, on 19/11/83 while serving with 1453 Flight.
XV789 - Went to RAF Bruggen for BRDT, the date is not known.
XW767 - Crashed off Cape Pembroke, on 6/11/82 while with the 'HarDet'.
XW919 - Passed to SFDO, RNAS Culdrose date not known.
XW924 - Went to RAF Laarbruch for BDRT date not known.
XZ129 - Passed to RNAS Yeovilton for ground use.
XZ989 - Returned to RAF Gutersloh and used for ground instructional training as 8849M, date not known.
XZ992 - Crashed near Port Stanley, on 29/11/82 after a bird strike, while serving with 1453 Flight.
BAe Sea Harrier FRS.1
The following is a list of the Fleet Air Arm Pilots and their Sea Harrier FRS.1 aircraft that took part in the recovery of The Falkland Islands during Operation Corporate:
HMS Hermes Air Group
800 NAS Pilots
Lt Cdrs Andy Auld (CO), Mike Blissett and Rod Frederiksen
Lts Mike Hale, Simon Hargreaves, Andy McHarg, Clive Morrell, Dave Smith and Nick Taylor and Flt Lt Ted Ball.
899 NAS Pilots
Lt Cdrs Neil Thomas (CO), Tony Ogilvy and Gordon Batt,
S/Lt Andy George, Flt Lts Dave Morgan and Robert Penfold.
HMS Invincible Air Group
801 NAS Pilots
Lt Cdrs Nigel 'Sharkey' Ward (CO), Doug Hamilton
Lts Charlie Cantan, Alan Curtis, Brian Haigh and Steve Thomas and Flt Lt Ian Mortimer
899 NAS Pilots
Lt Cdrs Robin Kent, John Eyton-Jones and Mike Broadwater
Flt Lt Paul Barton and Lt Mike Watson.
From all of the names above, those of Alan Curtiss, John Eyton-Jones and Nick Taylor stand above the rest; for having given their lives during the conflict, they have given all a man can in
defence of something he truly believes in.
The Sea Ha
 Pilotos de la FAA, por su audacia y bravía,
no habrá quien los iguale jamás.
Pilotos de la FAA, por su audacia y bravía,
no habrá quien los iguale jamás.
 By 3 April 1982, Anthony
Parsons, Britain's delegate to the UN, had shepherded through the UN's Security Council Resolution 502. That called for Argentina's immediate removal of its
armed forces from the Falklands as a condition precedent to negotiation about Falklands' future sovereignty. Parson's brilliant diplomacy at the UN, a bare few
hours after the Argentina's invasion, put the Falklands center stage in world affairs and convinced a heterogeneous assortment of 3rd world, industrialized and
non English speaking states to oppose in public the junta's military adventurism. Parson's diplomatic triumph was complete. Absent Argentina's removal of its
military forces Britain could now take military steps to retake the Falklands.The Soviet Union failed to veto the British resolution and non-aligned states
mutely resisted the Argentinean ambassador's pleas for their help. Much to the surprise of Argentina's foreign office settlement of border disputes by armed
force was not a precedent modern nation states could stomach. The reasons were clear. Even passive approval of Argentina's invasion would condone military
initiatives almost anywhere else along the Amur River for example where China and the Soviet Union contested in a not always cold war(10). Thenceforth
Argentina's diplomacy remained tentative and defensive.
By 3 April 1982, Anthony
Parsons, Britain's delegate to the UN, had shepherded through the UN's Security Council Resolution 502. That called for Argentina's immediate removal of its
armed forces from the Falklands as a condition precedent to negotiation about Falklands' future sovereignty. Parson's brilliant diplomacy at the UN, a bare few
hours after the Argentina's invasion, put the Falklands center stage in world affairs and convinced a heterogeneous assortment of 3rd world, industrialized and
non English speaking states to oppose in public the junta's military adventurism. Parson's diplomatic triumph was complete. Absent Argentina's removal of its
military forces Britain could now take military steps to retake the Falklands.The Soviet Union failed to veto the British resolution and non-aligned states
mutely resisted the Argentinean ambassador's pleas for their help. Much to the surprise of Argentina's foreign office settlement of border disputes by armed
force was not a precedent modern nation states could stomach. The reasons were clear. Even passive approval of Argentina's invasion would condone military
initiatives almost anywhere else along the Amur River for example where China and the Soviet Union contested in a not always cold war(10). Thenceforth
Argentina's diplomacy remained tentative and defensive.
 The seismic forces that split
South America from Africa eons ago forced layers of material upwards from the earth's crust; a few broke the oceans' surface. One such is South Georgia, a
mountainous mass of 1450 sq. miles shaped like a North West to South East hot dog, half permanently covered in ice. Although a merchant captain, de la Roche,
may have sighted the island in 1675 Captain James Cook RN in Resolution was first to set foot on it. He named that desolate mass and claimed it for the crown
on January 17,1775. At 54 deg S and 36 deg W South Georgia falls victim to some of the world's worst weather. "The wild rocks raised their lofty summits till
they were lost in the clouds and the valleys laid buried in everlasting snow. Not a tree or shrub was to be seen, no not even big enough to make a toothpick. I
landed in three different places and took possession of the country in his Majesty's name under a discharge of arms(13)." Until the late 20th century no one
else coveted the island and the name and ownership stuck.
The seismic forces that split
South America from Africa eons ago forced layers of material upwards from the earth's crust; a few broke the oceans' surface. One such is South Georgia, a
mountainous mass of 1450 sq. miles shaped like a North West to South East hot dog, half permanently covered in ice. Although a merchant captain, de la Roche,
may have sighted the island in 1675 Captain James Cook RN in Resolution was first to set foot on it. He named that desolate mass and claimed it for the crown
on January 17,1775. At 54 deg S and 36 deg W South Georgia falls victim to some of the world's worst weather. "The wild rocks raised their lofty summits till
they were lost in the clouds and the valleys laid buried in everlasting snow. Not a tree or shrub was to be seen, no not even big enough to make a toothpick. I
landed in three different places and took possession of the country in his Majesty's name under a discharge of arms(13)." Until the late 20th century no one
else coveted the island and the name and ownership stuck.
 Pitiless weather and jagged
topography, many mountains surpass five thousand feet, make the island impassable for most of its length to all but the most intrepid. Storms with 100 MPH
winds are common. Violent downdrafts swoop from peaks down to ground level with little warning and savage one part of the island while leaving others in frigid
calm. Ice bergs calved from sheer cliffs compete in size and menace with their larger cousins floating up from the Antarctic. Because these formations do not
always show on radar screens navigation inshore, especially at night when chunks of ice slink in unnoticed, is a hazardous affair. Rubble from the wind scoured
mountain sides renders them unstable underfoot. Climbers are few. Trees do not grow. Tussock grass feeds rats and a few thousand reindeer while seals, penguins
and a few dozen species of bird live off the riches of the sea.
Pitiless weather and jagged
topography, many mountains surpass five thousand feet, make the island impassable for most of its length to all but the most intrepid. Storms with 100 MPH
winds are common. Violent downdrafts swoop from peaks down to ground level with little warning and savage one part of the island while leaving others in frigid
calm. Ice bergs calved from sheer cliffs compete in size and menace with their larger cousins floating up from the Antarctic. Because these formations do not
always show on radar screens navigation inshore, especially at night when chunks of ice slink in unnoticed, is a hazardous affair. Rubble from the wind scoured
mountain sides renders them unstable underfoot. Climbers are few. Trees do not grow. Tussock grass feeds rats and a few thousand reindeer while seals, penguins
and a few dozen species of bird live off the riches of the sea.
 Thatcher ordered Admiral
Fieldhouse on 7 April 1982 to reestablish British presence on South Georgia(15). The order was based on a false premise because British subjects, members of
the British Antarctic Survey, remained at large in several posts around the island. A backward look at British military policy in the 1970's is needed here. It
must be recalled that the costs of maintaining large ground and air forces on NATO's central front and ballistic missile submarines at sea had foreclosed solo
British operations outside Europe. The men, equipment and planning for such ventures simply did not exist. Successive governments and their Treasuries had not
given the Ministry of Defense enough resources to match commitments, a free Falklands for example, that the Foreign and Commonwealth Office had kept in place.
As a consequence the fragile command and control structure for the forces intended to seize the Falklands was an unpracticed expedient. The recapture of South
Georgia burdened an embryonic organization, itself unsure of its specific goal and the means at hand to achieve it, with a task that had not been tried since
WW2, the expulsion of invaders from British territory(16).
Thatcher ordered Admiral
Fieldhouse on 7 April 1982 to reestablish British presence on South Georgia(15). The order was based on a false premise because British subjects, members of
the British Antarctic Survey, remained at large in several posts around the island. A backward look at British military policy in the 1970's is needed here. It
must be recalled that the costs of maintaining large ground and air forces on NATO's central front and ballistic missile submarines at sea had foreclosed solo
British operations outside Europe. The men, equipment and planning for such ventures simply did not exist. Successive governments and their Treasuries had not
given the Ministry of Defense enough resources to match commitments, a free Falklands for example, that the Foreign and Commonwealth Office had kept in place.
As a consequence the fragile command and control structure for the forces intended to seize the Falklands was an unpracticed expedient. The recapture of South
Georgia burdened an embryonic organization, itself unsure of its specific goal and the means at hand to achieve it, with a task that had not been tried since
WW2, the expulsion of invaders from British territory(16).
 Though best
suited for the job, Sheridan's absence from Vaux' command as it organized itself for the attack on Falklands deprived his unit and 3 Commando Brigade of a
critical human asset. Vaux sensed that invasion of the Falklands, if it came to that, would be a boots in the mud affair and that victory would hang on basic
soldiering in the wet and cold rather than on the high-tech gadgetry bought for combat on the North European plain. Vaux' 2nd in command fit Preston's
requirements precisely. Sheridan, son and grandson of Indian Army officers, was the quintessential field grade infantry officer. He had entered the Royal
Marines at age eighteen, received his commission and led troops in Aden, Borneo, Malaya, Oman and in the UK. He was a graduate of Camberly Staff College and
had helped to organize and train a Commando for the Imperial Iranian Navy. A world class mountaineer and skier, he had been a member of the British Olympic
Biathon team from 1969 to 1972.
Though best
suited for the job, Sheridan's absence from Vaux' command as it organized itself for the attack on Falklands deprived his unit and 3 Commando Brigade of a
critical human asset. Vaux sensed that invasion of the Falklands, if it came to that, would be a boots in the mud affair and that victory would hang on basic
soldiering in the wet and cold rather than on the high-tech gadgetry bought for combat on the North European plain. Vaux' 2nd in command fit Preston's
requirements precisely. Sheridan, son and grandson of Indian Army officers, was the quintessential field grade infantry officer. He had entered the Royal
Marines at age eighteen, received his commission and led troops in Aden, Borneo, Malaya, Oman and in the UK. He was a graduate of Camberly Staff College and
had helped to organize and train a Commando for the Imperial Iranian Navy. A world class mountaineer and skier, he had been a member of the British Olympic
Biathon team from 1969 to 1972.
 Young
and Sheridan, the land force commander, faced unique problems that had little to do with their Argentinean opponents. The efficacy of a system to command,
control and communicate with a patch work force operating 8000 miles from London was unproven and questionable because the British military had trained for
years almost exclusively to fight a NATO war in concert with US and German allies. Staffs, logistics and battle plans, communications' links, weapons'
purchases, training and intelligence efforts were aimed at convincing Soviet leaders that an attack by the Warsaw Pact would fail and that in the event their
tank armies would be destroyed. The logistics of fighting an air, land and sea war 8000 miles from London had never been seriously pondered. The Royal Navy was
not prepared to fight a battle whose loss could sunder the Anglo-American relationship that Britain's seaborn nuclear deterrent was meant to preserve. No
standing orders existed to fight a war that involved amphibious landings a few hundred miles north of the Antarctic circle. As it turned out, neither 3
Commando Brigade nor its follow on 5 Infantry Brigade knew best how to load their gear for an amphibious assault i.e. stow the most needed equipment on top and
the least necessary on the bottom. Priceless training time, was lost in reloading both amphibious and supply ships at Ascension Island and on the run south.
For that matter success in Paraquat and in the whole Falklands venture hung more on the intelligence, courage and drive of rather junior infantry officers and
their NCOs than on staffs' directives.
Young
and Sheridan, the land force commander, faced unique problems that had little to do with their Argentinean opponents. The efficacy of a system to command,
control and communicate with a patch work force operating 8000 miles from London was unproven and questionable because the British military had trained for
years almost exclusively to fight a NATO war in concert with US and German allies. Staffs, logistics and battle plans, communications' links, weapons'
purchases, training and intelligence efforts were aimed at convincing Soviet leaders that an attack by the Warsaw Pact would fail and that in the event their
tank armies would be destroyed. The logistics of fighting an air, land and sea war 8000 miles from London had never been seriously pondered. The Royal Navy was
not prepared to fight a battle whose loss could sunder the Anglo-American relationship that Britain's seaborn nuclear deterrent was meant to preserve. No
standing orders existed to fight a war that involved amphibious landings a few hundred miles north of the Antarctic circle. As it turned out, neither 3
Commando Brigade nor its follow on 5 Infantry Brigade knew best how to load their gear for an amphibious assault i.e. stow the most needed equipment on top and
the least necessary on the bottom. Priceless training time, was lost in reloading both amphibious and supply ships at Ascension Island and on the run south.
For that matter success in Paraquat and in the whole Falklands venture hung more on the intelligence, courage and drive of rather junior infantry officers and
their NCOs than on staffs' directives.
 Loadout for Operation Paraquat was a
microcosm of the Falklands campaign. Sheridan's force was split immediately because no one ship in Young's squadron could carry all the personnel and their
kit. Most of M Company, the core assault force, went to RFA Tidespring, a tanker, while the mortar crews, communicators, medics and naval gunfire support team
went with Sheridan to HMS Antrim. Tidespring was put in the unenviable position of carrying volatile fuels and live ammunition with the immediate prospect of
unloading both in rough seas. By 13 April 1982 Captain Young had been told what Sheridan knew informally: that three troops of D Squadron, about sixty men with
its command element, would join his force. Through the heroic efforts of both crew and the on board marines Air Troop and Mobility Troop along with Major
Delves and their great amount of kit were made safe aboard Antrim. Captain John Hamilton and his Mountain Troop went aboard Plymouth. Delves had black box
communications with SAS headquarters that Sheridan did not see. It was clear that the unrequested SAS manning imposed upon Sheridan had the potential of making
Operation Paraquat an SAS operation dispite the fact that he was the nominal commander of the landing force. Unity of command was to be observed in the breach.
Loadout for Operation Paraquat was a
microcosm of the Falklands campaign. Sheridan's force was split immediately because no one ship in Young's squadron could carry all the personnel and their
kit. Most of M Company, the core assault force, went to RFA Tidespring, a tanker, while the mortar crews, communicators, medics and naval gunfire support team
went with Sheridan to HMS Antrim. Tidespring was put in the unenviable position of carrying volatile fuels and live ammunition with the immediate prospect of
unloading both in rough seas. By 13 April 1982 Captain Young had been told what Sheridan knew informally: that three troops of D Squadron, about sixty men with
its command element, would join his force. Through the heroic efforts of both crew and the on board marines Air Troop and Mobility Troop along with Major
Delves and their great amount of kit were made safe aboard Antrim. Captain John Hamilton and his Mountain Troop went aboard Plymouth. Delves had black box
communications with SAS headquarters that Sheridan did not see. It was clear that the unrequested SAS manning imposed upon Sheridan had the potential of making
Operation Paraquat an SAS operation dispite the fact that he was the nominal commander of the landing force. Unity of command was to be observed in the breach.
 BAS members who had
been to Fortuna Glacier insisted to Delves and to Hamilton that Fortuna was virtually impassable especially with winter just breaking. Sheridan, an experienced
Himalyan climber who had been head of the Royal Marines Mountain and Arctic Cadre joined the voices raised against landing on the glacier(32). Other opponents
of this venture, crew and pilots from Endurance who had foot on the ground experience on South Georgia, argued that crevasses as big as London buses made it
virtually certain that the SAS men could not drag their pulks (sleds) any meaningful distance even in fair weather(33). If a storm broke, as was likely now
that winter had just begun, Hamilton's men would have no choice but to hunker down for an unpredictable period perhaps more than the five days allocated for
the reconnaissance. The pragmatic pessimists did not sway him and he sought affirmative advice where he knew he could find it. Delves went aboard Endurance and
used its satellite communications to speak with two very experienced Himalyan climbers, Stokes and Peacock, at SAS Headquarters in Britain who advised Hamilton
and Delves that Fortuna Glacier could be conquered. Peacock later said he would not have gone against Sheridan's judgment if he had known that it was indeed
Sheridan who opposed taking that route(34). In the end Major Delves and Captain Hamilton decided to lift mountain troop onto Fortuna Glacier.
BAS members who had
been to Fortuna Glacier insisted to Delves and to Hamilton that Fortuna was virtually impassable especially with winter just breaking. Sheridan, an experienced
Himalyan climber who had been head of the Royal Marines Mountain and Arctic Cadre joined the voices raised against landing on the glacier(32). Other opponents
of this venture, crew and pilots from Endurance who had foot on the ground experience on South Georgia, argued that crevasses as big as London buses made it
virtually certain that the SAS men could not drag their pulks (sleds) any meaningful distance even in fair weather(33). If a storm broke, as was likely now
that winter had just begun, Hamilton's men would have no choice but to hunker down for an unpredictable period perhaps more than the five days allocated for
the reconnaissance. The pragmatic pessimists did not sway him and he sought affirmative advice where he knew he could find it. Delves went aboard Endurance and
used its satellite communications to speak with two very experienced Himalyan climbers, Stokes and Peacock, at SAS Headquarters in Britain who advised Hamilton
and Delves that Fortuna Glacier could be conquered. Peacock later said he would not have gone against Sheridan's judgment if he had known that it was indeed
Sheridan who opposed taking that route(34). In the end Major Delves and Captain Hamilton decided to lift mountain troop onto Fortuna Glacier.
 By now a reconnaissance operation
had degenerated into an odds against rescue operation. Stanley had few assets: a battered helicopter, the only Wessex left, and two hours of daylight to fly
through awful weather in order to rescue sixteen men in terminal condition. Taking a new route to the glacier he found the survivors huddled inside inflated
rafts used as tents and landed, the last hope for rescue that day. As the weather worsened he piled in all sixteen men --- the SAS men reluctantly left their
kit and weapons except for sidearms --- and took off fifteen hundred pounds above the helicopter's maximum design weight. Stanley made his way back to Antrim,
his sixth trip from Fortuna Glacier, and landed on Antrim's pitching deck in a controlled crash.
By now a reconnaissance operation
had degenerated into an odds against rescue operation. Stanley had few assets: a battered helicopter, the only Wessex left, and two hours of daylight to fly
through awful weather in order to rescue sixteen men in terminal condition. Taking a new route to the glacier he found the survivors huddled inside inflated
rafts used as tents and landed, the last hope for rescue that day. As the weather worsened he piled in all sixteen men --- the SAS men reluctantly left their
kit and weapons except for sidearms --- and took off fifteen hundred pounds above the helicopter's maximum design weight. Stanley made his way back to Antrim,
his sixth trip from Fortuna Glacier, and landed on Antrim's pitching deck in a controlled crash.
 2 SBS came
south on Endurance and it was their turn to reconnoiter Sheridan's possible landing sites from south of Leith and Grytviken ie from across Cumberland East Bay.
Hound Bay, at the seaward neck of Barff Peninsula, was the insertion point for three SBS patrols. They were to make their way on foot half way up the
peninsula, pick up two Gemini rafts dropped from helicopters and cross the bay to Brown Mountain. That low mountain was one of the two pieces of vital ground
whose seizure was necessary for any attack on Grytviken. The mountain also provided a point from which Argentinean activity, if any, could be closely
scrutinized. That two BAS men, Myles Plant and Tony North lived in the proposed patrol area and had seen no Argentine military activity did not deter the SBS
leader from mounting his operation. He was of course safe from superiors' direct advice and criticism because Sheridan and Young were on Antrim many miles
away. Ellerbeck flew his helicopter from Endurance to Cindy Buxton and Anne Price's hut on St Andrew's Bay to warn them of incipient military activity. They
too had seen nothing of the Argentinean invaders.
2 SBS came
south on Endurance and it was their turn to reconnoiter Sheridan's possible landing sites from south of Leith and Grytviken ie from across Cumberland East Bay.
Hound Bay, at the seaward neck of Barff Peninsula, was the insertion point for three SBS patrols. They were to make their way on foot half way up the
peninsula, pick up two Gemini rafts dropped from helicopters and cross the bay to Brown Mountain. That low mountain was one of the two pieces of vital ground
whose seizure was necessary for any attack on Grytviken. The mountain also provided a point from which Argentinean activity, if any, could be closely
scrutinized. That two BAS men, Myles Plant and Tony North lived in the proposed patrol area and had seen no Argentine military activity did not deter the SBS
leader from mounting his operation. He was of course safe from superiors' direct advice and criticism because Sheridan and Young were on Antrim many miles
away. Ellerbeck flew his helicopter from Endurance to Cindy Buxton and Anne Price's hut on St Andrew's Bay to warn them of incipient military activity. They
too had seen nothing of the Argentinean invaders.
 "South Georgia op seems bogged
down for fear of Arg submarine (conventional, Sante Fe)."(50) Santa Fe's torpedoes were a potential risk for Young's force but they did not present a
clear and present danger. Santa Fe's submerged speed approximated Tidespring's thirteen knots; its sustained surface speed just that. The tactical offense
posed by two twenty-five knot destroyers and their embarked helicopters with active sonars in use against an ageing diesel submarine with generic electrical
problems is lethal(51). Because of its low top speed and the noise it would emit at that speed it was extremely unlikely that Santa Fe could gain a position
that allowed a high probability of a successful attack on any of the British ships. True Endurance's radio crew had intercepted messages from an overflying
Argentinean aircraft giving that ship's position to an Argentinean submarine. That coordination made sense because Endurance's loud diesel engines could be
easily picked up by the submarine's sonar and because Endurance had no sonar of its own to warn of impending attack. Worse Barker's ship could not turn handily
to avoid an observed torpedo. Yet a quick read of the tactical situation showed that a submarine attack seemed very improbable; Santa Fe's job was to land
troop reenforcements on South Georgia and not to brawl with British surface ships and ASW helicopters. A diesel submarine manned by an unblooded crew and
burdened by a motley crowd of landsmen is most unlikely to prosecute an attack, risky in itself, that would draw the mortal attention of a British nuclear
submarine captain trained to hunt down Soviet nuclear boats.
"South Georgia op seems bogged
down for fear of Arg submarine (conventional, Sante Fe)."(50) Santa Fe's torpedoes were a potential risk for Young's force but they did not present a
clear and present danger. Santa Fe's submerged speed approximated Tidespring's thirteen knots; its sustained surface speed just that. The tactical offense
posed by two twenty-five knot destroyers and their embarked helicopters with active sonars in use against an ageing diesel submarine with generic electrical
problems is lethal(51). Because of its low top speed and the noise it would emit at that speed it was extremely unlikely that Santa Fe could gain a position
that allowed a high probability of a successful attack on any of the British ships. True Endurance's radio crew had intercepted messages from an overflying
Argentinean aircraft giving that ship's position to an Argentinean submarine. That coordination made sense because Endurance's loud diesel engines could be
easily picked up by the submarine's sonar and because Endurance had no sonar of its own to warn of impending attack. Worse Barker's ship could not turn handily
to avoid an observed torpedo. Yet a quick read of the tactical situation showed that a submarine attack seemed very improbable; Santa Fe's job was to land
troop reenforcements on South Georgia and not to brawl with British surface ships and ASW helicopters. A diesel submarine manned by an unblooded crew and
burdened by a motley crowd of landsmen is most unlikely to prosecute an attack, risky in itself, that would draw the mortal attention of a British nuclear
submarine captain trained to hunt down Soviet nuclear boats.
 At dawn on the 25th
the helicopters began their search. Once again Ian Stanley from Antrim found the target, dropped two old fashioned depth charges and damaged the Santa Fe
enough to make her an easy surface target for machine gun, missile and ASW torpedo attacks by any British ship or helicopter in the neighborhood. Santa Fe did
not dive; Stanley's depth charge attacks were so accurate that the sub's ballast tanks were terminally damaged and she became easy prey for ensuing attacks by
Young's helicopters. Captain Bicain limped back into Grytviken harbor, tied up his boat alongside the BAS jetty at King Edward Point and watched as its flooded
stern sank below the surface. This drama fit the bizarre side of the Falklands war. Submarines are accurately typed; in war zones they navigate under water
where layers of differing salinity and temperature protect them from direct observation and hostile sonar. That Bicain did not take advantage of the hundred or
so fathoms of cold water under his keel in order to elude British attackers meant that he could not dive because his boat had ovewhelming mechanical
failure(59). Nor did his limited speed allow him to break off the action. Bicain could not fight, hide or run; he was a sitting duck. He could honorably have
struck.
At dawn on the 25th
the helicopters began their search. Once again Ian Stanley from Antrim found the target, dropped two old fashioned depth charges and damaged the Santa Fe
enough to make her an easy surface target for machine gun, missile and ASW torpedo attacks by any British ship or helicopter in the neighborhood. Santa Fe did
not dive; Stanley's depth charge attacks were so accurate that the sub's ballast tanks were terminally damaged and she became easy prey for ensuing attacks by
Young's helicopters. Captain Bicain limped back into Grytviken harbor, tied up his boat alongside the BAS jetty at King Edward Point and watched as its flooded
stern sank below the surface. This drama fit the bizarre side of the Falklands war. Submarines are accurately typed; in war zones they navigate under water
where layers of differing salinity and temperature protect them from direct observation and hostile sonar. That Bicain did not take advantage of the hundred or
so fathoms of cold water under his keel in order to elude British attackers meant that he could not dive because his boat had ovewhelming mechanical
failure(59). Nor did his limited speed allow him to break off the action. Bicain could not fight, hide or run; he was a sitting duck. He could honorably have
struck.
 The helicopters' attacks proved equally odd.
Bicain's boat was initially and as it turned out terminally damaged by depth charges so named because they function best at depths of water where an explosion
close to a hull causes water pressure to burst the hull. The trick is to get this very low tech weapon to explode near the sub's hull. Used against a surfaced
craft much of a depth charge's force vanishes ineffectually into the air. Ian Stanley's splendid airmanship and good fortune continued. Battered into
unseaworthiness Santa Fe turned back to port and on the way got hit by helicopters' AS -12 missiles whose fuzes did not detonate their missiles' warheads
because the sub's plastic sail did not offer sufficient resistance. ASW torpedoes fired at Santa Fe's screws were ineffective because these do not detonate
unless the target is more than thirty feet underwater and Santa Fe was surfaced. The British attacks had laudable intent --- the idea behind war is to destroy
the enemy --- but the better part lay in getting Bicain to surrender his boat and crew intact once he began his limp back to shore. Code books, live prisoners
and captured weaponry are far more valuable than bodies and metal on the sea bottom.
The helicopters' attacks proved equally odd.
Bicain's boat was initially and as it turned out terminally damaged by depth charges so named because they function best at depths of water where an explosion
close to a hull causes water pressure to burst the hull. The trick is to get this very low tech weapon to explode near the sub's hull. Used against a surfaced
craft much of a depth charge's force vanishes ineffectually into the air. Ian Stanley's splendid airmanship and good fortune continued. Battered into
unseaworthiness Santa Fe turned back to port and on the way got hit by helicopters' AS -12 missiles whose fuzes did not detonate their missiles' warheads
because the sub's plastic sail did not offer sufficient resistance. ASW torpedoes fired at Santa Fe's screws were ineffective because these do not detonate
unless the target is more than thirty feet underwater and Santa Fe was surfaced. The British attacks had laudable intent --- the idea behind war is to destroy
the enemy --- but the better part lay in getting Bicain to surrender his boat and crew intact once he began his limp back to shore. Code books, live prisoners
and captured weaponry are far more valuable than bodies and metal on the sea bottom.
 Sheridan knew that disabling the Santa Fe was
only an intermediate step and not the victory he had been sent to obtain. The jackpot was ownership of Grytviken. He waited upon Young, the amphibious force
commander, outside his cabin door to ask that the ships be positioned so that helicopters could lift a scratch force of seventy five men to attack and seize
Grytviken. Tidespring carrying his main assault force was more than fifty miles away and the remnants of Boat Troop remained esconced on Grass Island. Sheridan
judged that his command element, the mortar teams, Delves' few SAS men, the marines from Endurance and SAS men from Plymouth could break the Argentinean
defenses if landed quickly with naval gunfire support. It was a bold judgment made without computers or any other form of high technology; rather it was the
gut feeling of a long time infantryman, comfortable in his own skin, who knew what heartens or demoralizes green troops holding positions against whom or what
they could not know. Delay in landing British troops could mean hardened Argentinean defenses. Sheridan had to wait for three hours for Young's approval - he
remained overall commander until the troops landed - while Young and his aviators replayed the attacks on Santa Fe, ascertained who engaged first, (it was
Stanley) and who might get the decorations if any. The helos had returned victorious from their attacks by1030 but it was not until 1330 that Young agreed to
put ashore the landing force. Without the formality of an O Group, Sheridan gave hasty orders to his officers at 1345.?
Sheridan knew that disabling the Santa Fe was
only an intermediate step and not the victory he had been sent to obtain. The jackpot was ownership of Grytviken. He waited upon Young, the amphibious force
commander, outside his cabin door to ask that the ships be positioned so that helicopters could lift a scratch force of seventy five men to attack and seize
Grytviken. Tidespring carrying his main assault force was more than fifty miles away and the remnants of Boat Troop remained esconced on Grass Island. Sheridan
judged that his command element, the mortar teams, Delves' few SAS men, the marines from Endurance and SAS men from Plymouth could break the Argentinean
defenses if landed quickly with naval gunfire support. It was a bold judgment made without computers or any other form of high technology; rather it was the
gut feeling of a long time infantryman, comfortable in his own skin, who knew what heartens or demoralizes green troops holding positions against whom or what
they could not know. Delay in landing British troops could mean hardened Argentinean defenses. Sheridan had to wait for three hours for Young's approval - he
remained overall commander until the troops landed - while Young and his aviators replayed the attacks on Santa Fe, ascertained who engaged first, (it was
Stanley) and who might get the decorations if any. The helos had returned victorious from their attacks by1030 but it was not until 1330 that Young agreed to
put ashore the landing force. Without the formality of an O Group, Sheridan gave hasty orders to his officers at 1345.?
 Sheridan's fire plan, worked out
with LtCol Eve RA, was critical to his mission's success. The four guns on Antrim and Plymouth were his only artillery. Ten minutes before the first element
landed, at1335, British 4.5'' shells rained in great profusion on Hestesletten, the landing site, a flat patch of rocky earth at the foot of Brown Mountain.
Hestesletten though small was the only flat surface close to Brown Mountain that was suitable for helo landings and troops' assembly. It had to be made safe.
Fifteen minutes later the fire switched to the top of Brown Mountain as the SAS men emerged from the helos to secure the landing site. No enemy fire greeted
Delves' men then or later that day. The naval gunfire killed no one and destroyed no positions but it was a precisely timed demonstration of accurate shooting
well seen and heard by the Argentinean garrison(60). Sheridan ordered in his second group, Royal Marines, and then arrived himself at1535 with his command
element and medics. Already short of daylight Sheridan was livid with rage at Delves who had not obeyed orders to advance to contact enemy forces in the
direction of Brown Mountain and to seize its summit. Delves replied that an Argentine position lay at the mountain's top. Sheridan ordered Delves again to
advance and Delves moved forward over stony ground onto and up Brown Mountain. As a preliminary to their attack, the SAS men fired Milan missiles at a
suspected enemy position only to discover that they had killed two seals who were disporting themselves on the banks of the Penguin River. No Argentinean
troops awaited Delves and his men on Brown Mountain.
Sheridan's fire plan, worked out
with LtCol Eve RA, was critical to his mission's success. The four guns on Antrim and Plymouth were his only artillery. Ten minutes before the first element
landed, at1335, British 4.5'' shells rained in great profusion on Hestesletten, the landing site, a flat patch of rocky earth at the foot of Brown Mountain.
Hestesletten though small was the only flat surface close to Brown Mountain that was suitable for helo landings and troops' assembly. It had to be made safe.
Fifteen minutes later the fire switched to the top of Brown Mountain as the SAS men emerged from the helos to secure the landing site. No enemy fire greeted
Delves' men then or later that day. The naval gunfire killed no one and destroyed no positions but it was a precisely timed demonstration of accurate shooting
well seen and heard by the Argentinean garrison(60). Sheridan ordered in his second group, Royal Marines, and then arrived himself at1535 with his command
element and medics. Already short of daylight Sheridan was livid with rage at Delves who had not obeyed orders to advance to contact enemy forces in the
direction of Brown Mountain and to seize its summit. Delves replied that an Argentine position lay at the mountain's top. Sheridan ordered Delves again to
advance and Delves moved forward over stony ground onto and up Brown Mountain. As a preliminary to their attack, the SAS men fired Milan missiles at a
suspected enemy position only to discover that they had killed two seals who were disporting themselves on the banks of the Penguin River. No Argentinean
troops awaited Delves and his men on Brown Mountain.
 Sheridan's advance met no opposition nor
was a hostile shot fired at the advancing British troops. While the British scurried to the top of Brown Mountain naval gunfire shifted to its third phase.
Sheridan had been ordered to avoid whereever possible damage to BAS buildings and to persons. Accordingly his fire plan's third phase directed ships' gunfire
to land over and behind the BAS buildings and the Argentinean defensive positions. The defending Argentinian troops then realized that only a slight adjustment
meant heavy fire onto them. Before South Georgia the Argentine marines had never been under fire let alone that of accurately registered naval guns. At 1705,
ninety minutes after his arrival, Sheridan saw two white flags fluttering from the main buildings in Grytviken. He called off the landing in Bore Valley Pass
and began the three kilometer march in Grytviken. Delves' SAS men leaped forward and he declined to answer Sheridan's call to halt. Sheridan called Antrim for
a helicopter that took him into Grytviken to accept the surrender from the Argentinean commanding officer, LtCdr Luis Lagos. Sheridan took the surrender
himself ashore as light failed.
Sheridan's advance met no opposition nor
was a hostile shot fired at the advancing British troops. While the British scurried to the top of Brown Mountain naval gunfire shifted to its third phase.
Sheridan had been ordered to avoid whereever possible damage to BAS buildings and to persons. Accordingly his fire plan's third phase directed ships' gunfire
to land over and behind the BAS buildings and the Argentinean defensive positions. The defending Argentinian troops then realized that only a slight adjustment
meant heavy fire onto them. Before South Georgia the Argentine marines had never been under fire let alone that of accurately registered naval guns. At 1705,
ninety minutes after his arrival, Sheridan saw two white flags fluttering from the main buildings in Grytviken. He called off the landing in Bore Valley Pass
and began the three kilometer march in Grytviken. Delves' SAS men leaped forward and he declined to answer Sheridan's call to halt. Sheridan called Antrim for
a helicopter that took him into Grytviken to accept the surrender from the Argentinean commanding officer, LtCdr Luis Lagos. Sheridan took the surrender
himself ashore as light failed.
 On 26 April 1982 a
bare three weeks after Port Stanley fell, the commander of Argentine forces on South Georgia Lt Cdr Lagos had signed the formal instrument of surrender in the
BAS base at King Edward Point. Dispite the delays, the navy's unfamiliarity with amphibious operations, the failed reconnaissance, the threat real or imagined
of submarine attack, the ramshackle command structure, the dispersion of his assault force, the SAS' faulty motors on their gemini boats and the near disaster
of Fortuna Glacier Sheridan put the best face on the nasty business of war. He had completed his military mission with no casualties to his own men or to the
enemy either(61).
On 26 April 1982 a
bare three weeks after Port Stanley fell, the commander of Argentine forces on South Georgia Lt Cdr Lagos had signed the formal instrument of surrender in the
BAS base at King Edward Point. Dispite the delays, the navy's unfamiliarity with amphibious operations, the failed reconnaissance, the threat real or imagined
of submarine attack, the ramshackle command structure, the dispersion of his assault force, the SAS' faulty motors on their gemini boats and the near disaster
of Fortuna Glacier Sheridan put the best face on the nasty business of war. He had completed his military mission with no casualties to his own men or to the
enemy either(61).
 Sheridan the land force commander
was stunned to receive from Northwood a message asking his list of those to be decorated for the victory. Thatcher held a jubilant al fresco press conference
outside No 10 Downing Street: "Just rejoice at that news and congratulate our forces and the marines ... Rejoice"(63). South Georgia was not a victory for
which combat decorations might have issued because there was no ground combat. Sheridan's landing force had received no incoming fire and suffered no
casualties(64). In fact the operation was a string of blunders rescued from utter disaster mainly by the moral and physical courage of Major J. M. G. Sheridan
RM and Lcdr. Ian Stanley RN. True many others had been cold, wet, tired and in danger of losing their lives to the weather but none had shown valor in the face
of enemy fire because there had been no military opposition. That would come later.
Sheridan the land force commander
was stunned to receive from Northwood a message asking his list of those to be decorated for the victory. Thatcher held a jubilant al fresco press conference
outside No 10 Downing Street: "Just rejoice at that news and congratulate our forces and the marines ... Rejoice"(63). South Georgia was not a victory for
which combat decorations might have issued because there was no ground combat. Sheridan's landing force had received no incoming fire and suffered no
casualties(64). In fact the operation was a string of blunders rescued from utter disaster mainly by the moral and physical courage of Major J. M. G. Sheridan
RM and Lcdr. Ian Stanley RN. True many others had been cold, wet, tired and in danger of losing their lives to the weather but none had shown valor in the face
of enemy fire because there had been no military opposition. That would come later.
 Sheridan's capture of Grytviken
and Leith showed the many sides to this small war. A small and bloodless military affair metamorphosed into a major political victory. If ever the Royal
Marines had proven their worth to the politicians this was the occasion. Thatcher was not yet the Warrior Queen, that would take blood, time and Port Stanley's
seizure, but she had restored British sovereignty to a tiny bit of hijacked property. She could, moreover, hold a cabinet together long enough to gain a much
needed victory because a few Royal Marines took the initiative and won a dicey military engagement 8000 miles from home. For the first time since Suez a
British Prime Minister undertook diplomatic/military responsabilities outside NATO, risked blood, treasure and her job and prevailed dispite a clumsy military
command and control system about which she knew very little. British professional military, especially pilots and infantry, finished the job, heroically so in
some instances, despite their seniors' lapses. The Argentine military, on the other hand, had no rationized plan for the defense of their new holdings. The
Argentine Navy demonstrated strategic and tactical incompetence in the loss of Santa Fe. It would not come out again to fight in the face of submarine and
surface opposition.
Sheridan's capture of Grytviken
and Leith showed the many sides to this small war. A small and bloodless military affair metamorphosed into a major political victory. If ever the Royal
Marines had proven their worth to the politicians this was the occasion. Thatcher was not yet the Warrior Queen, that would take blood, time and Port Stanley's
seizure, but she had restored British sovereignty to a tiny bit of hijacked property. She could, moreover, hold a cabinet together long enough to gain a much
needed victory because a few Royal Marines took the initiative and won a dicey military engagement 8000 miles from home. For the first time since Suez a
British Prime Minister undertook diplomatic/military responsabilities outside NATO, risked blood, treasure and her job and prevailed dispite a clumsy military
command and control system about which she knew very little. British professional military, especially pilots and infantry, finished the job, heroically so in
some instances, despite their seniors' lapses. The Argentine military, on the other hand, had no rationized plan for the defense of their new holdings. The
Argentine Navy demonstrated strategic and tactical incompetence in the loss of Santa Fe. It would not come out again to fight in the face of submarine and
surface opposition.